Building Real-Time Event Streams in the Cloud, On Premises, or Both with Confluent
To the developer or architect seeking to provide their business with as much value as possible, what is the best way to start working with data in motion? Choosing Apache Kafka® gets you started quickly with data streams, but it is increasingly challenging as you try to incorporate tasks like stream processing, connectivity to third-party systems, relocating the workload to another deployment setting such as the cloud, scaling to production, and more. With Confluent, you can get started quickly, while also incorporating all of these aspects in a familiar, uniform, and complete setting. In this tutorial, you’ll learn how to get started with Confluent Cloud, a fully managed service for Kafka, and Confluent Platform, an enterprise-grade distribution of Kafka for self-managed environments.
In order to truly get started with data in motion, you need to demonstrate ubiquitous real-time data and continuous stream processing, whether you’re working with a managed cloud service, a self-managed on-prem deployment, or a hybrid cloud environment.
This tutorial uses the Datagen connector of the Kafka Connect framework to stream sample data into Kafka, join the data sets into a combined stream using ksqlDB, and stream the results into a third-party system. MongoDB was chosen, but any one of the other 120+ third-party fully managed or self-managed services or databases can be used.
This tutorial begins with the fully managed cloud services Confluent Cloud and MongoDB Atlas, and then shows the same data pipeline in a self-managed deployment using Confluent Platform and MongoDB Server. Lastly, Confluent Replicator is used to bridge the two environments.
For reference, everything covered in this tutorial is available on GitHub.
Fully managed: Confluent Cloud and MongoDB Atlas
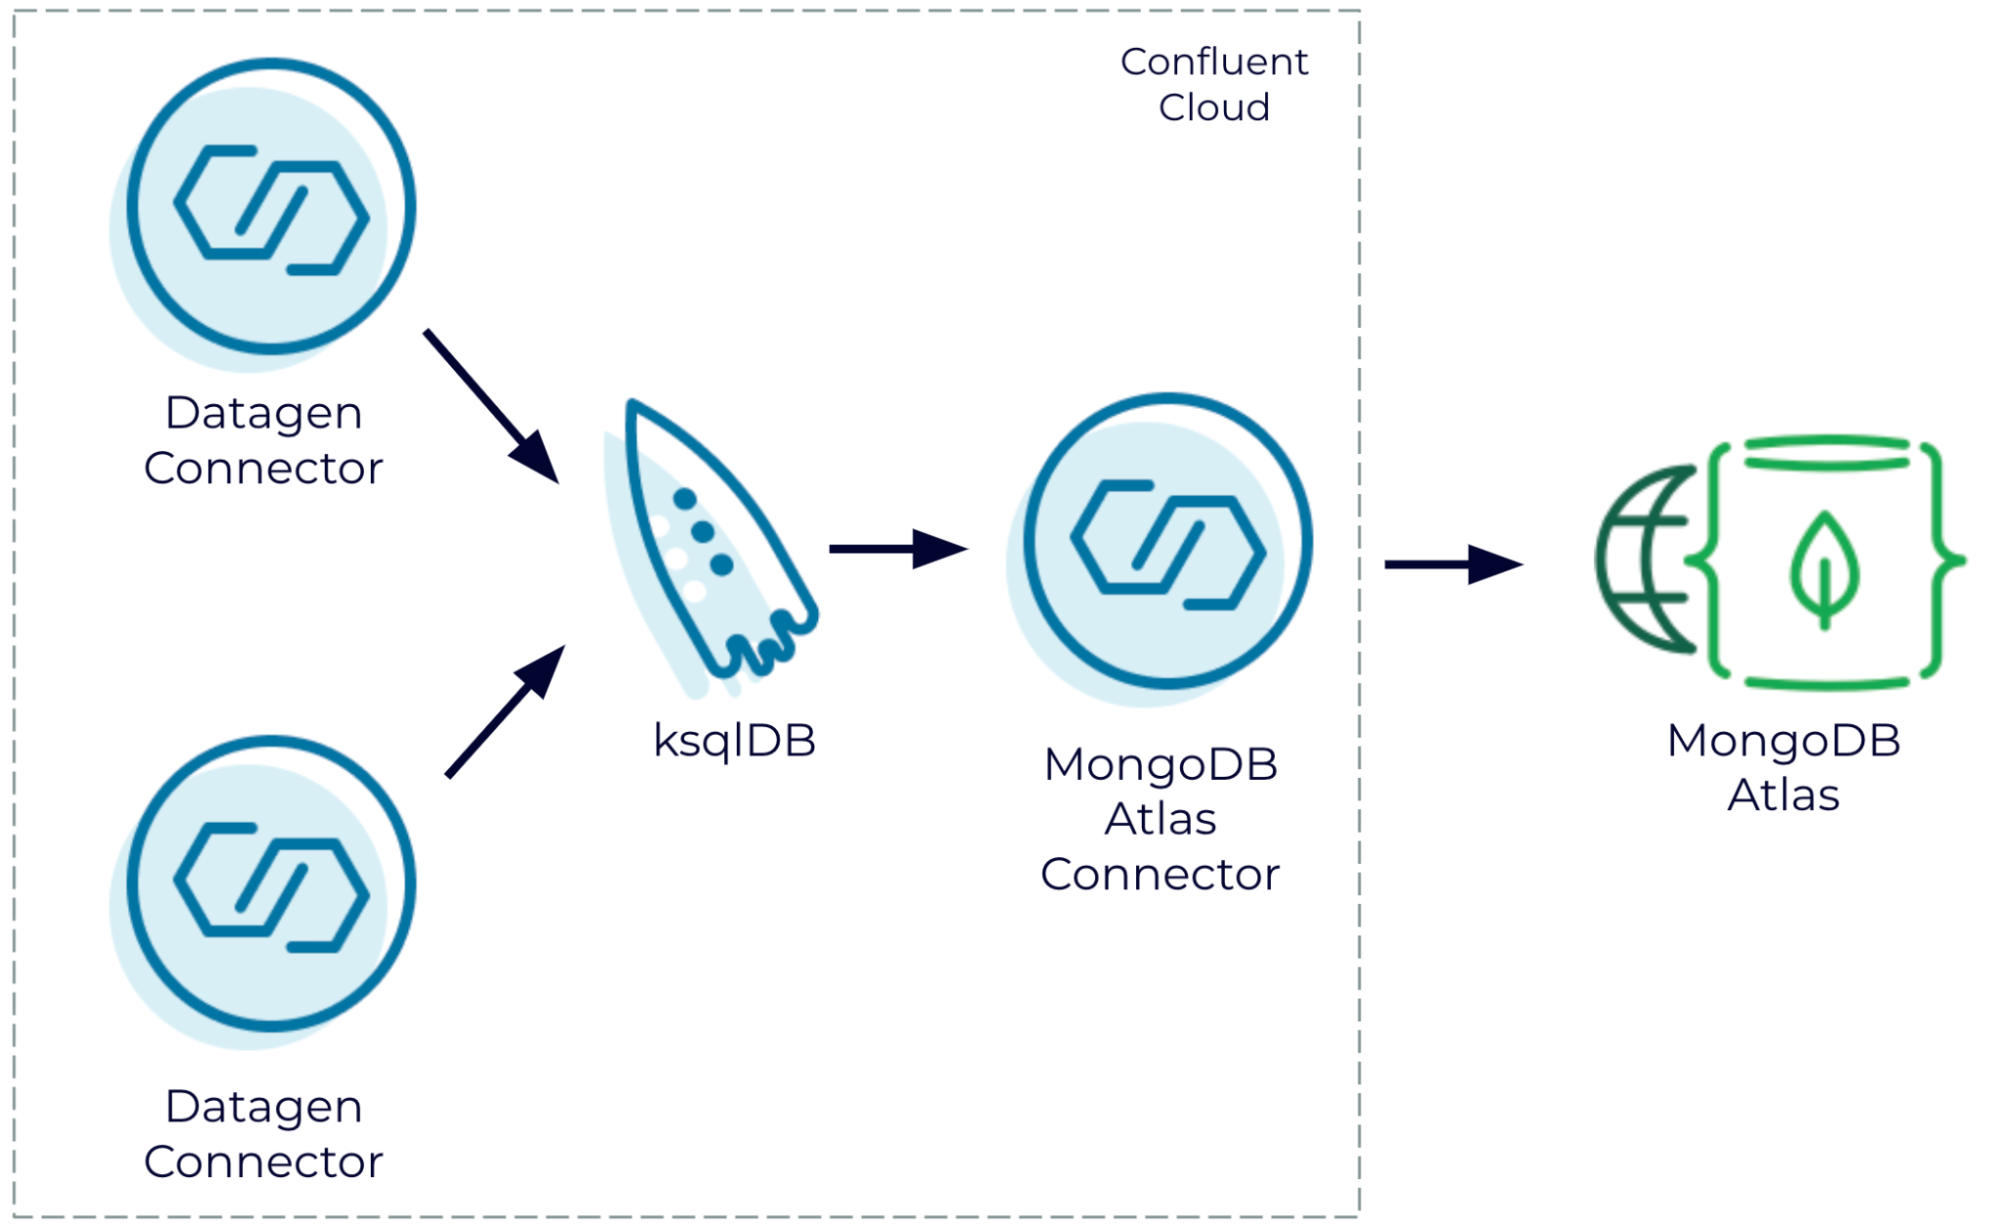
Join generated data streams in Confluent Cloud and write the results to MongoDB Atlas
One of the benefits of using a fully managed cloud service is that you can start small to kick the tires and then scale to production without having to turn over the whole environment. MongoDB Atlas is a fantastic example of a fully managed cloud service, and the schema flexibility offered by Mongo is great for quick time to value.
First, you need to set up a MongoDB Atlas environment (the free option is fine). Be sure to note the cloud provider and region that you select because you need to use the same one for Confluent Cloud.
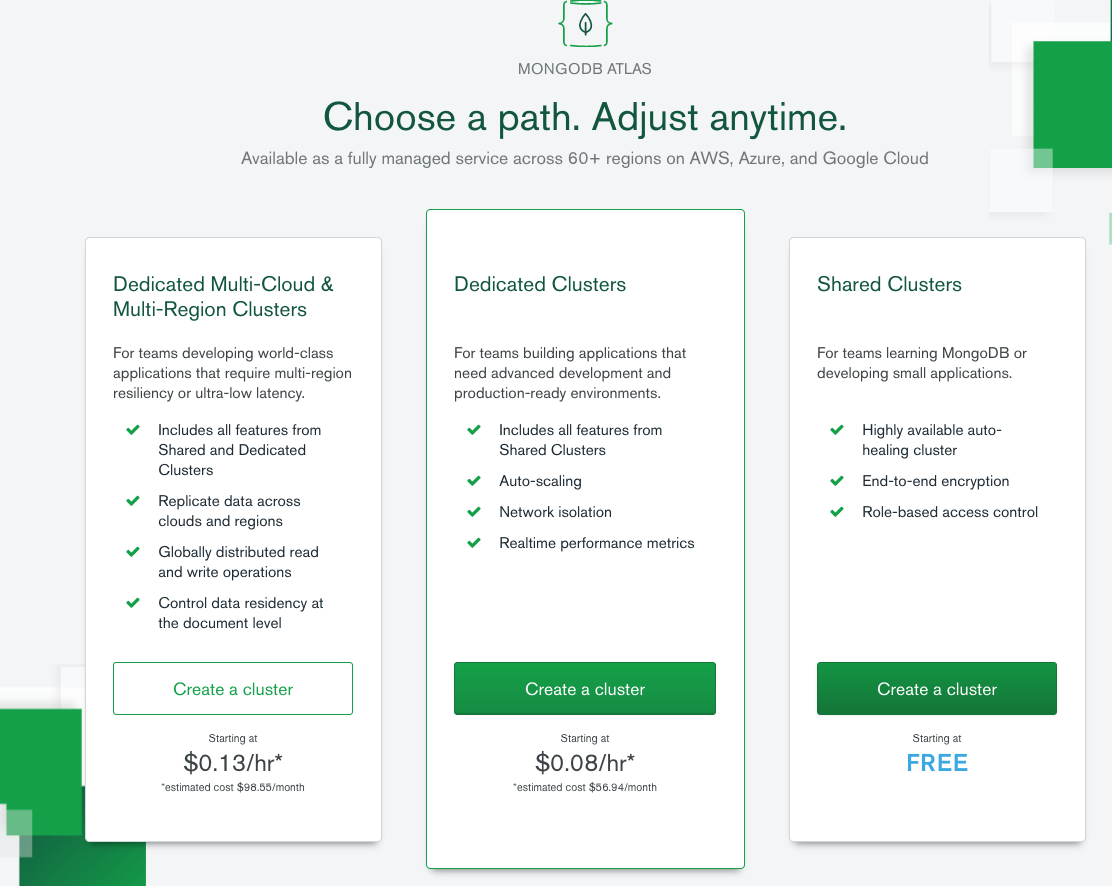
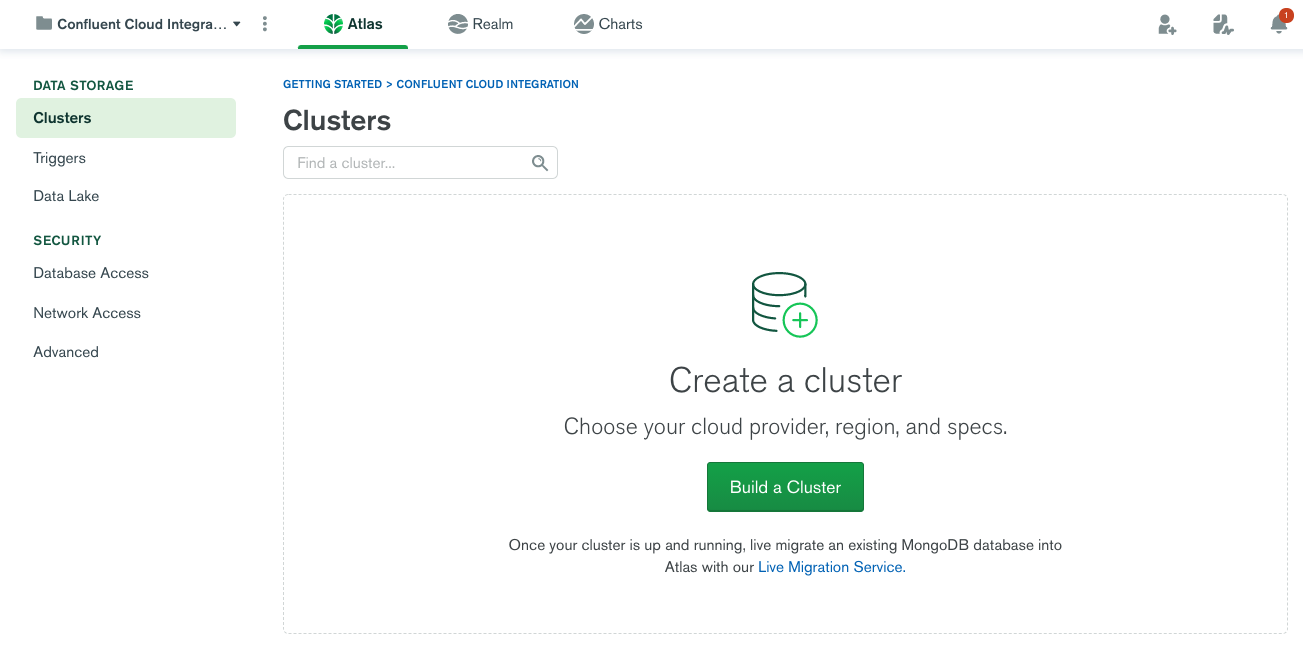
Once your MongoDB Atlas environment is set up, note the host name for the cluster, which can be obtained by clicking CONNECT. You’ll need it later when you configure the sink connector.
Next, set up and configure a Confluent Cloud environment, including the CLI. The free Basic cluster works fine for this tutorial. Be sure to use the same provider and region as you did for MongoDB Atlas:
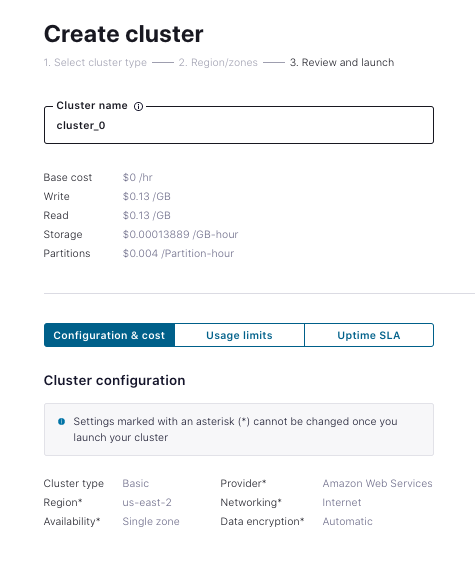
Once your Confluent Cloud cluster is created and the CLI is enabled, you can optionally create a couple of topics using the CLI:
ccloud kafka topic create users
ccloud kafka topic create trades
Or, you can just define connectors and let the topics be created for you. To get started quickly, use the Datagen connector to simulate user data. There’s a GUI for it, but it’s faster to edit a JSON file defining the connector to include your Confluent Cloud API key and secret:
{
  "name": "UsersSourceConnector",
  "config": {
    "connector.class": "DatagenSource",
    "name": "UsersSourceConnector",
    "kafka.api.key": "<your confluent cloud api key>",
    "kafka.api.secret": "<your confluent cloud api secret>",
    "kafka.topic": "users",
    "output.data.format": "JSON",
    "quickstart": "USERS",
    "max.interval": "1000",
    "tasks.max": "1"
  }
}
Now create the connector using the CLI:
ccloud connector create --config ./datagen-users-source.json
Created connector UsersSourceConnector lcc-my2xx
View the connector in the Confluent Cloud UI. After provisioning, it should look something like the following:

You now have one dataset, but to do a join, you need two or more. The following simulates an active stream of stock trades, which happens to contain a matching user ID. Obtain a valid configuration for that instantiation of the Datagen connector by inserting the Confluent Cloud credentials:
{
  "name": "TradesSourceConnector",
  "config": {
    "connector.class": "DatagenSource",
    "name": "TradesSourceConnector",
    "kafka.api.key": "<your confluent cloud API key>",
    "kafka.api.secret": <your confluent cloud API secret>",
    "kafka.topic": "trades",
    "output.data.format": "JSON",
    "quickstart": "STOCK_TRADES",
    "max.interval": "100",
    "tasks.max": "1"
  }
}
You can now deploy the connector to Confluent Cloud:
ccloud connector create --config ./datagen-trades-source.json
Created connector TradesSourceConnector lcc-p1jpk
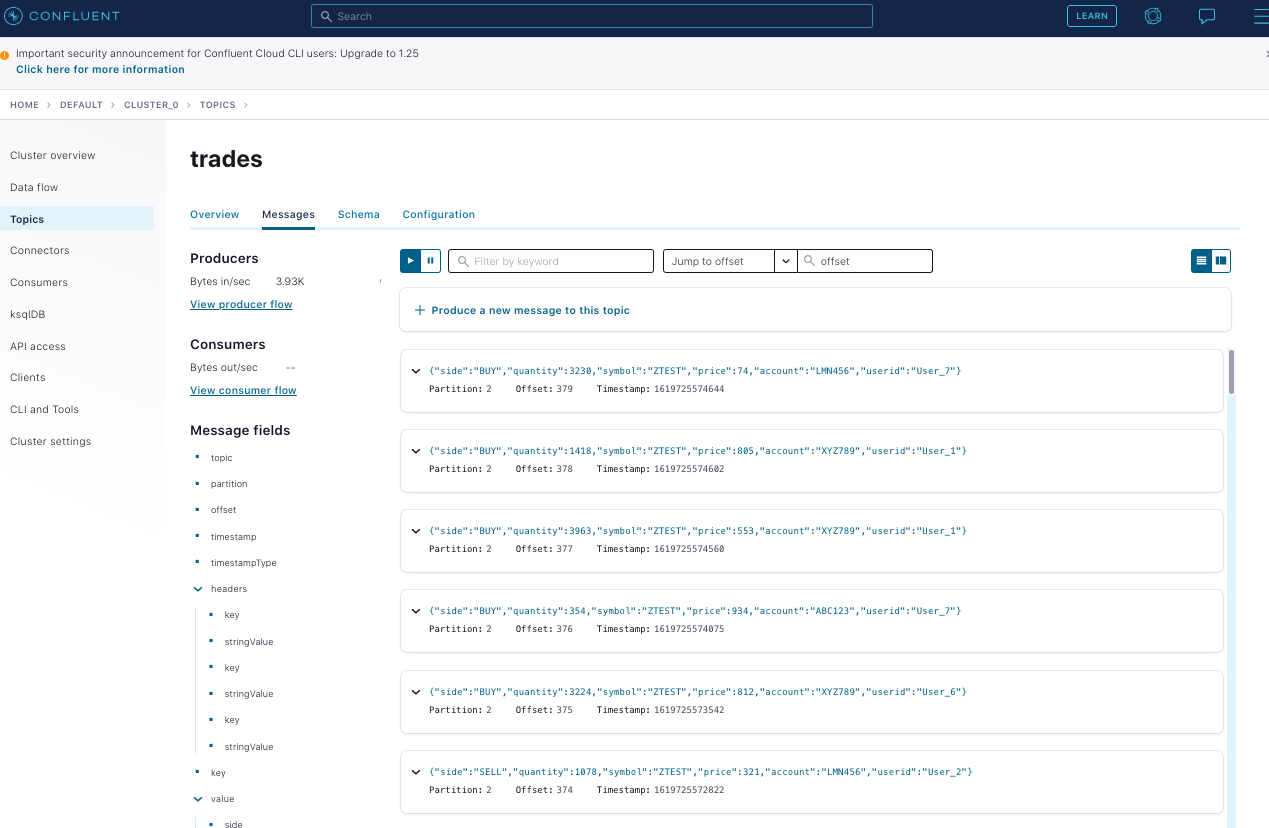
After provisioning is complete, data moving through your topic for trades looks something like this:
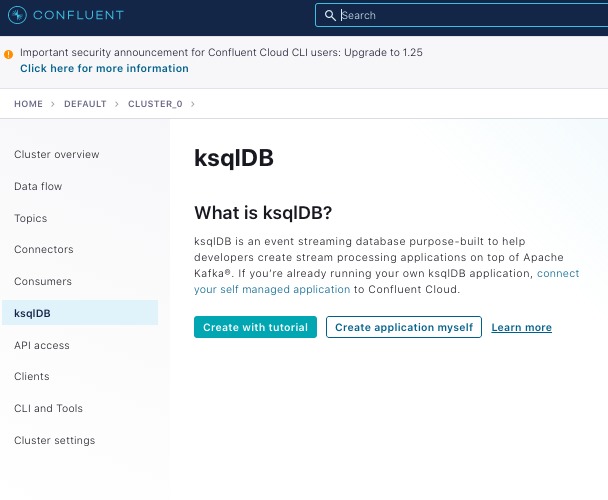
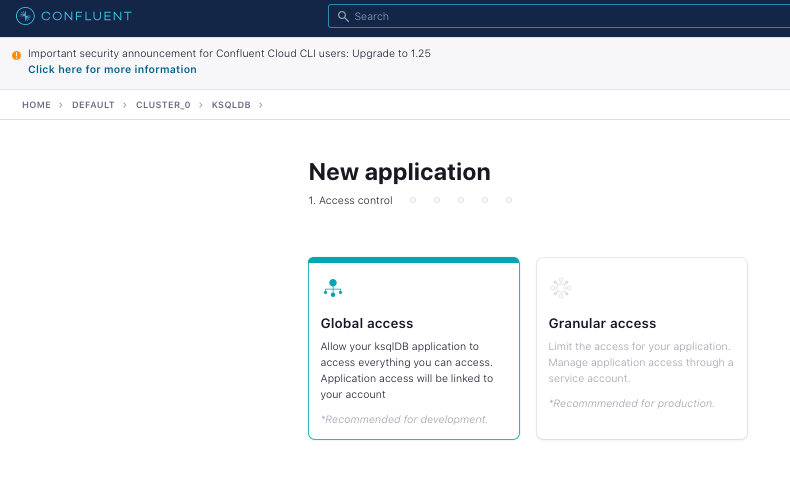
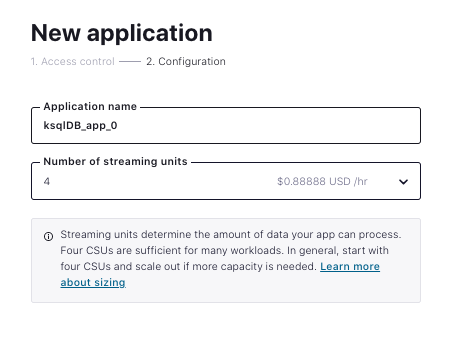
Now you can start a ksqlDB application, which can be used to join the streams:
 |
 |
 |
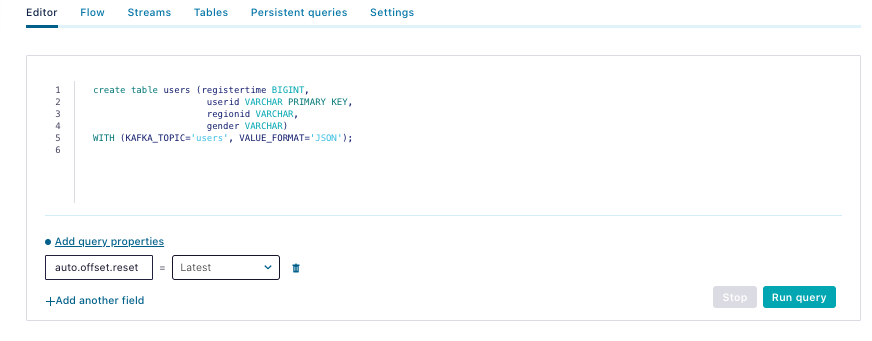
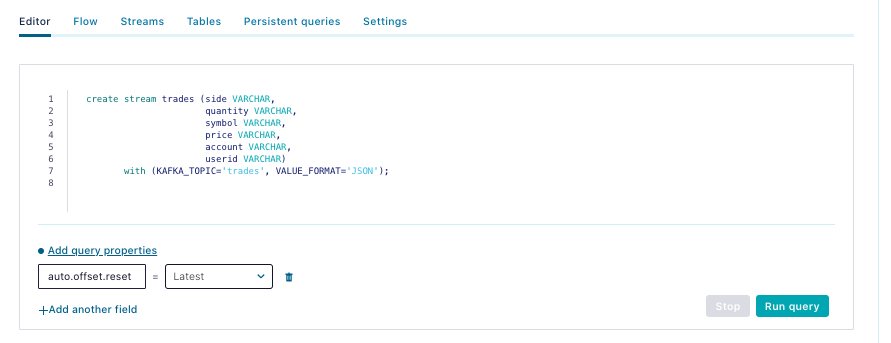
When the application has been provisioned, you can edit queries. ksqlDB supports both streams and tables. Since user data is expected to change randomly and slowly, create a table for users and create a stream for trades as that data is append only and immutable in nature. Then join the two into an enriched stream of trades that includes detailed user information.
The users table query:
| create table users (registertime BIGINT, userid VARCHAR PRIMARY KEY, regionid VARCHAR, gender VARCHAR) WITH (KAFKA_TOPIC='users', VALUE_FORMAT='JSON'); |
 |
The trades stream query:
| create stream trades (side VARCHAR, quantity VARCHAR, symbol VARCHAR, price VARCHAR, account VARCHAR, userid VARCHAR) with (KAFKA_TOPIC='trades', VALUE_FORMAT='JSON'); |
 |
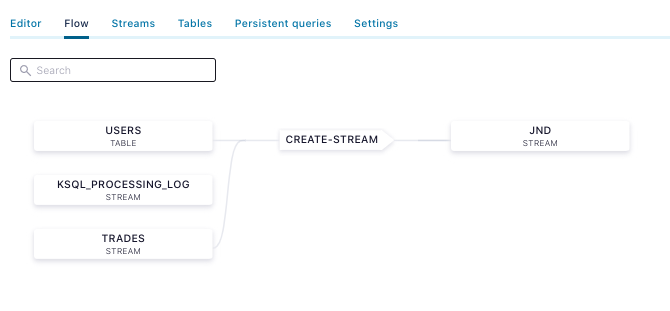
One more query joins the table and stream. You need to specify the Kafka topic that you write to because you want to use that as a source to a sink connector:
create stream jnd
 WITH (KAFKA_TOPIC=’JND’) as
 SELECT users.userid,
        users.regionid,
        users.gender,
        trades.symbol,
        trades.price,
        trades.account,
        trades.quantity
 FROM trades left join users on users.userid = trades.userid
 emit CHANGES;
This creates a visible data flow in Confluent Cloud:
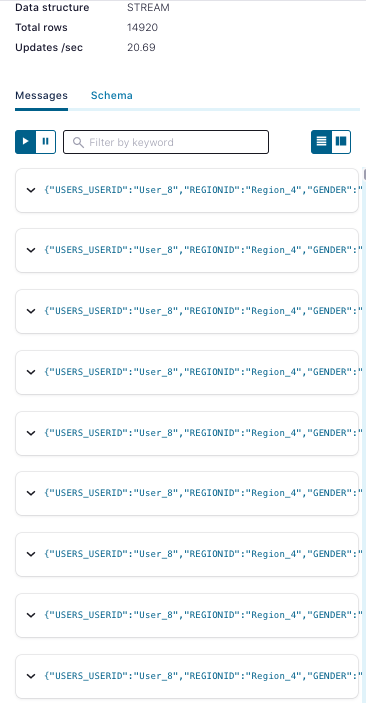
If you click on the JND stream, you can view the messages:
Now that you have joined and enriched the stream, you can pipe that data into the MongoDB Atlas Sink Connector. Here’s an example of a MongoDB sink connector configuration for Atlas, which you need to edit to include your proper credentials for both Confluent Cloud and Atlas:
{
    "connector.class": "MongoDbAtlasSink",
    "name": "mongodb-sink",
    "kafka.api.key": "",
    "kafka.api.secret": "",
    "input.data.format" : "JSON",
    "connection.host": "",
    "connection.user": "",
    "connection.password": "",
    "topics": "JND",
    "database": "Data4Atlas",
    "collection": "kafka",
    "tasks.max": "1"
}
This can be launched on the Confluent Cloud CLI as follows:
ccloud connector create --config ./mongodb-atlas-sink.json
As soon as the connector is provisioned, you should see the operations metric in Atlas start to spike:

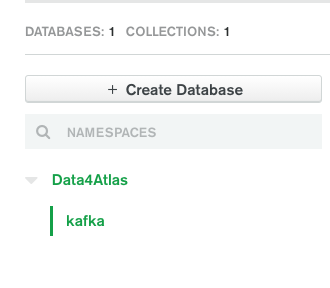
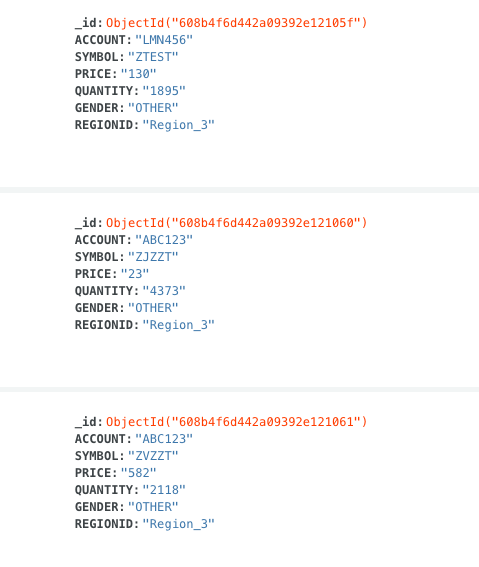
And you should also see the joined data present in Atlas as its own collection in a new database. One of the best attributes about MongoDB is that you don’t need to worry about schema when you’re playing around like this:
 |
 |
Self-managed: Confluent Platform to MongoDB Server
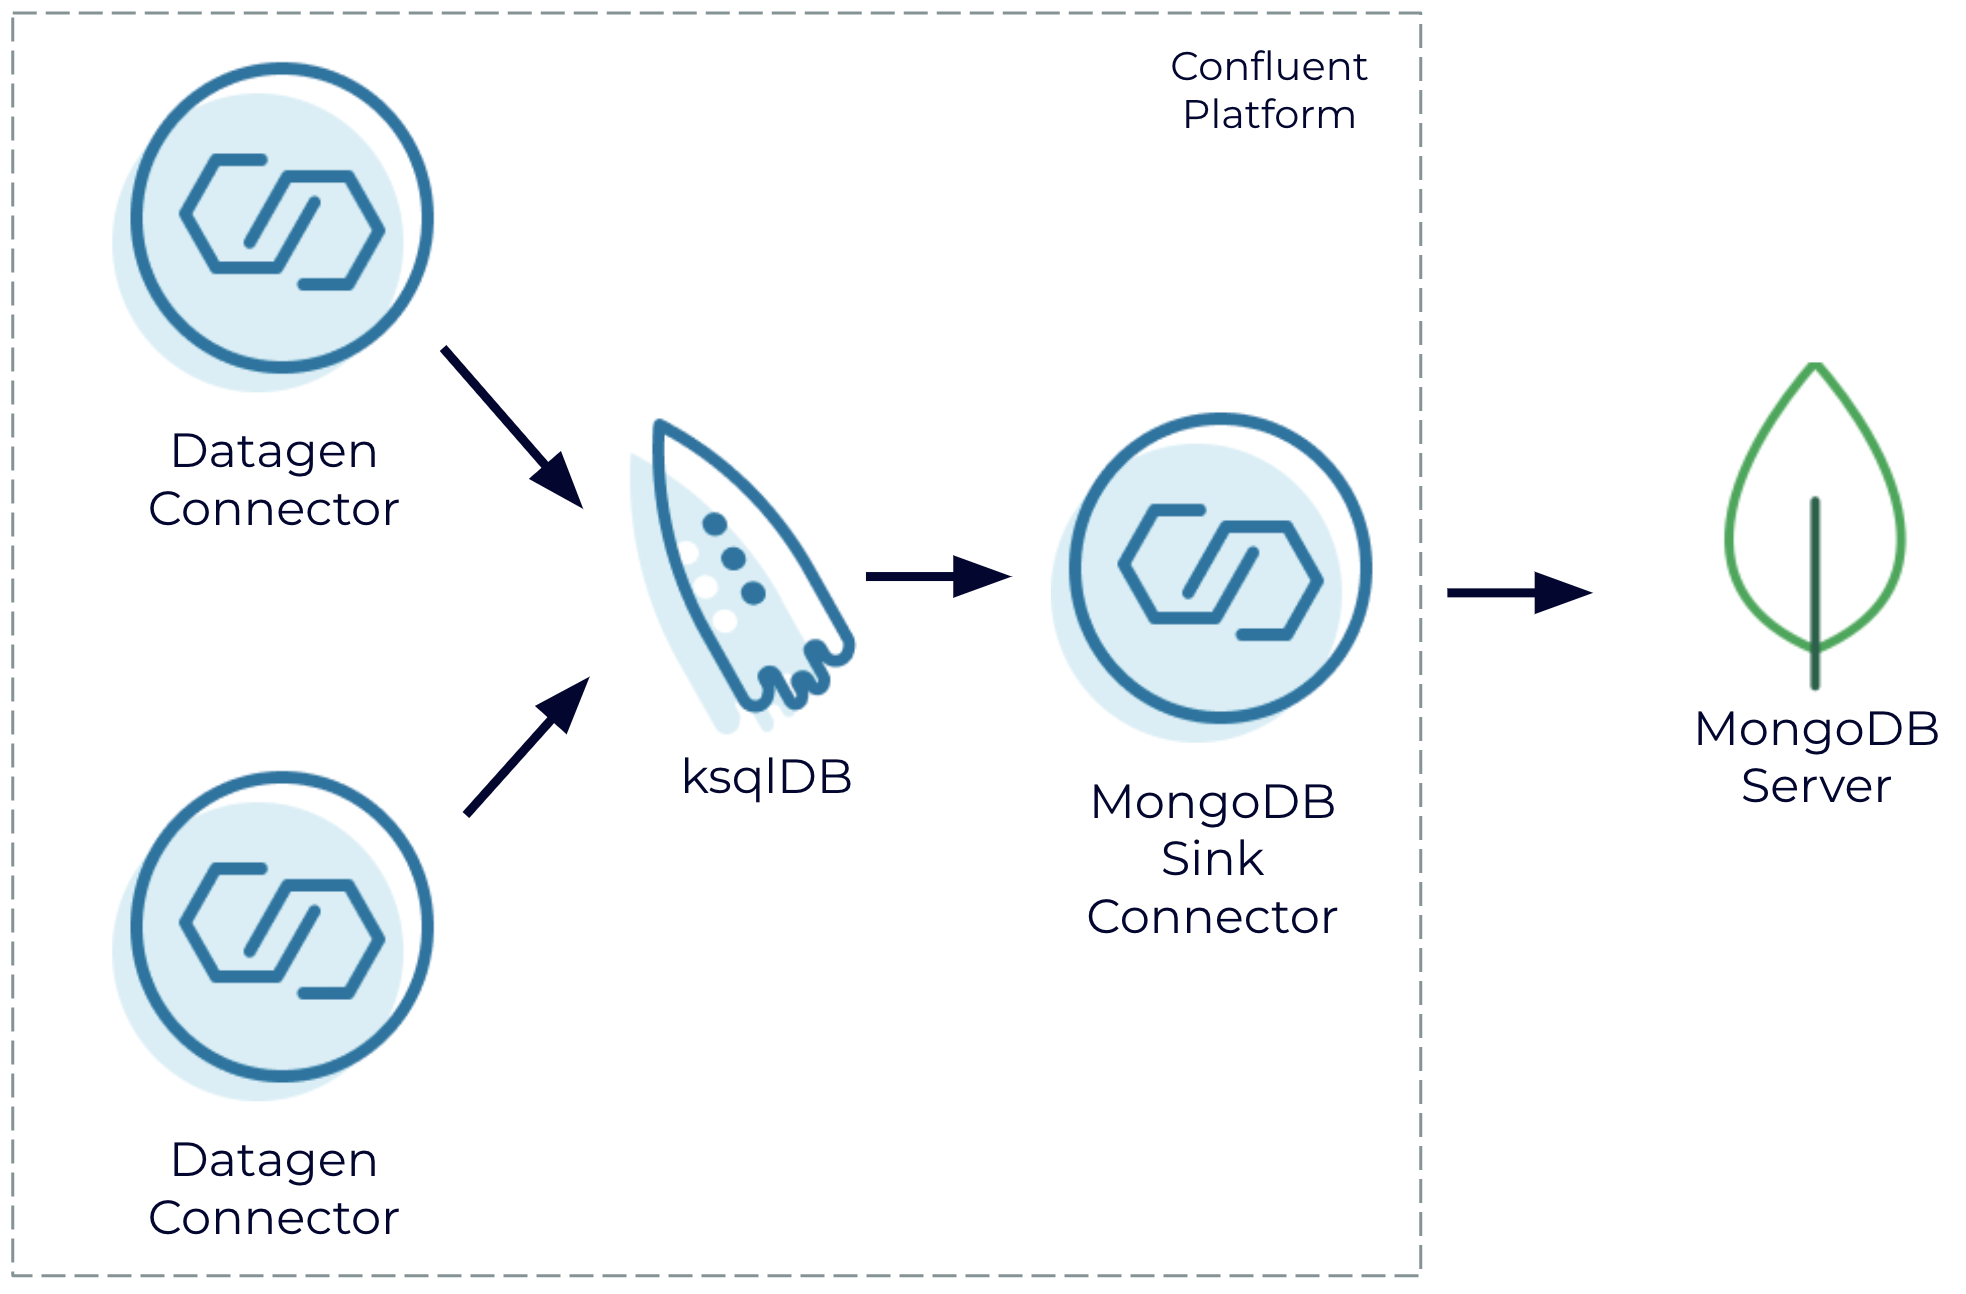
Join generated data streams in a self-managed setting using Confluent Platform and write the results to MongoDB Server
If you’re working in a primarily self-managed environment, you can still use Confluent to generate these streams, join them, and pipe them to MongoDB Server without leveraging any fully managed services. This docker-compose.yml file follows the example for building your own custom demo of Confluent Platform. It tweaks the cp-all-in-one image to include the Datagen connector and the MongoDB sink connector. It also includes MongoDB Server.
Within a few minutes of running docker-compose up -d, you should have all these components running locally. The next step is to initialize MongoDB Server with the provided script:
sh ./init-mongo.sh
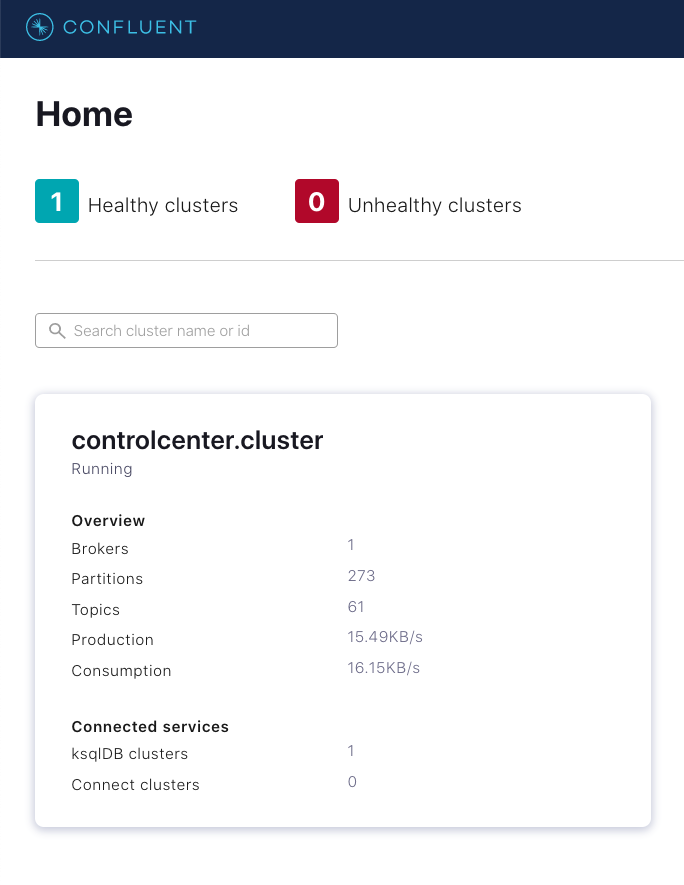
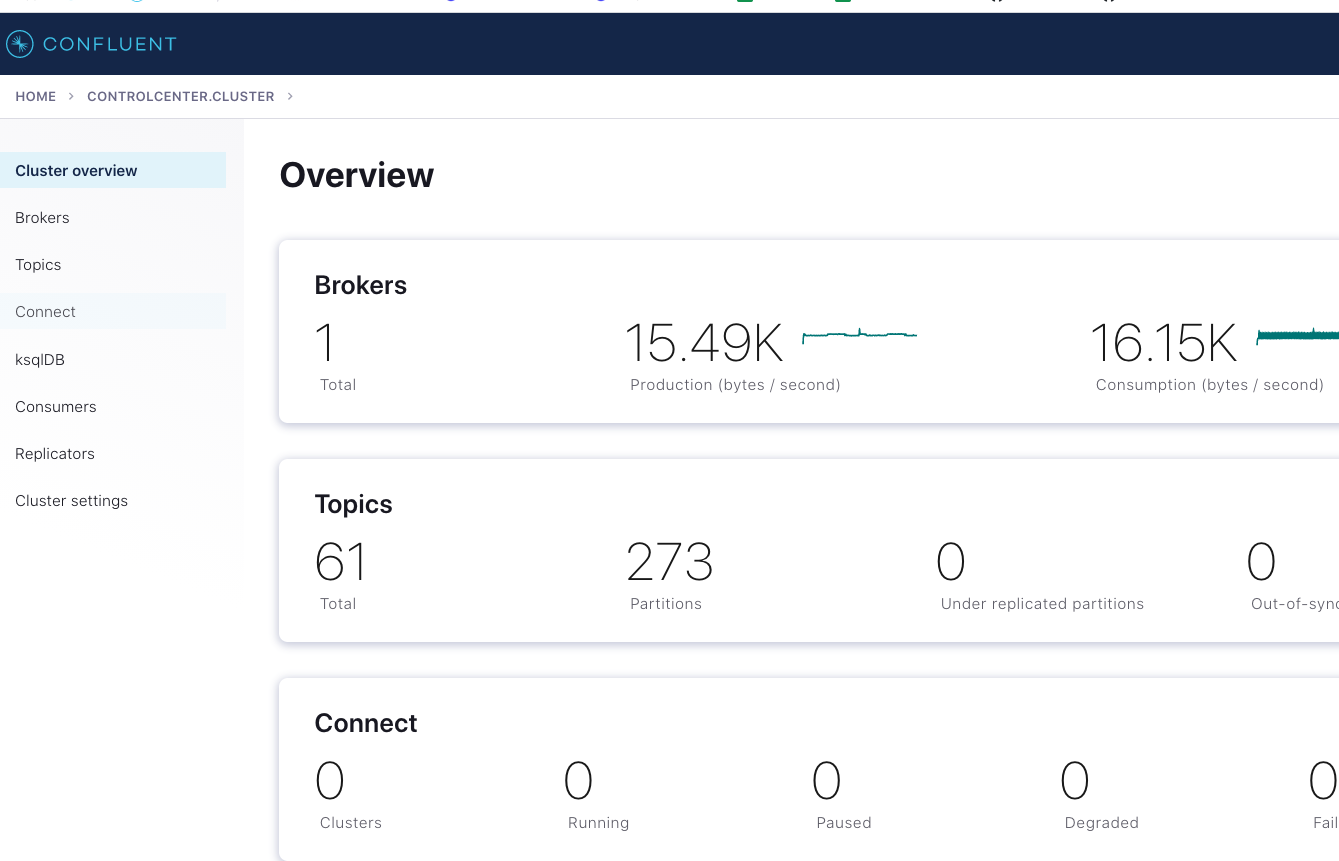
You should be able to see a fresh cluster in Confluent Control Center by navigating to localhost:9021:
 |
 |
While there’s a UI in Confluent Control Center for configuring a connector, this shell script launches the Datagen connector for trades using the Confluent REST API. As you can see, the JSON is the same:
curl -X POST -H "Content-Type: application/json" --data '
{
  "name": "datagen-users",
  "config": {
    "connector.class": "io.confluent.kafka.connect.datagen.DatagenConnector",
    "kafka.topic": "users-topic",
    "quickstart": "users",
    "key.converter": "org.apache.kafka.connect.storage.StringConverter",
    "value.converter": "org.apache.kafka.connect.json.JsonConverter",
    "value.converter.schemas.enable": "false",
    "max.interval": 1000,
    "iterations": 10000000,
    "tasks.max": "1"
  }
}' http://localhost:8083/connectors -w "\n"
Launch the Datagen connector on the trades topic:
curl -X POST -H "Content-Type: application/json" --data '
{
  "name": "datagen-trades",
  "config": {
    "connector.class": "io.confluent.kafka.connect.datagen.DatagenConnector",
    "kafka.topic": "trades-topic",
    "quickstart": "stock_trades",
    "key.converter": "org.apache.kafka.connect.storage.StringConverter",
    "value.converter": "org.apache.kafka.connect.json.JsonConverter",
    "value.converter.schemas.enable": "false",
    "max.interval": 1000,
    "iterations": 10000000,
    "tasks.max": "1"
  }
} ' http://localhost:8083/connectors -w "\n"
With the two Datagen connectors running, you can deploy the same ksqlDB queries using either the ksqlDB CLI or the interface in Confluent Control Center.
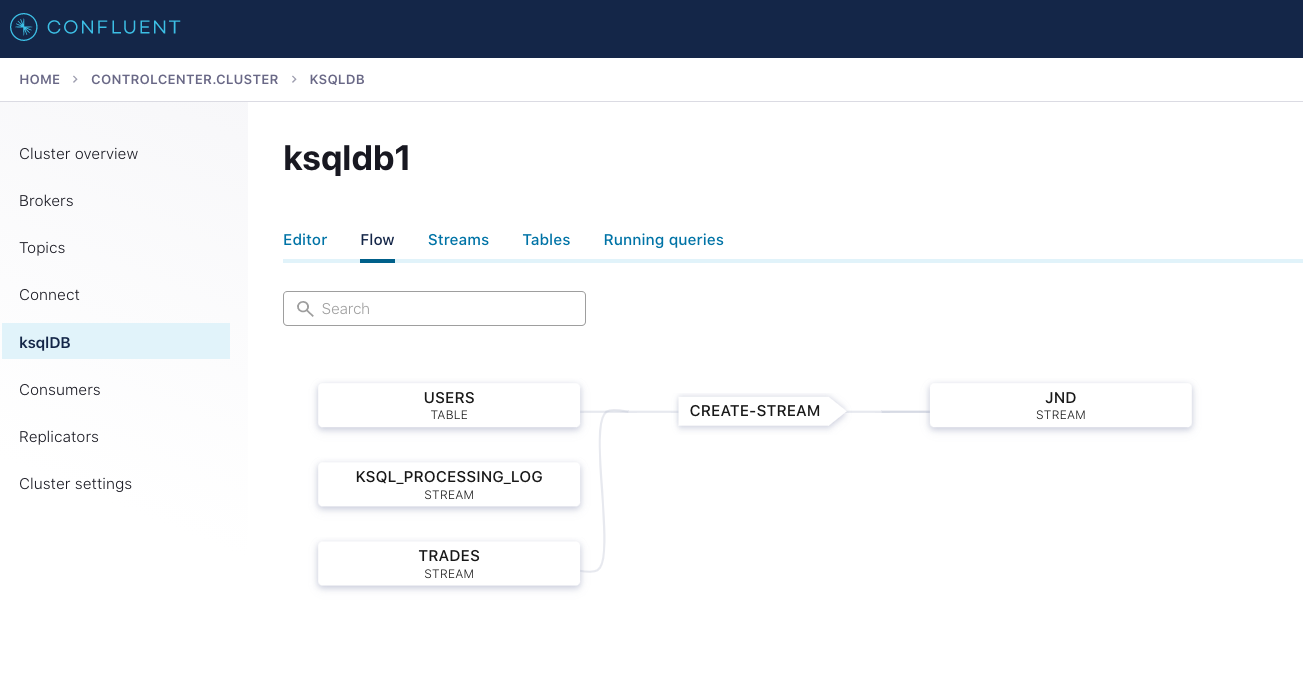
This creates the exact same data flow as shown in Confluent Cloud earlier:
You can now create the sink connector to the locally running Docker image for MongoDB Server:
curl -X POST -H "Content-Type: application/json" --data '
{
 "name": "mongodb-sink",
 "config": {
     "connector.class":"com.mongodb.kafka.connect.MongoSinkConnector",
     "tasks.max":"1",
     "topics": "JND",
      "connection.uri":"mongodb://mongo1:27017,mongo2:27018,mongo3:27019",
     "database":"trades",
     "collection":"trade-data",
   "key.converter":"org.apache.kafka.connect.storage.StringConverter",
     "key.converter.schemas.enable":false,
     "value.converter":"org.apache.kafka.connect.storage.StringConverter",
     "value.converter.schemas.enable":false
 }
}' http://localhost:8083/connectors -w "\n"
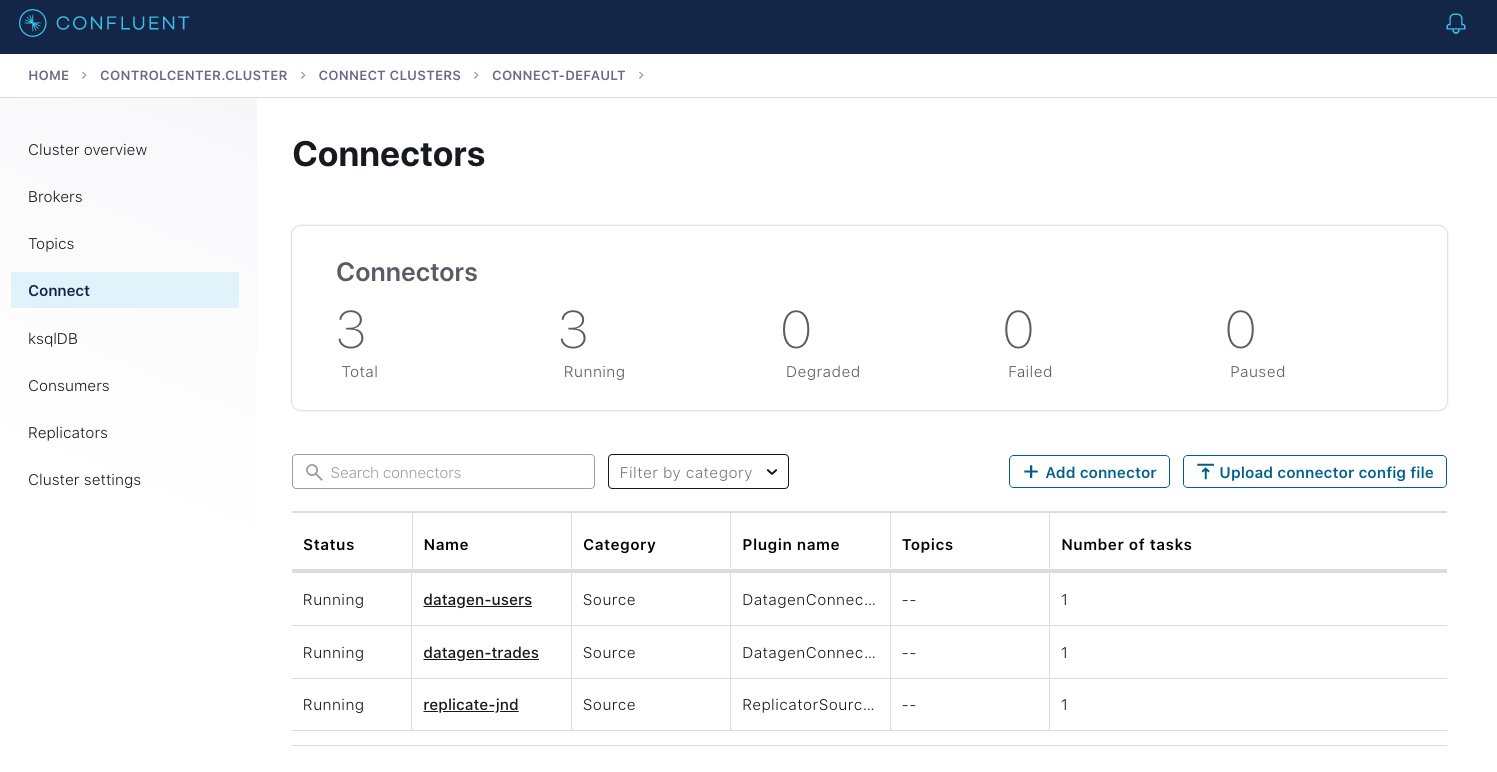
Once the connector is launched and running, you should be able to see all three connectors in Confluent Control Center:
And the data should populate to MongoDB Server, which automatically created the database and collection when the connector was first used:
docker-compose exec mongo1 /usr/bin/mongo
rs0:PRIMARY> show collections;
tradez
rs0:PRIMARY> db.tradez.find({});
{ "_id" : ObjectId("6080988bd6d6065b50c8caef"), "REGIONID" : "Region_1", "GENDER" : "OTHER", "SYMBOL" : "ZVV", "PRICE" : "190", "ACCOUNT" : "ABC123", "QUANTITY" : "2756" }
{ "_id" : ObjectId("6080988bd6d6065b50c8caf1"), "REGIONID" : "Region_2", "GENDER" : "FEMALE", "SYMBOL" : "ZVV", "PRICE" : "172", "ACCOUNT" : "LMN456", "QUANTITY" : "1122" }
{ "_id" : ObjectId("6080988bd6d6065b50c8caf2"), "REGIONID" : "Region_9", "GENDER" : "OTHER", "SYMBOL" : "ZXZZT", "PRICE" : "221", "ACCOUNT" : "ABC123", "QUANTITY" : "3699" }
{ "_id" : ObjectId("6080988cd6d6065b50c8caf3"), "REGIONID" : "Region_3", "GENDER" : "MALE", "SYMBOL" : "ZXZZT", "PRICE" : "912", "ACCOUNT" : "XYZ789", "QUANTITY" : "2693" }
{ "_id" : ObjectId("6080988dd6d6065b50c8caf4"), "REGIONID" : "Region_9", "GENDER" : "OTHER", "SYMBOL" : "ZJZZT", "PRICE" : "866", "ACCOUNT" : "LMN456", "QUANTITY" : "3776" }
{ "_id" : ObjectId("6080988dd6d6065b50c8caf6"), "REGIONID" : "Region_4", "GENDER" : "MALE", "SYMBOL" : "ZXZZT", "PRICE" : "826", "ACCOUNT" : "LMN456", "QUANTITY" : "1093" }
Confluent Platform to Confluent Cloud: Replicator
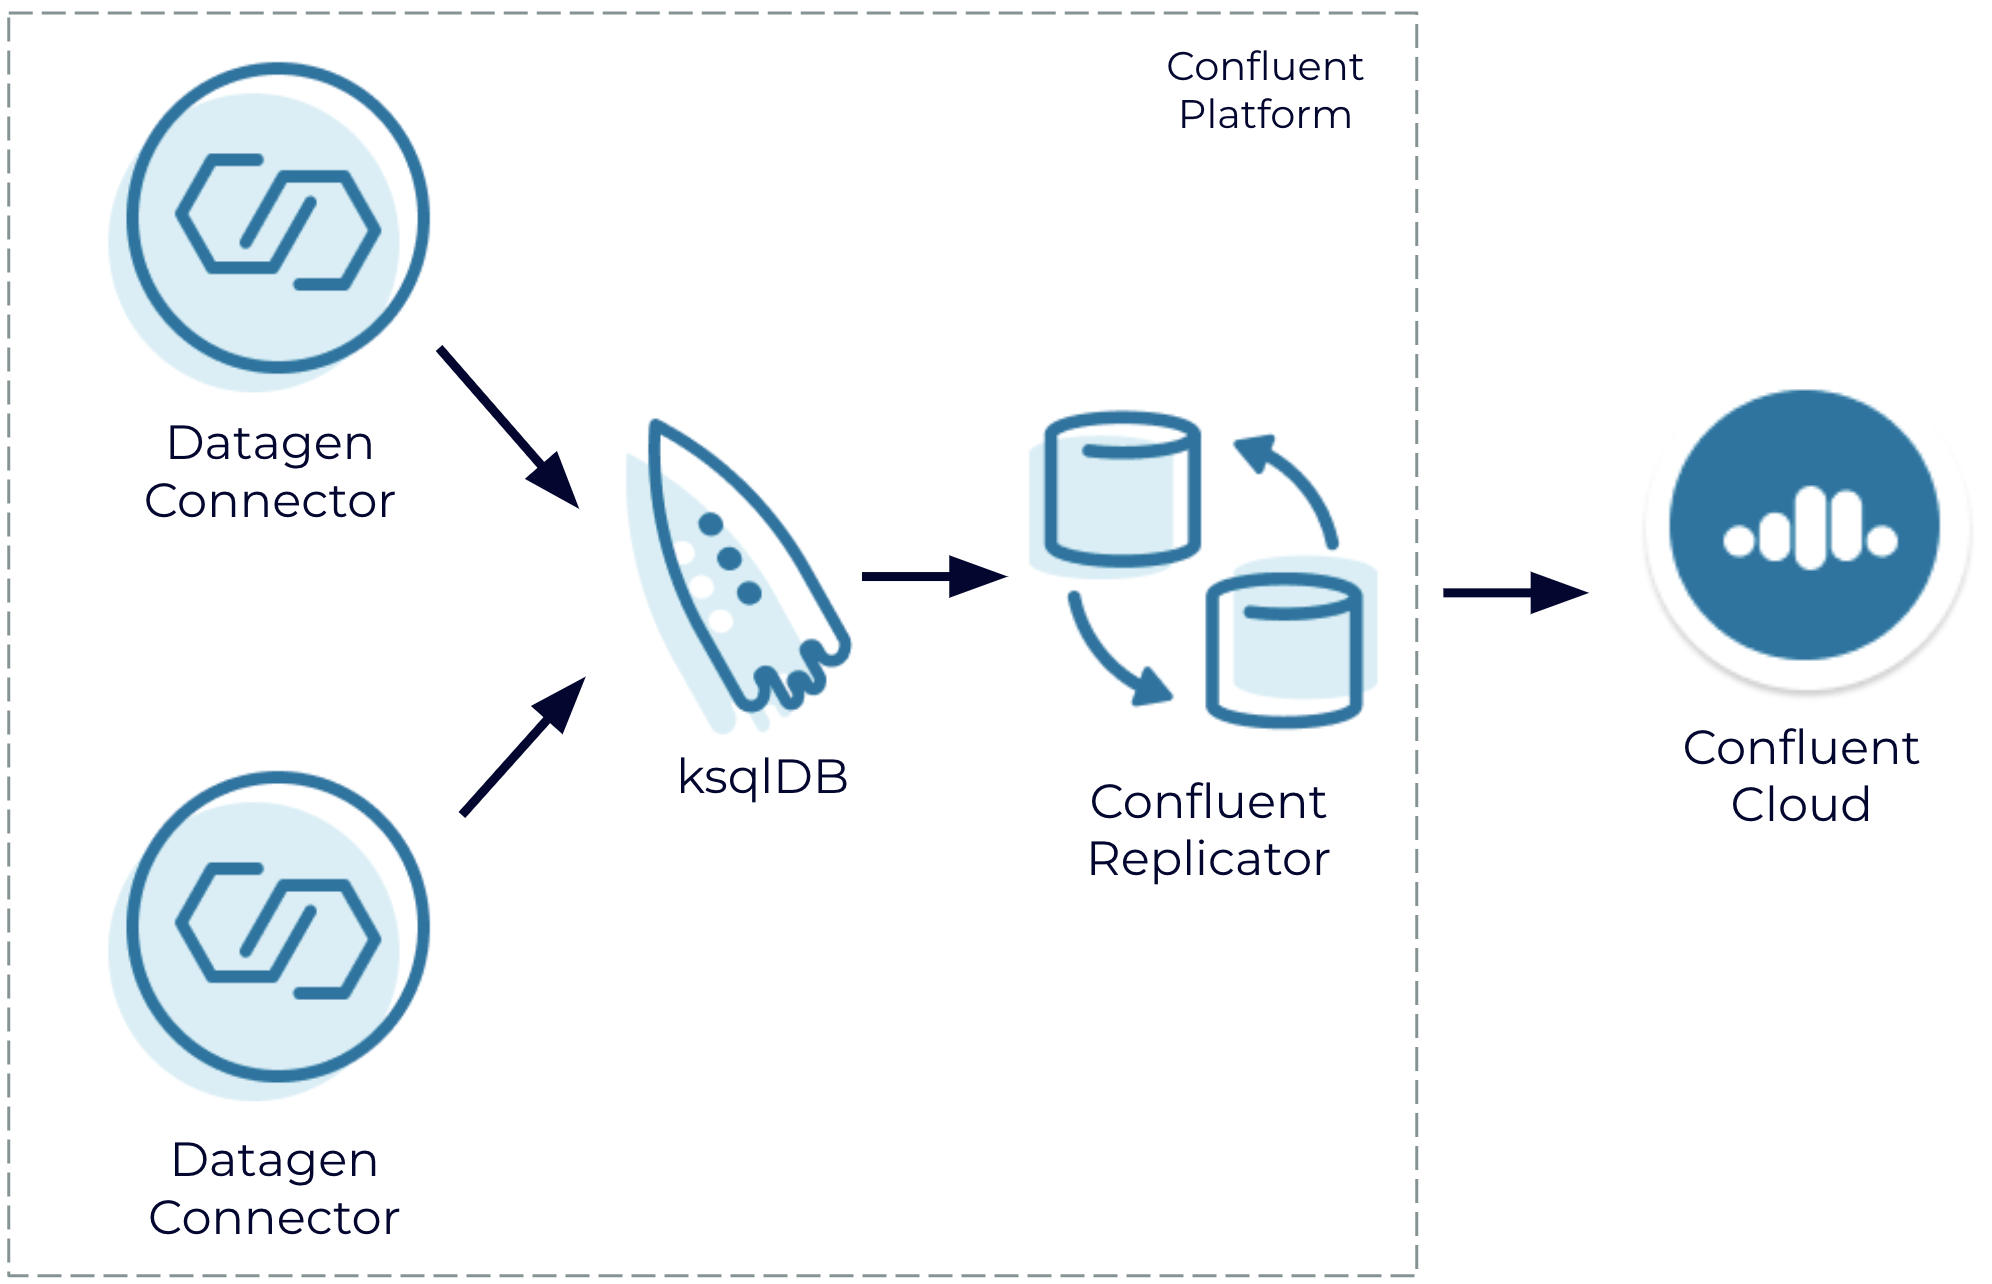
Join a generated data stream using Confluent Platform in a self-managed setting and replicate the resulting data stream to Confluent Cloud
Sometimes it’s just not possible or desirable to run an entire workload in a single place. For example, you might be in the middle of a long-term plan to migrate to a managed cloud service, or you might be part of a larger organization with different deployment resources available to different people. You might also have multi-datacenter or hybrid cloud requirements to meet resiliency and latency SLAs, or you might still be in the process of figuring this out. Regardless, it’s critical that you have the ability to access events in other environments as if they were local.
Confluent Replicator is a Kafka Connect-based component that allows you to easily and reliably replicate topics from one Kafka cluster to another, and Cluster Linking offers the ability to directly connect clusters together and mirror topics without using Connect. This tutorial uses Replicator.
Like the example above, the docker-compose file also builds on cp-all-in-one. This time, Confluent Replicator and the Datagen connector are included, but instances of MongoDB Server are omitted. The intention is to replicate the joined topic to Confluent Cloud and then optionally write to MongoDB Atlas via the first example. The included config file specifies a replication of the joined dataset topic to Confluent Cloud backed to the source. This non-default configuration is slightly more involved and varies from the documented best practice of backing Replicator to the sink. Backing to the source makes sense if you don’t have the privileges required to configure a service account or to set the required ACLs on Confluent Cloud.
First, run docker-compose up -d to start up a local cluster. Then, run through the steps described above to set up the two generated data streams and the ksqlDB join locally. Next, edit the connector configuration file for Confluent Replicator to specify the Kafka topics that you’d like to replicate, as well as the Confluent Cloud connectivity information. Lastly, run the script to launch the Replicator as a connector.

The join query as shown in Confluent Control Center
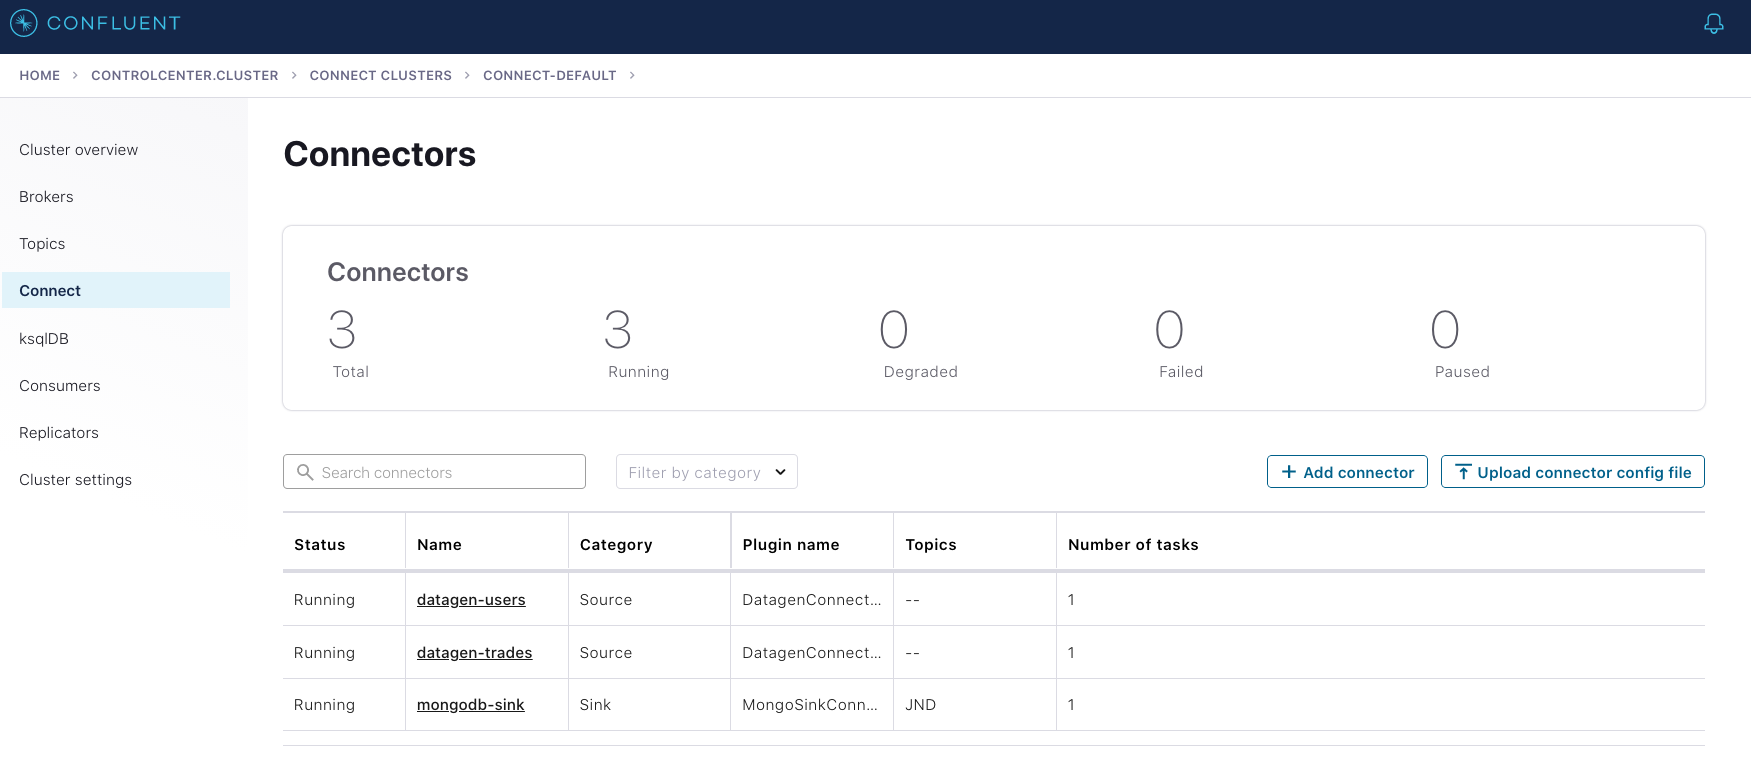
The Datagen connectors run locally with the Confluent Replicator connector
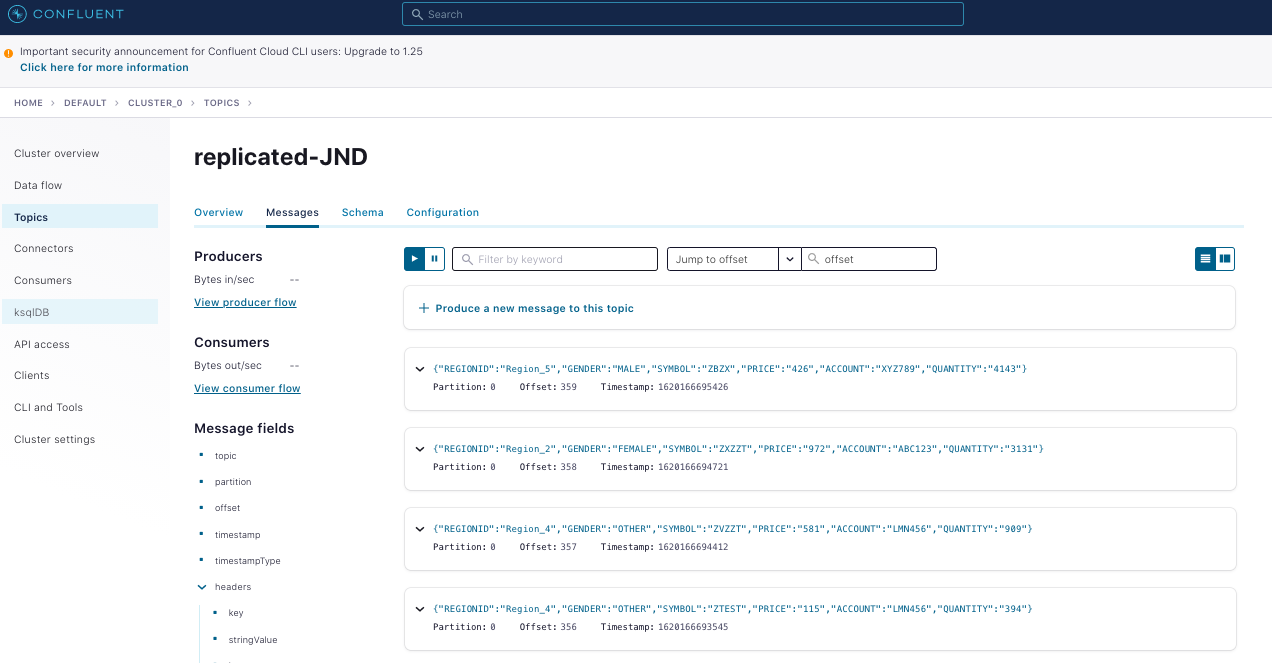
The replicated output of the on-prem join as seen in Confluent Cloud
Conclusion
This tutorial demonstrates how easy it is to use Confluent to quickly set data in motion. Unfortunately, it’s not easily duplicated in a strictly self-managed environment working solely with Kafka because you have to contend with a variety of issues, including instance type selection, cluster configuration, data stream generation, proper coding of the join in a stream processor of your choice, connecting to third-party systems, and more. Furthermore, switching between on prem to cloud and back or from self-managed to fully managed isn’t feasible without a significant amount of extra effort.
To save yourself and your business both time and resources, you can sign up for a free trial of Confluent Cloud and use the promo code CL60BLOG for an extra $60 of free usage.* You can also get your free 30-day trial of Confluent Platform to begin developing real-time event streams from on prem to the cloud. You’ll be all set to begin developing real-time event streams from on-prem to the cloud!
このブログ記事は気に入りましたか?今すぐ共有
Confluent ブログの登録
New with Confluent Platform 7.9: Oracle XStream CDC Connector, Client-Side Field Level Encryption (EA), Confluent for VS Code, and More
This blog announces the general availability of Confluent Platform 7.9 and its latest key features: Oracle XStream CDC Connector, Client-Side Field Level Encryption (EA), Confluent for VS Code, and more.
Meet the Oracle XStream CDC Source Connector
Confluent's new Oracle XStream CDC Premium Connector delivers enterprise-grade performance with 2-3x throughput improvement over traditional approaches, eliminates costly Oracle GoldenGate licensing requirements, and seamlessly integrates with 120+ connectors...

