[Virtual Event] GenAI Streamposium: Learn to Build & Scale Real-Time GenAI Apps | Register Now
How to Consume Data from Apache Kafka Topics and Schema Registry with Confluent and Azure Databricks
How do you process IoT data, change data capture (CDC) data, or streaming data from sensors, applications, and sources in real time? Apache Kafka® and Apache Spark® are widely adopted technologies in the industry, but they require specific skills and expertise to run. Leveraging Confluent Cloud and Azure Databricks as fully managed services in Microsoft Azure, you can implement new real-time data pipelines with less effort and without the need to upgrade your datacenter (or set up a new one).
This blog post demonstrates how to configure Azure Databricks to interact with Confluent Cloud so that you can ingest, process, store, make real-time predictions and gain business insights from your data.
Below is a common architectural pattern used for streaming data:
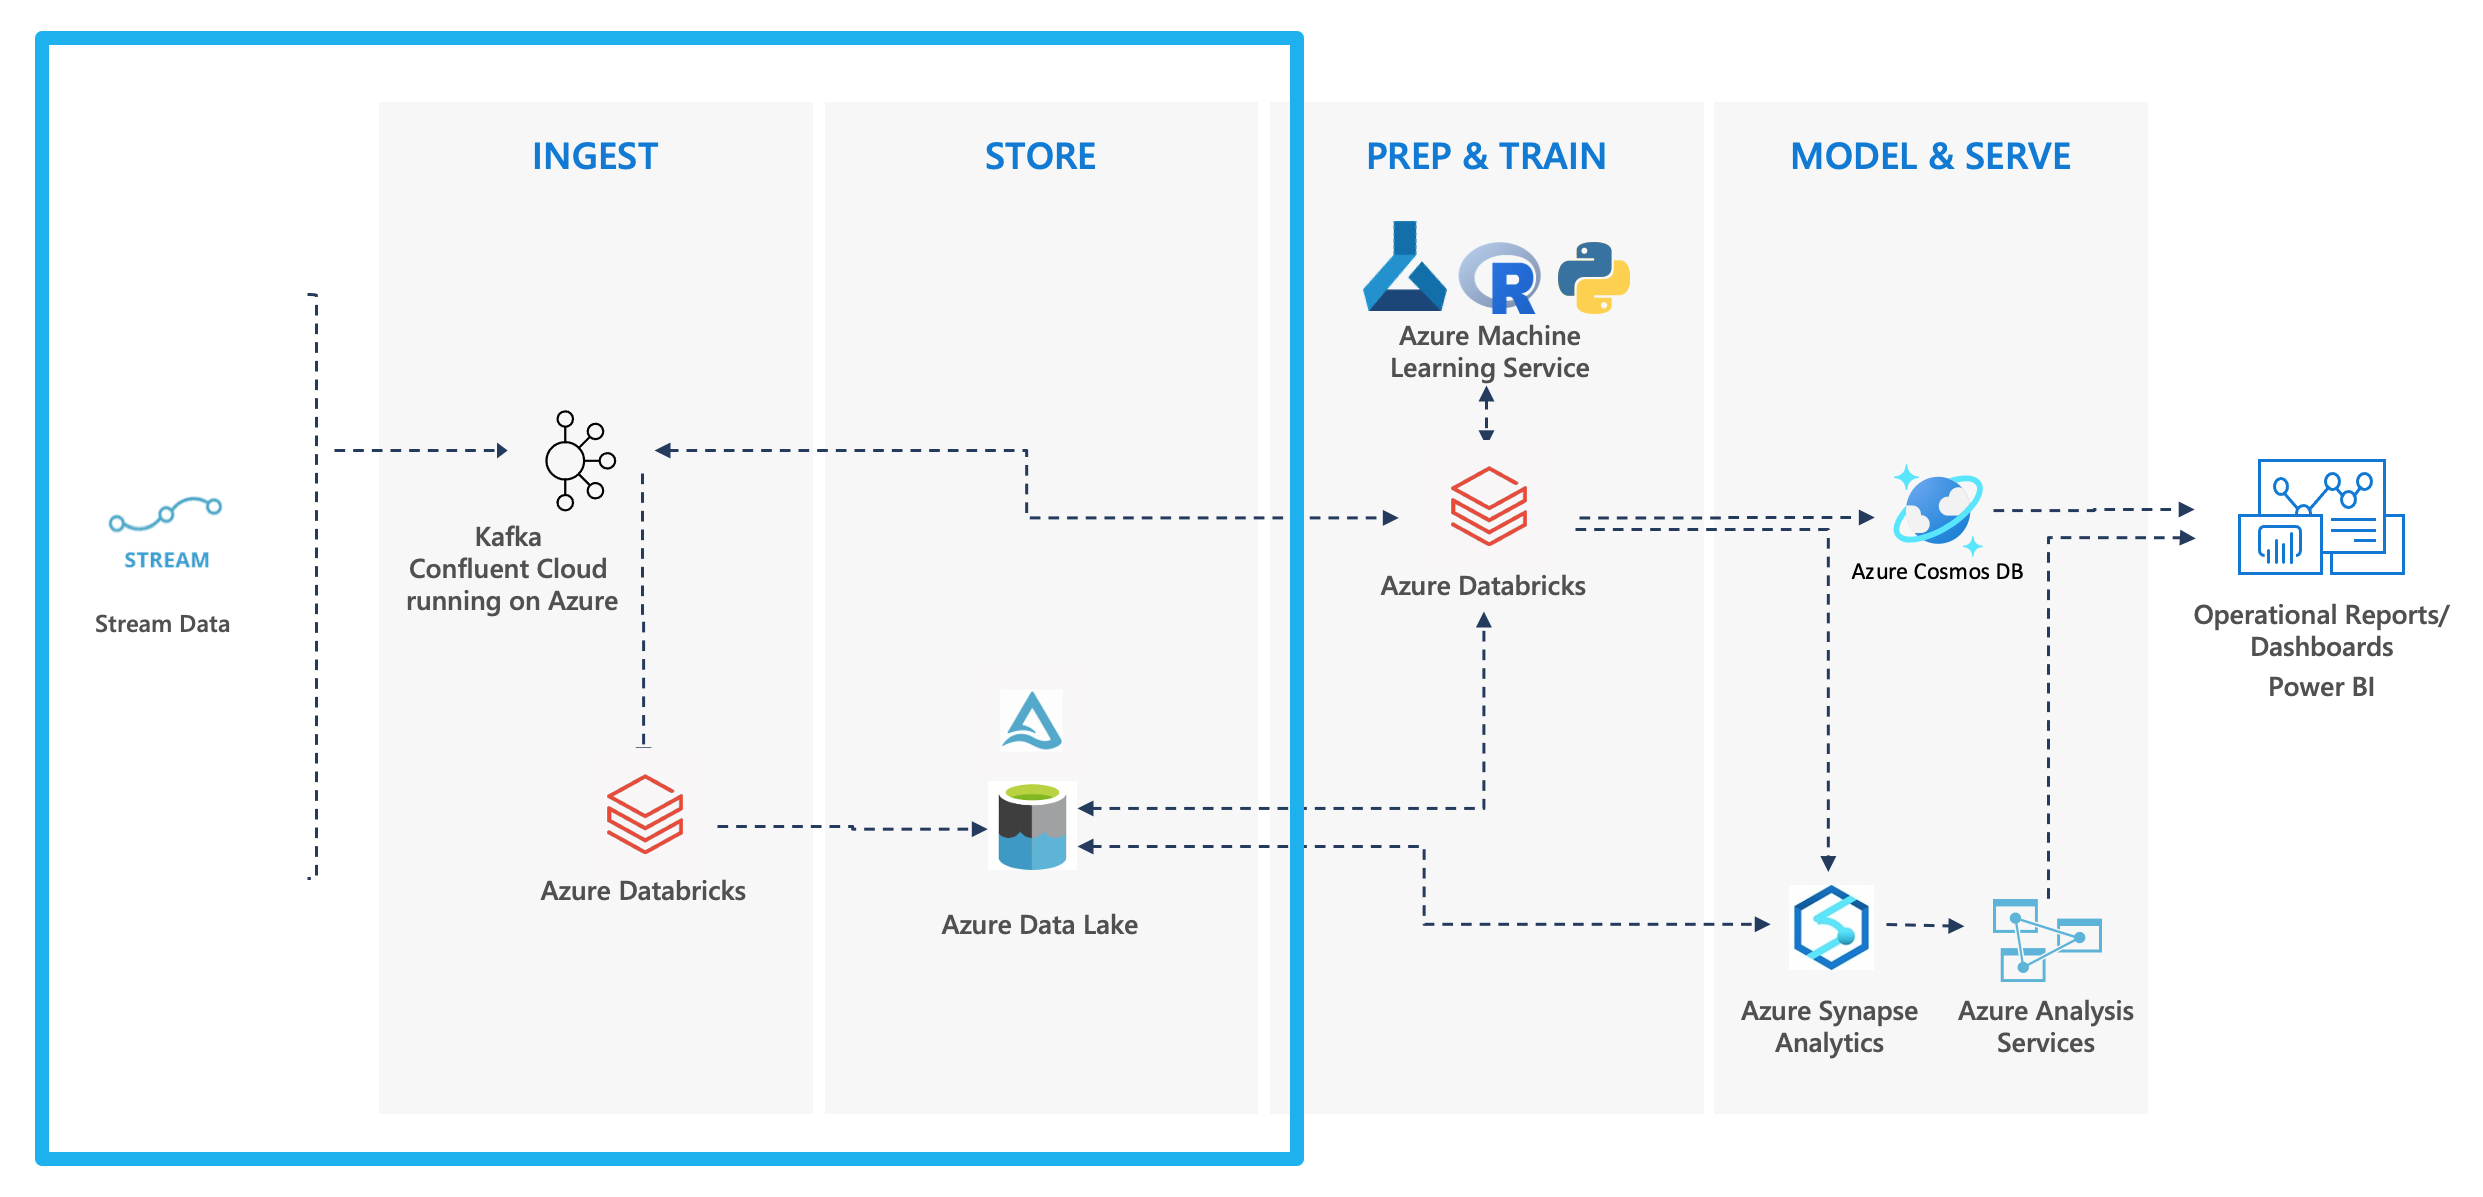
Pattern: Streaming Analytics + Machine Learning
This tutorial shows you how to implement the above architecture outlined in blue.
Prerequisites
- Microsoft Azure account
- Confluent Cloud account (or leverage the seamless integration between Microsoft Azure and Confluent Cloud)
| ℹ️ | Sign up for Confluent Cloud and receive $400 to spend within Confluent Cloud during your first 60 days. In addition, you can use the promo code CL60BLOG for an additional $60 of free Confluent Cloud usage.* |
Objective
This step-by-step guide uses sample Python code in Azure Databricks to consume Apache Kafka topics that live in Confluent Cloud, leveraging a secured Confluent Schema Registry and AVRO data format, parsing the data, and storing it on Azure Data Lake Storage (ADLS) in Delta Lake.
- Process the data with Azure Databricks
- Step 4: Prepare the Databricks environment
- Step 5: Gather keys, secrets, and paths
- Step 6: Set up the Schema Registry client
- Step 7: Set up the Spark ReadStream
- Step 8: Parsing and writing out the data
- Step 9: Query the result
- Step 10: Stop the stream and shut down the cluster
- Step 11: Tear down the demo
Prepare the Confluent Cloud environment
Step 1: Create a Kafka cluster
Sign in to the Azure portal and search for Confluent Cloud.

If you already have a Confluent organization set up in Azure, you can use it, otherwise select Apache Kafka® on Confluent Cloud™ under the “Marketplace” section.
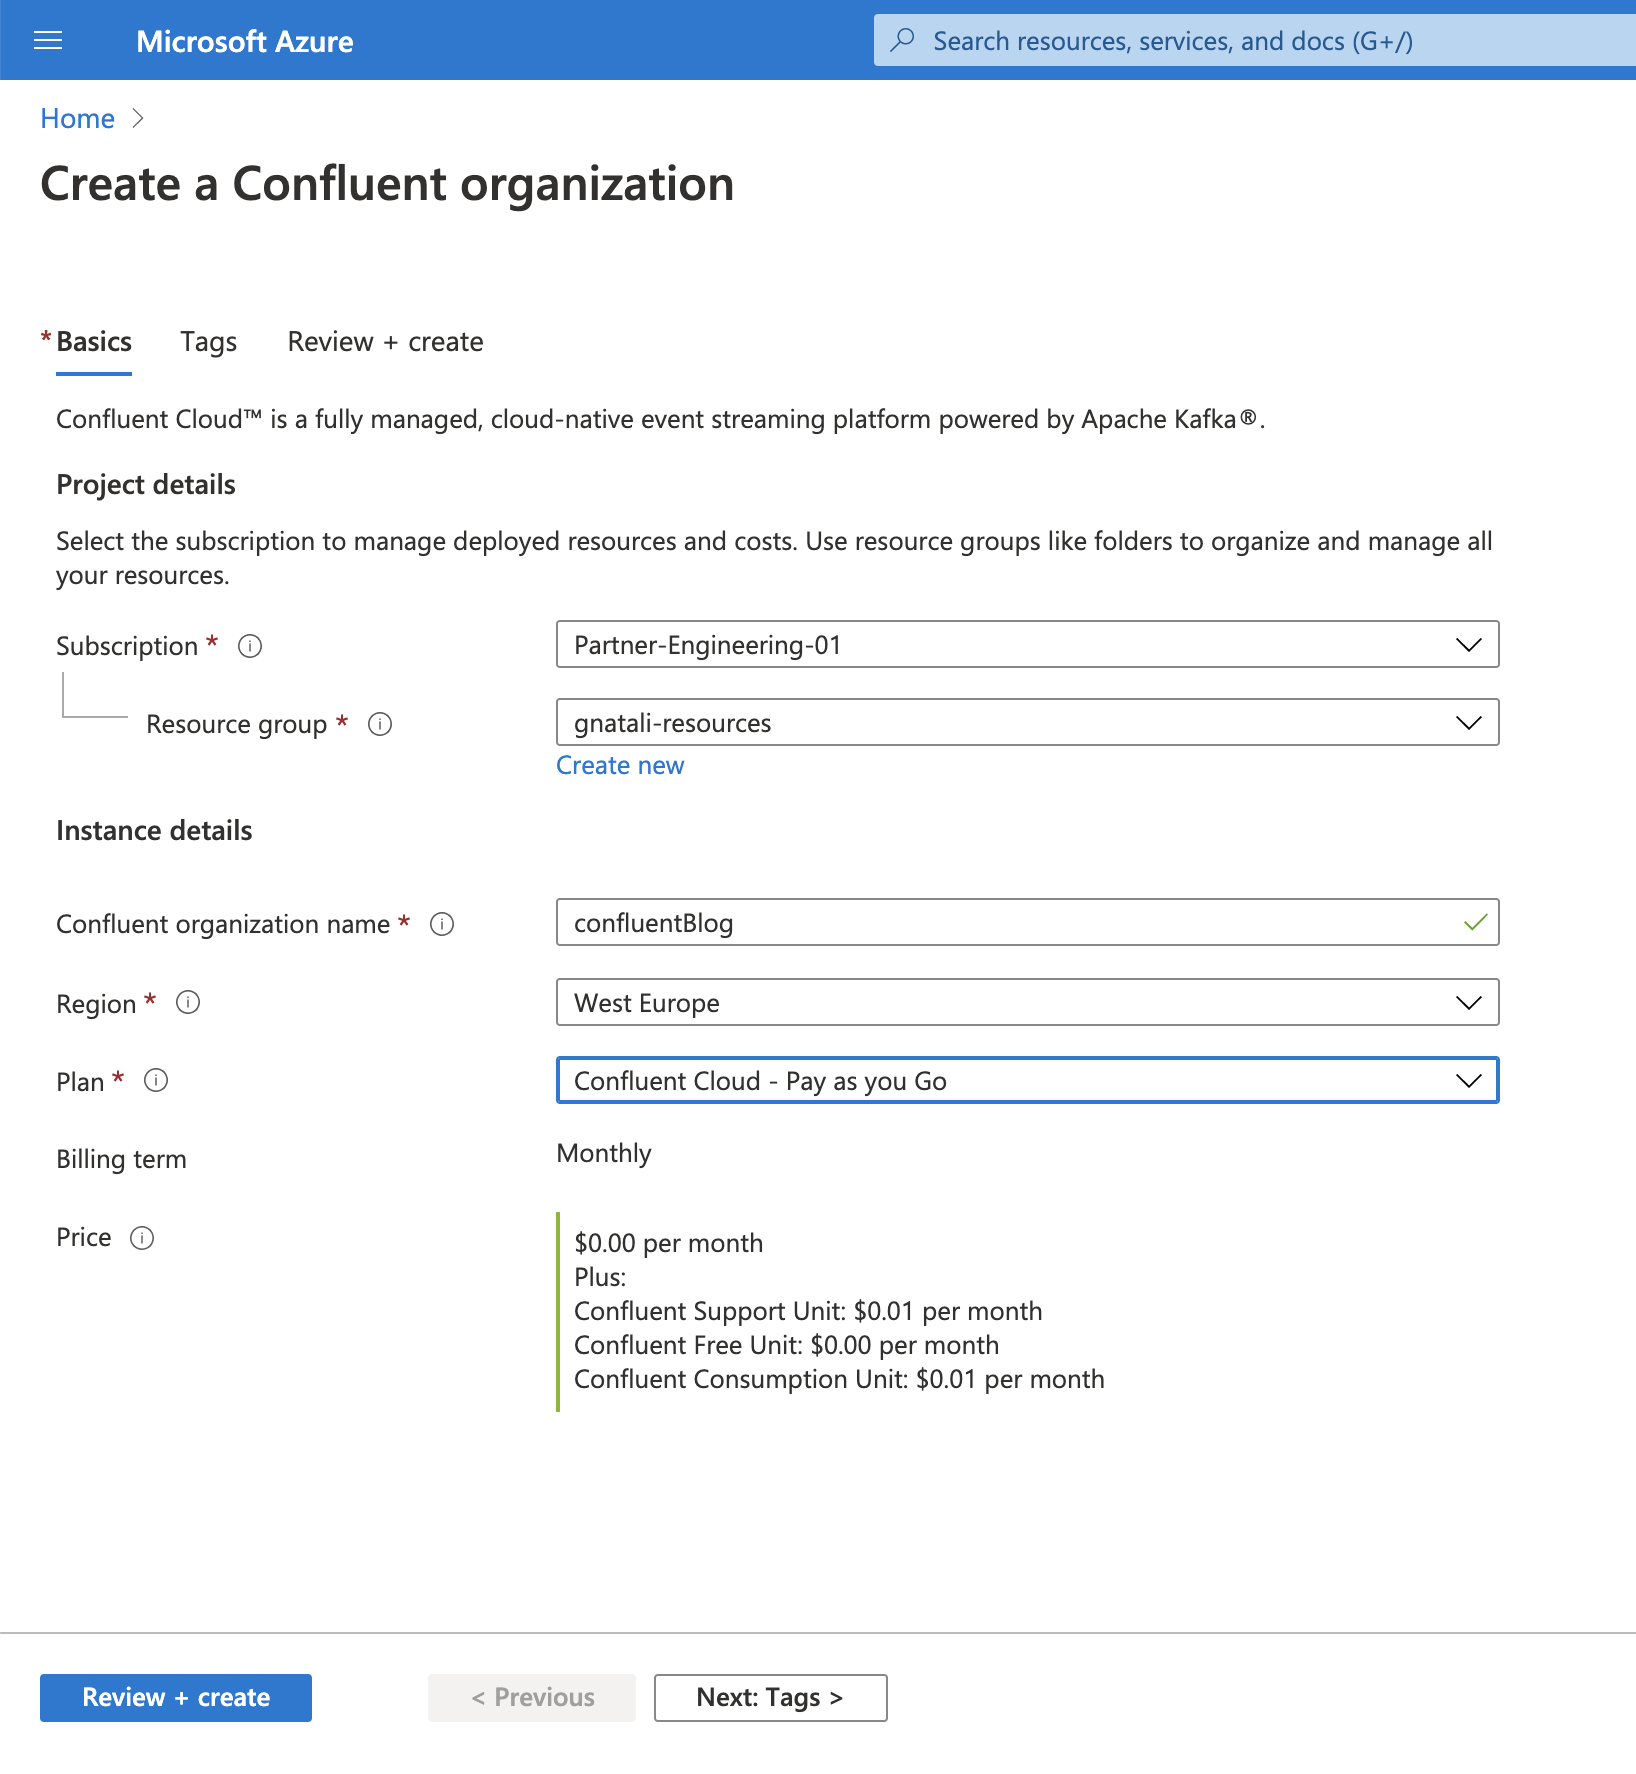
Choose your desired Subscription and Resource Group to host the Confluent organization, complete the mandatory fields, and then click Review + create. On the review page, click Create.
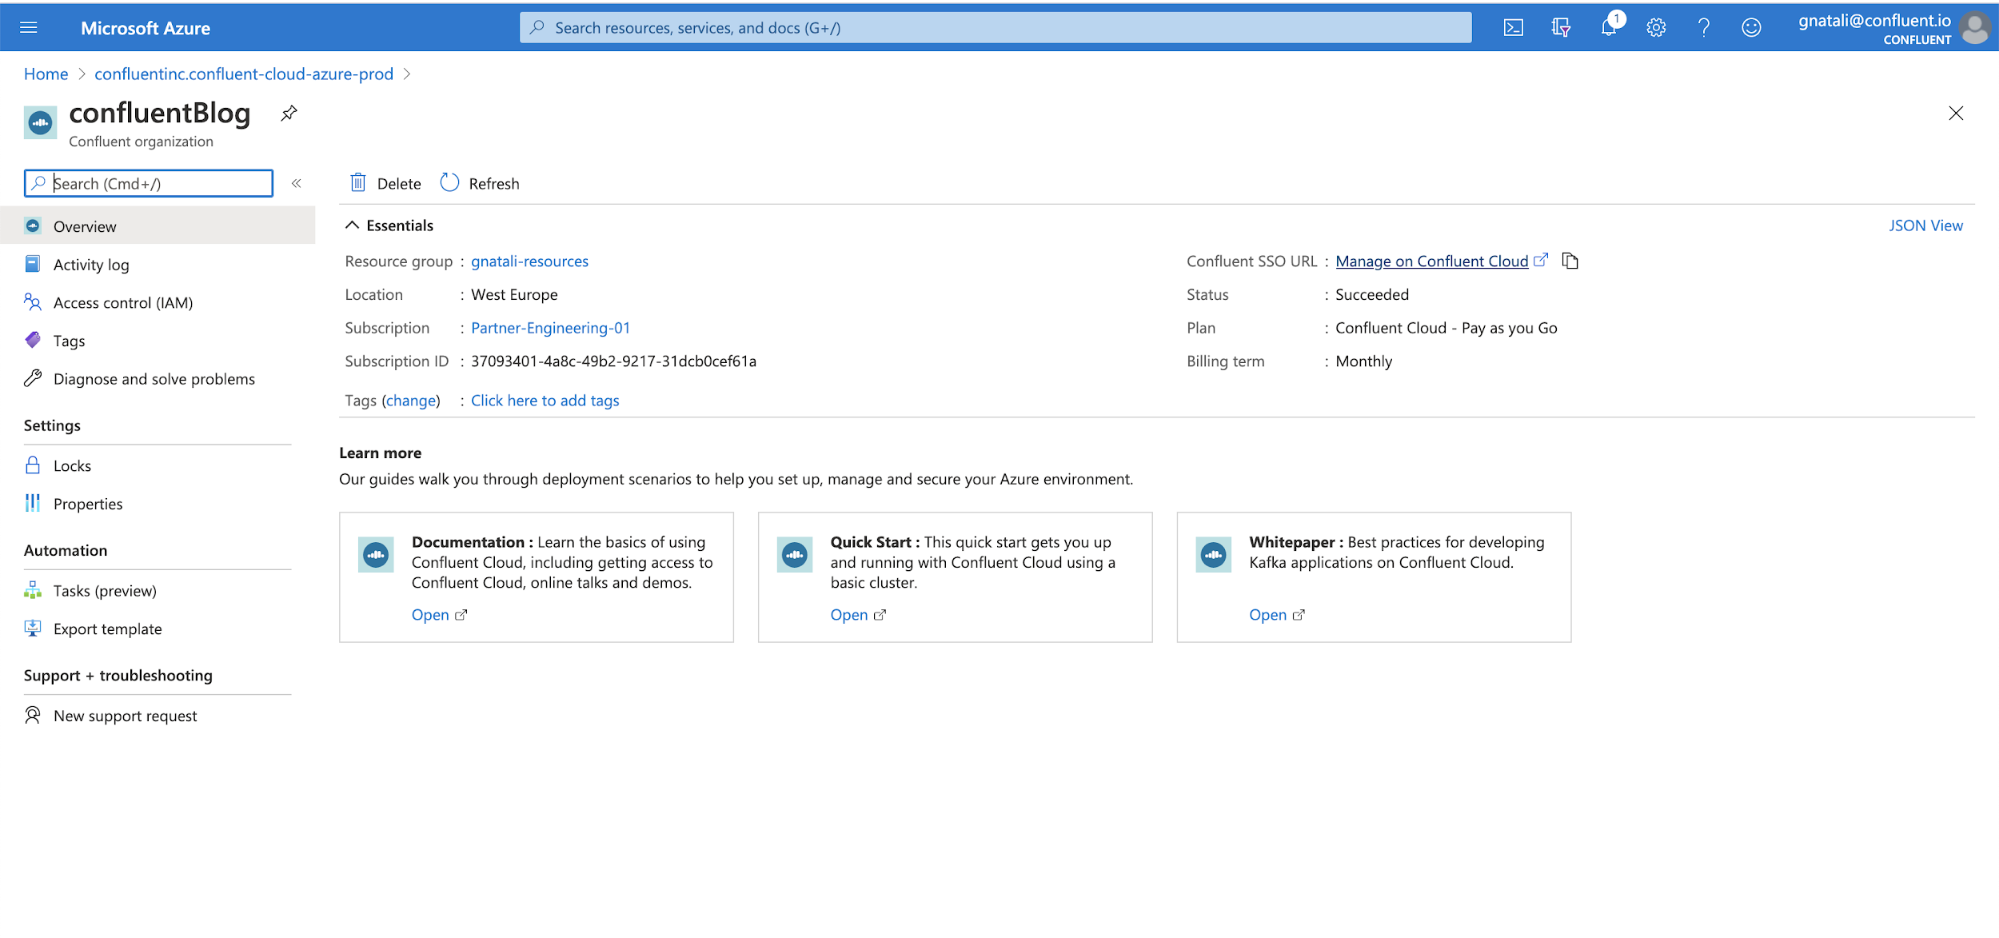
Wait for the deployment to complete and then click Go to resource. On the overview page, click the Confluent SSO link on the right.
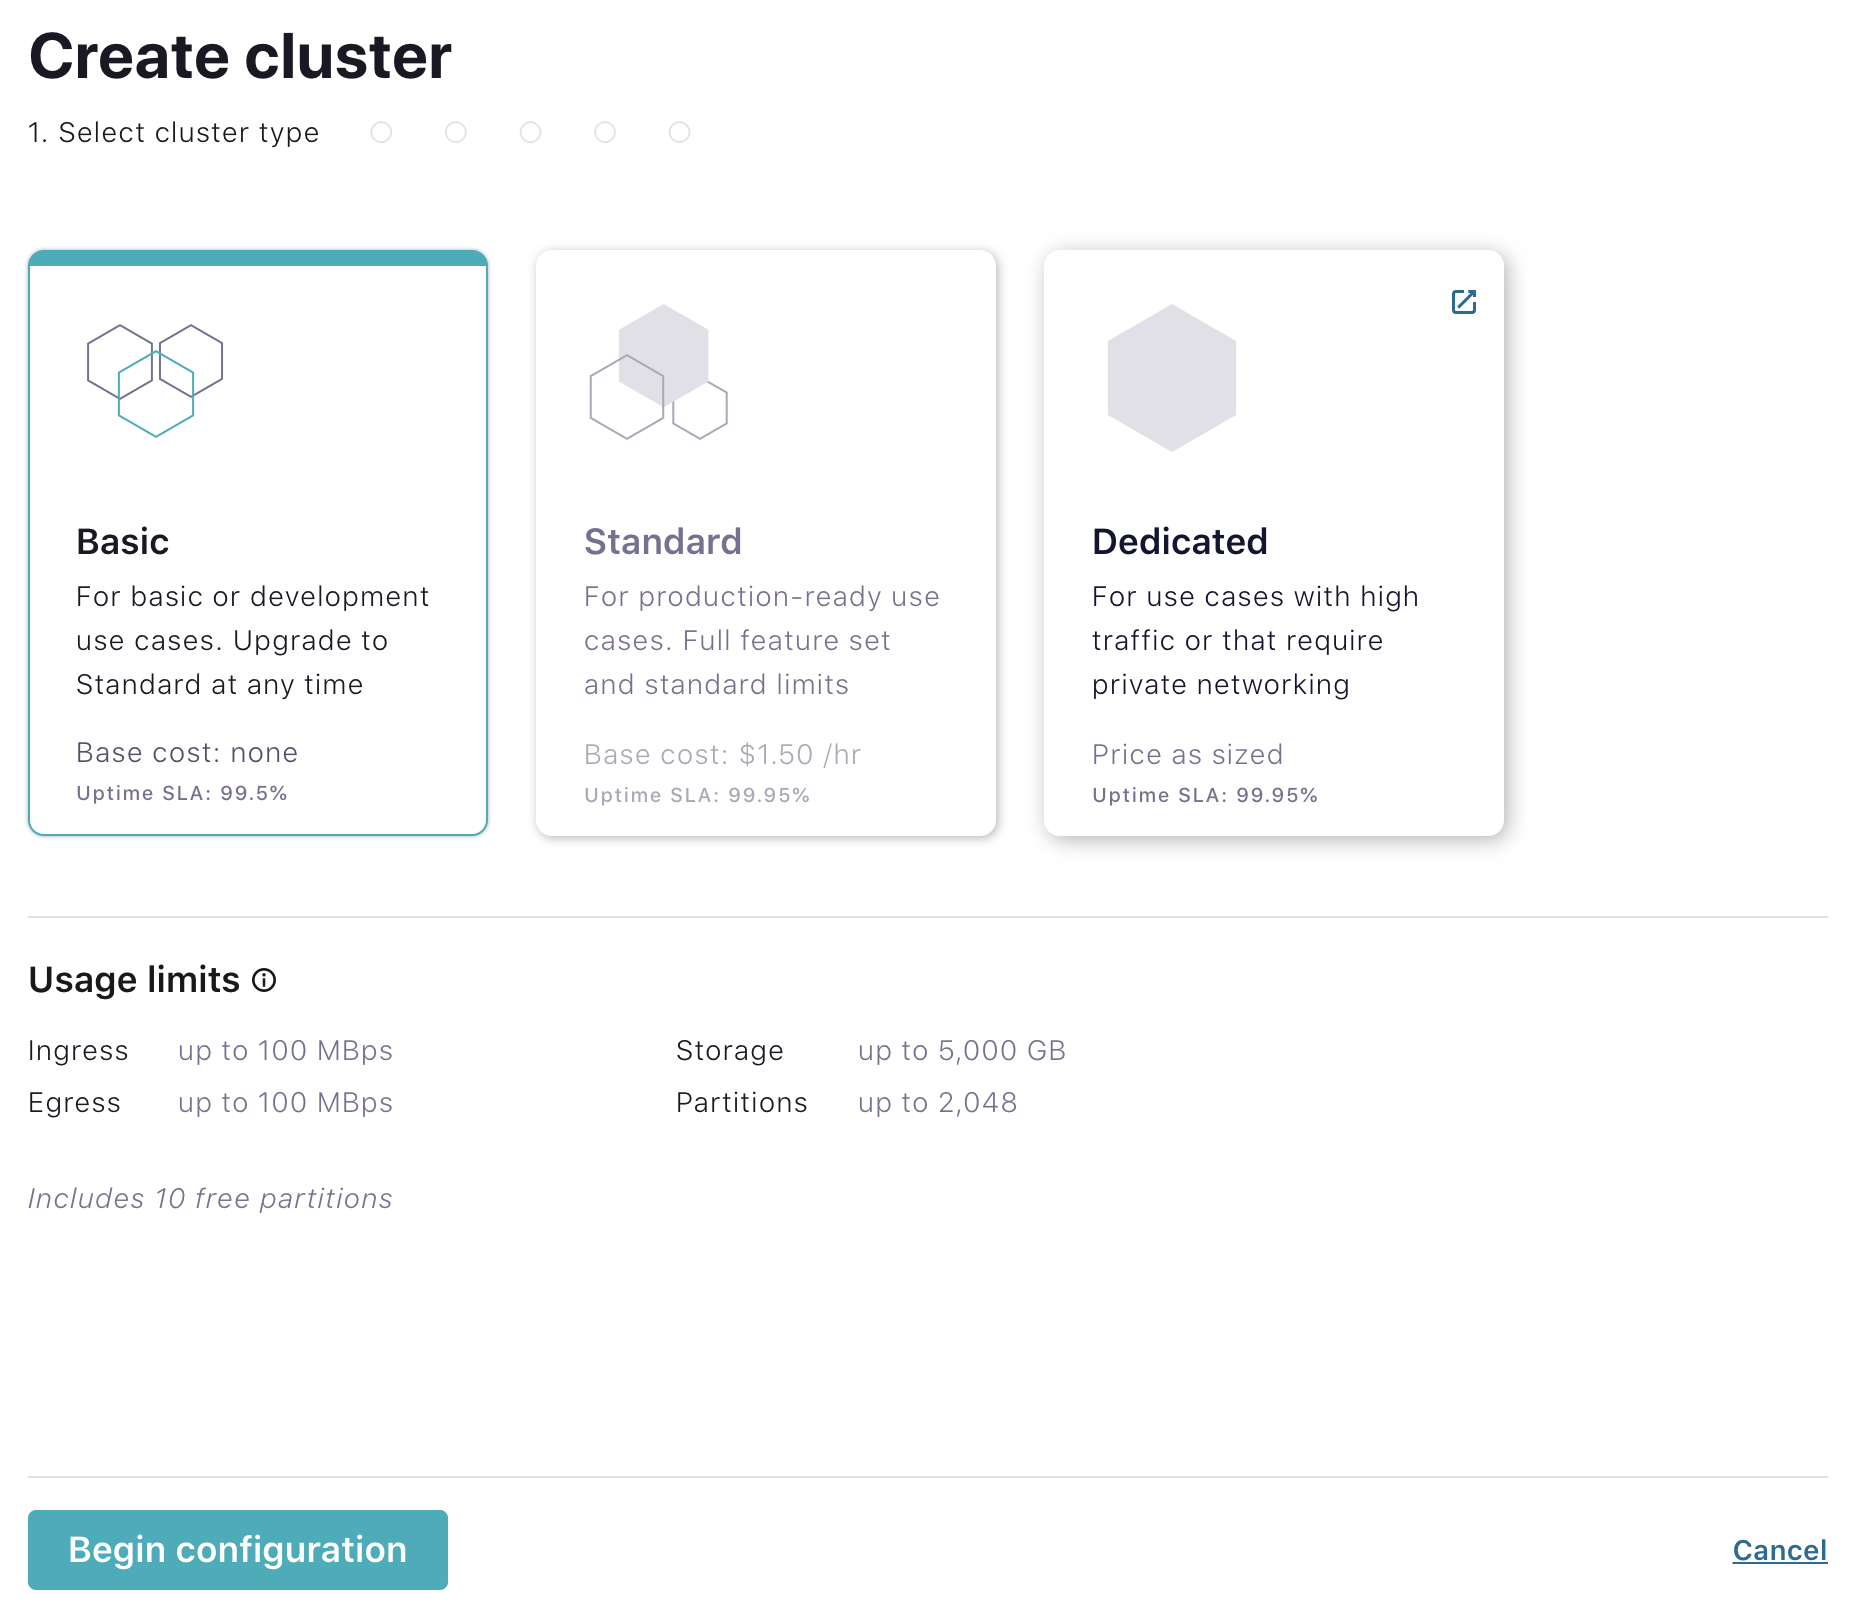
Once you are redirected to Confluent Cloud, click the Create cluster button. Select the cluster type Basic and click Begin Configuration.
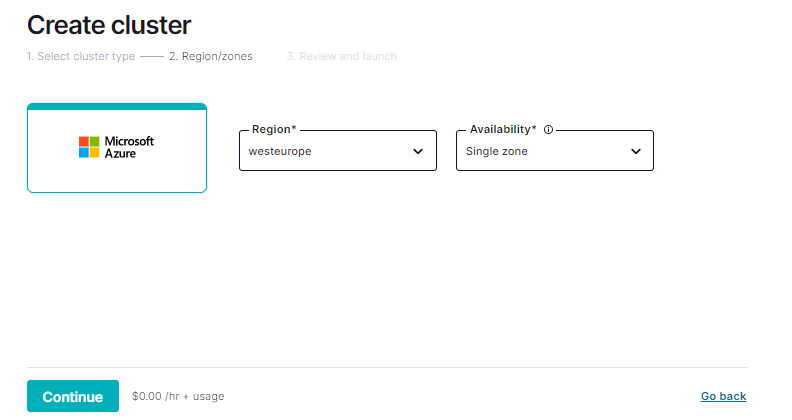
Select an Azure region, then click Continue.
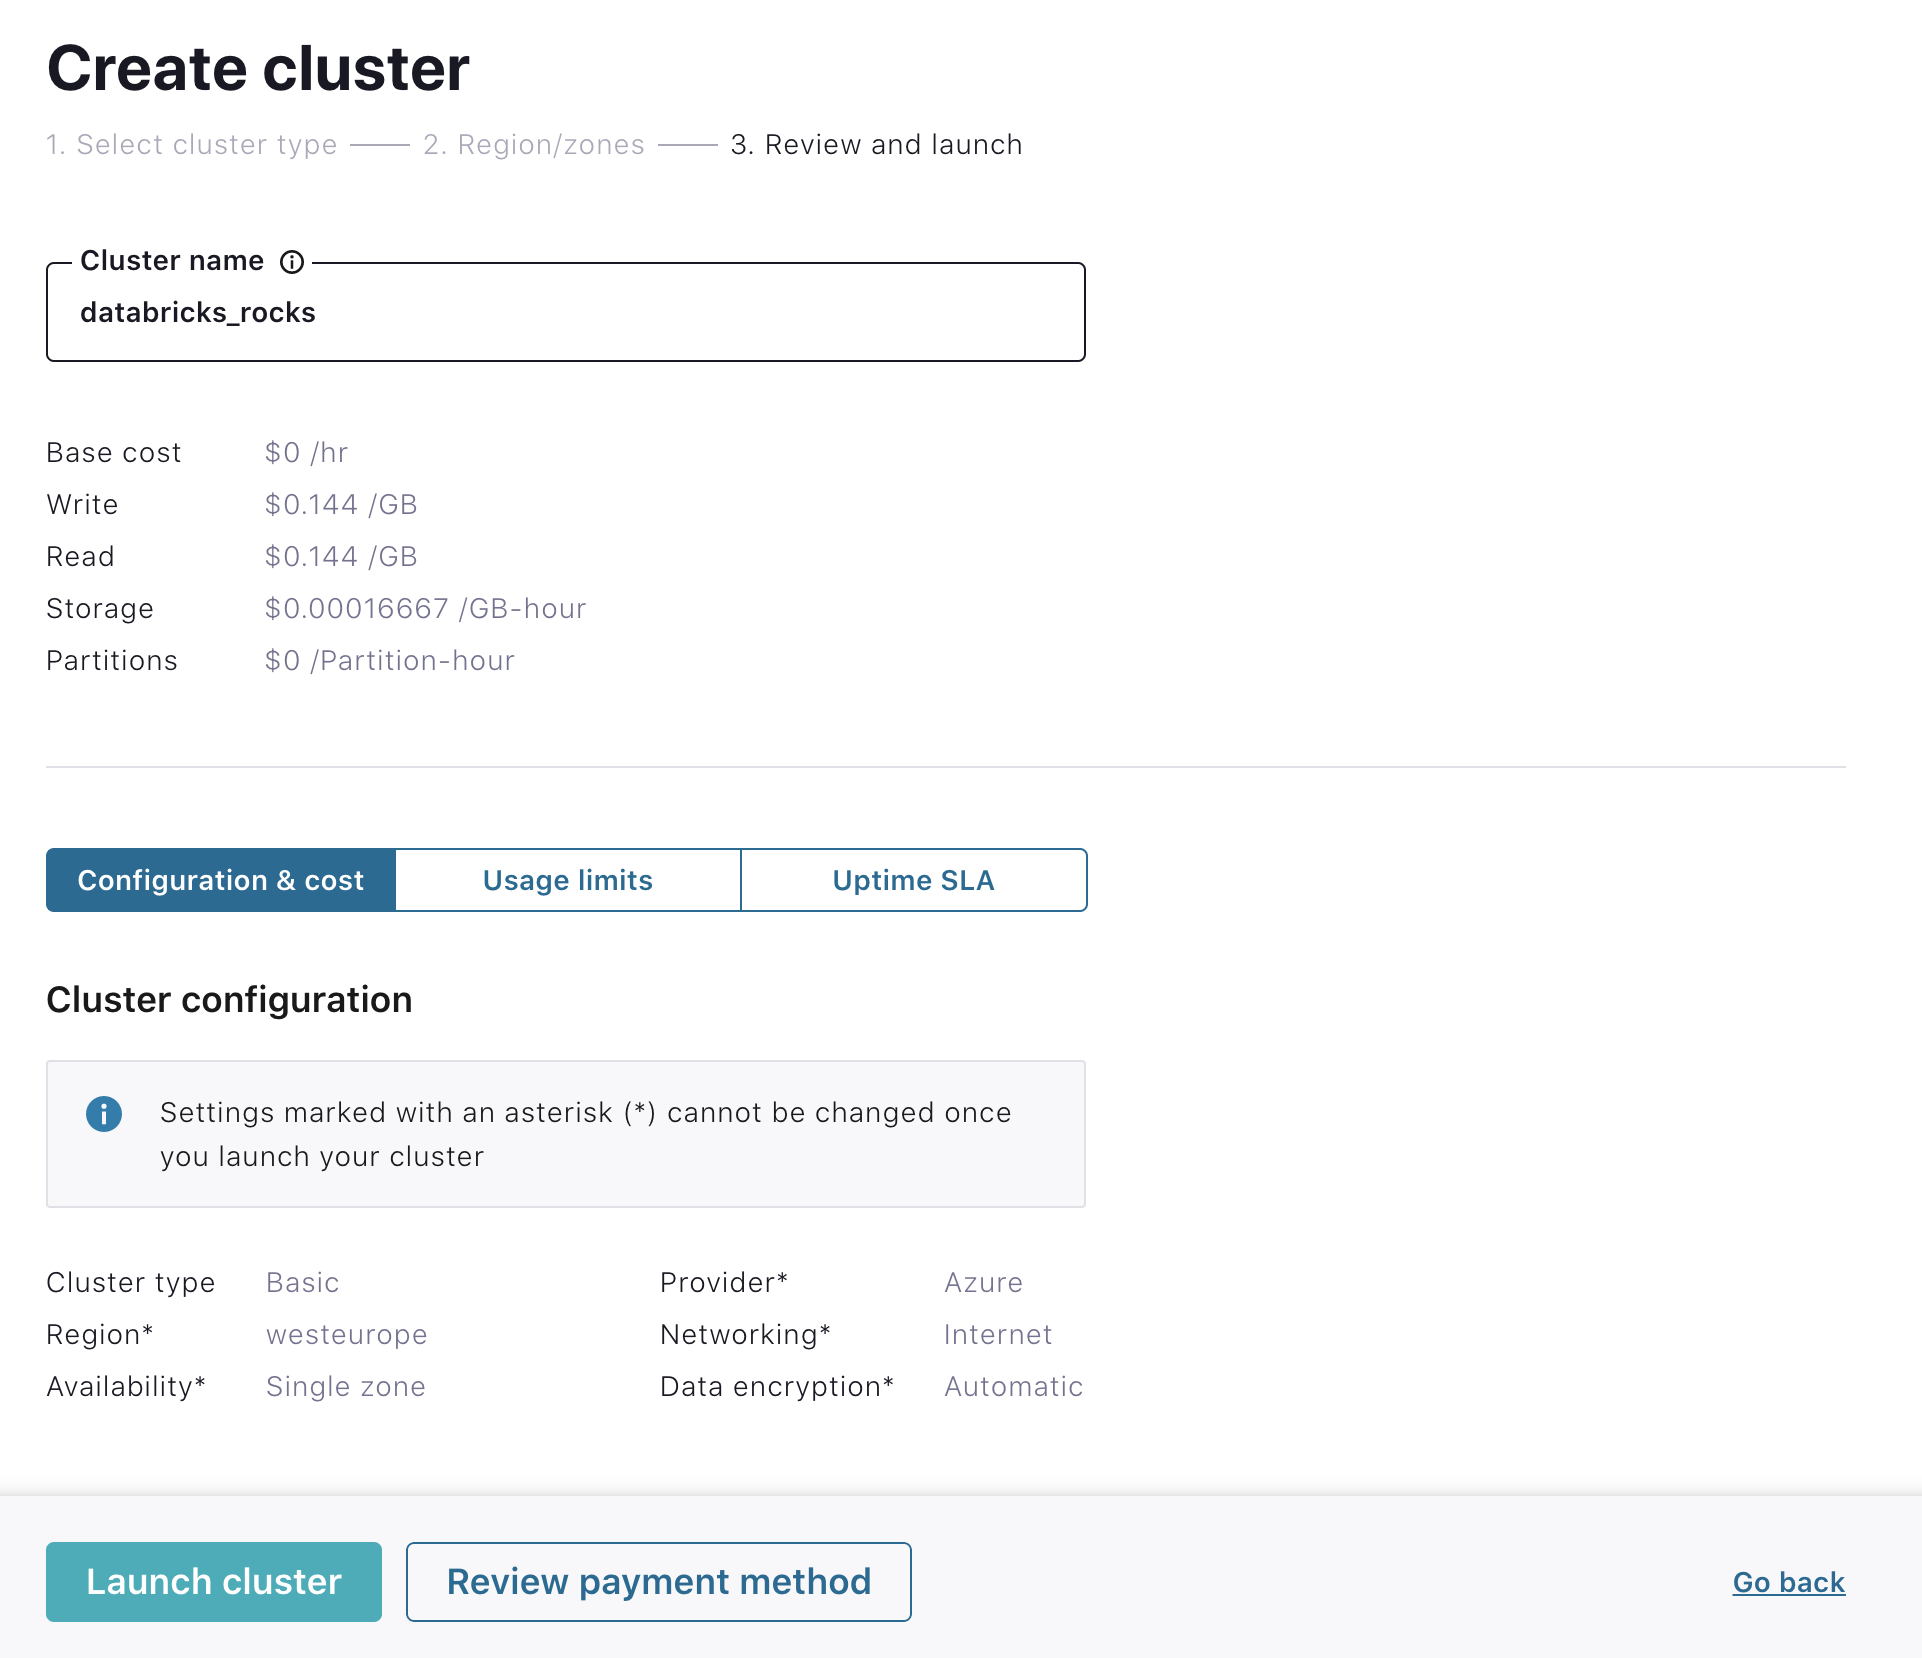
Specify a cluster name and click Launch cluster.
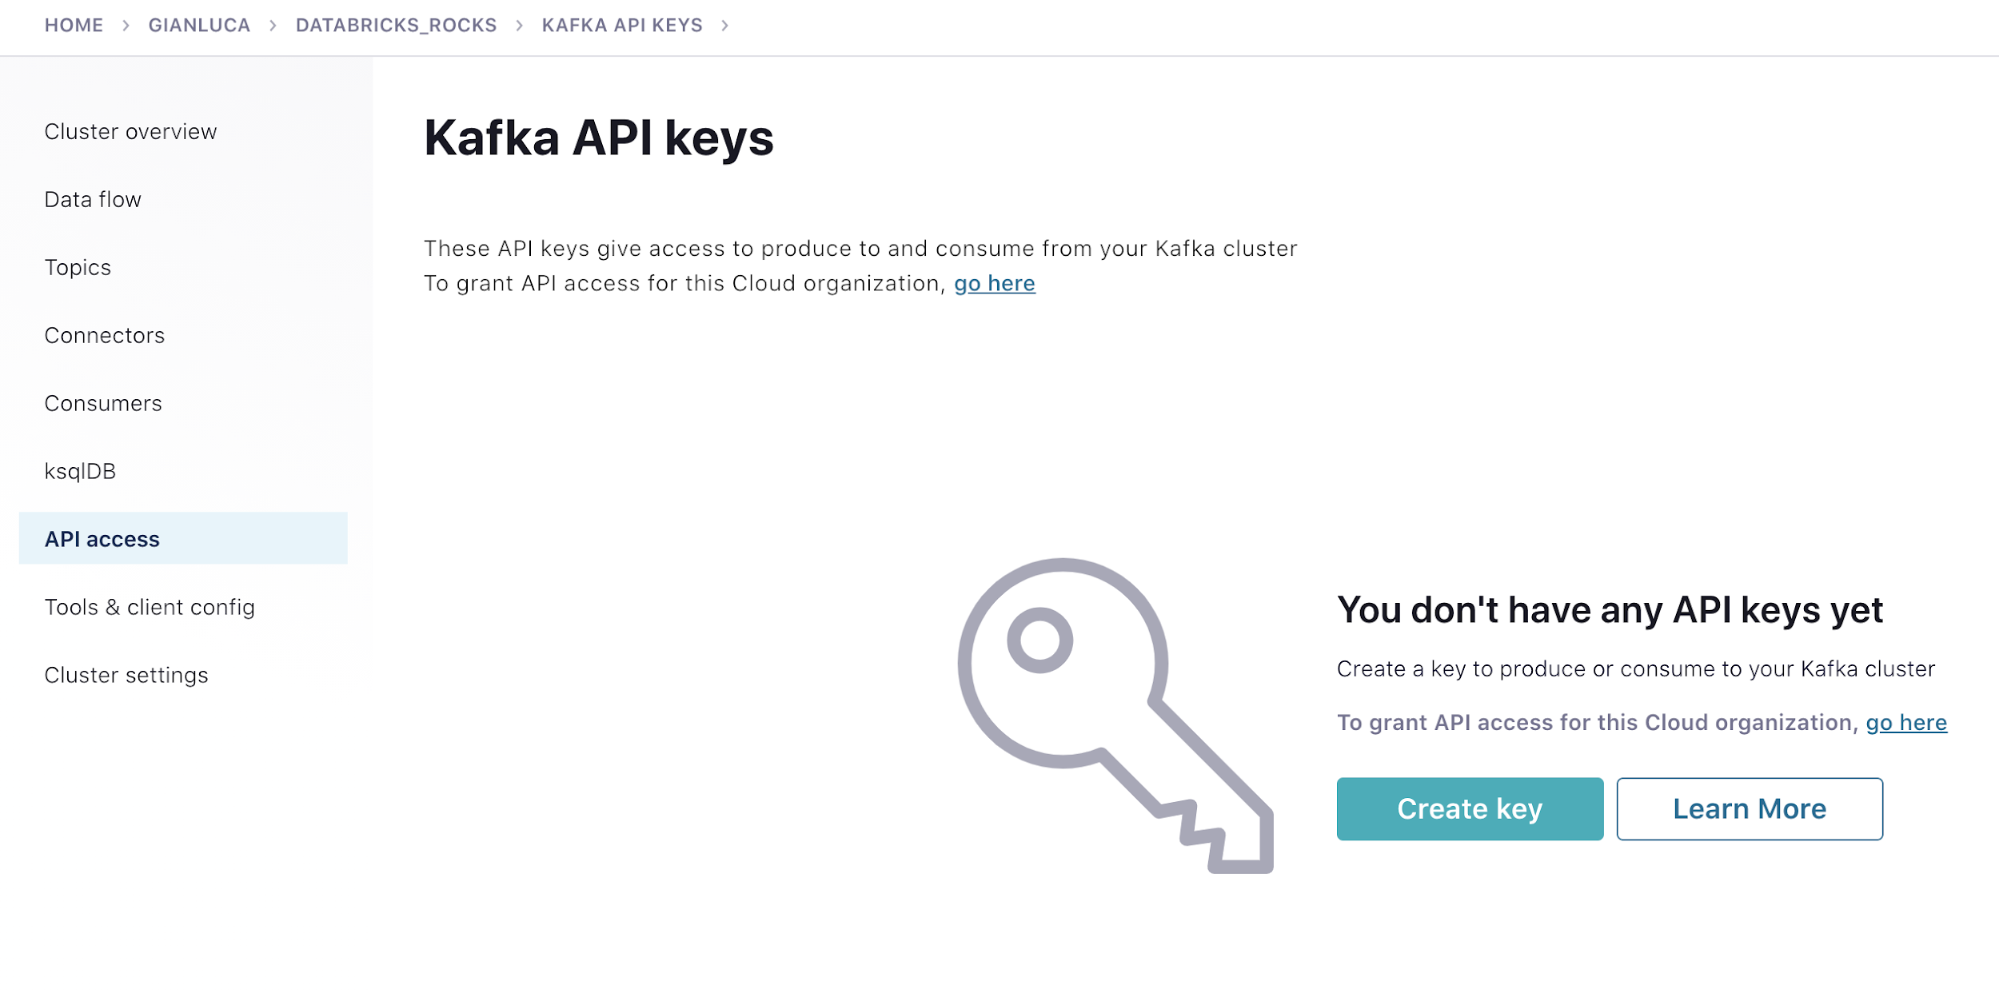
Create API keys for your Kafka cluster
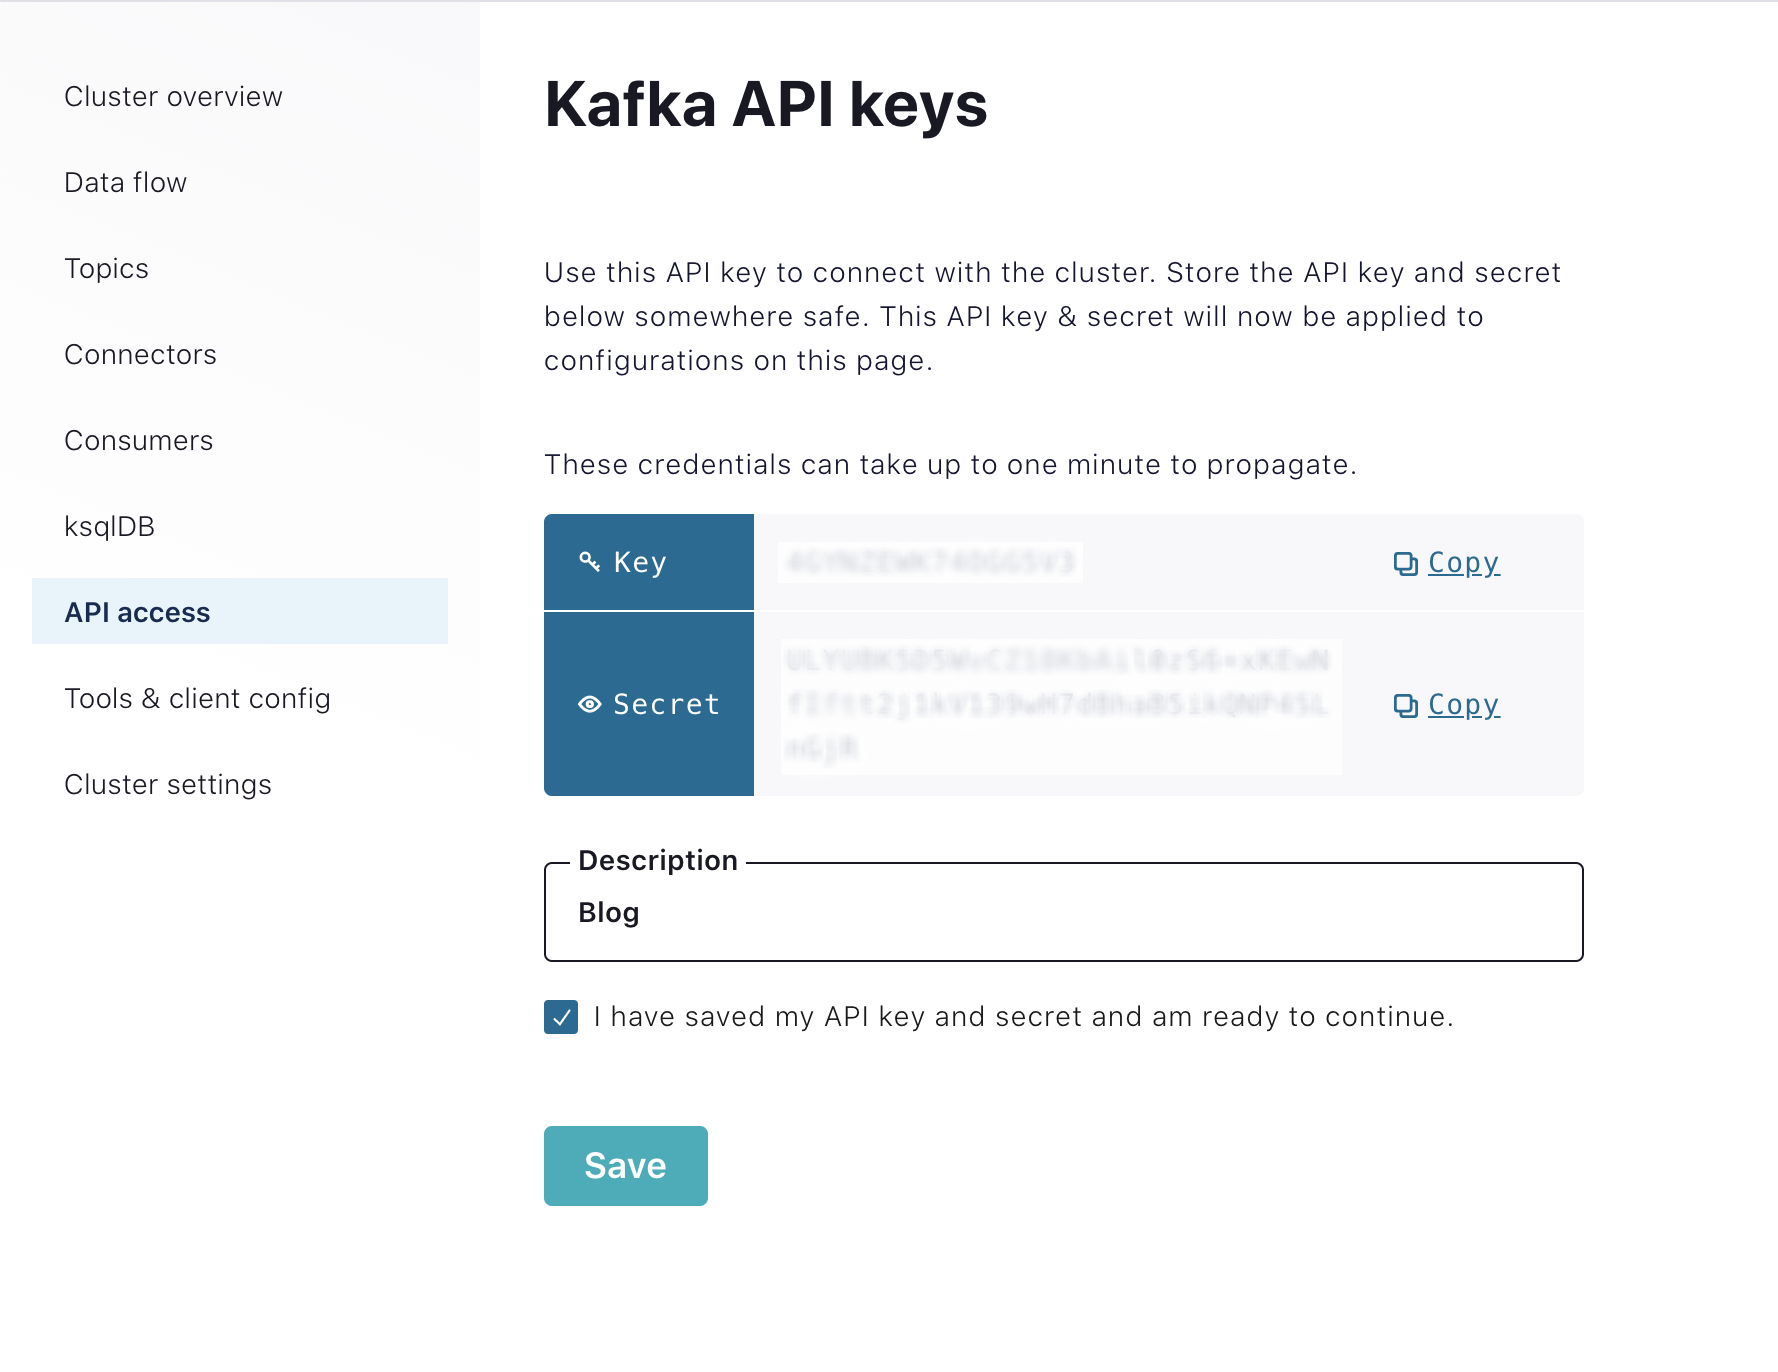
Next, click the API access link on the left menu and click Create key.
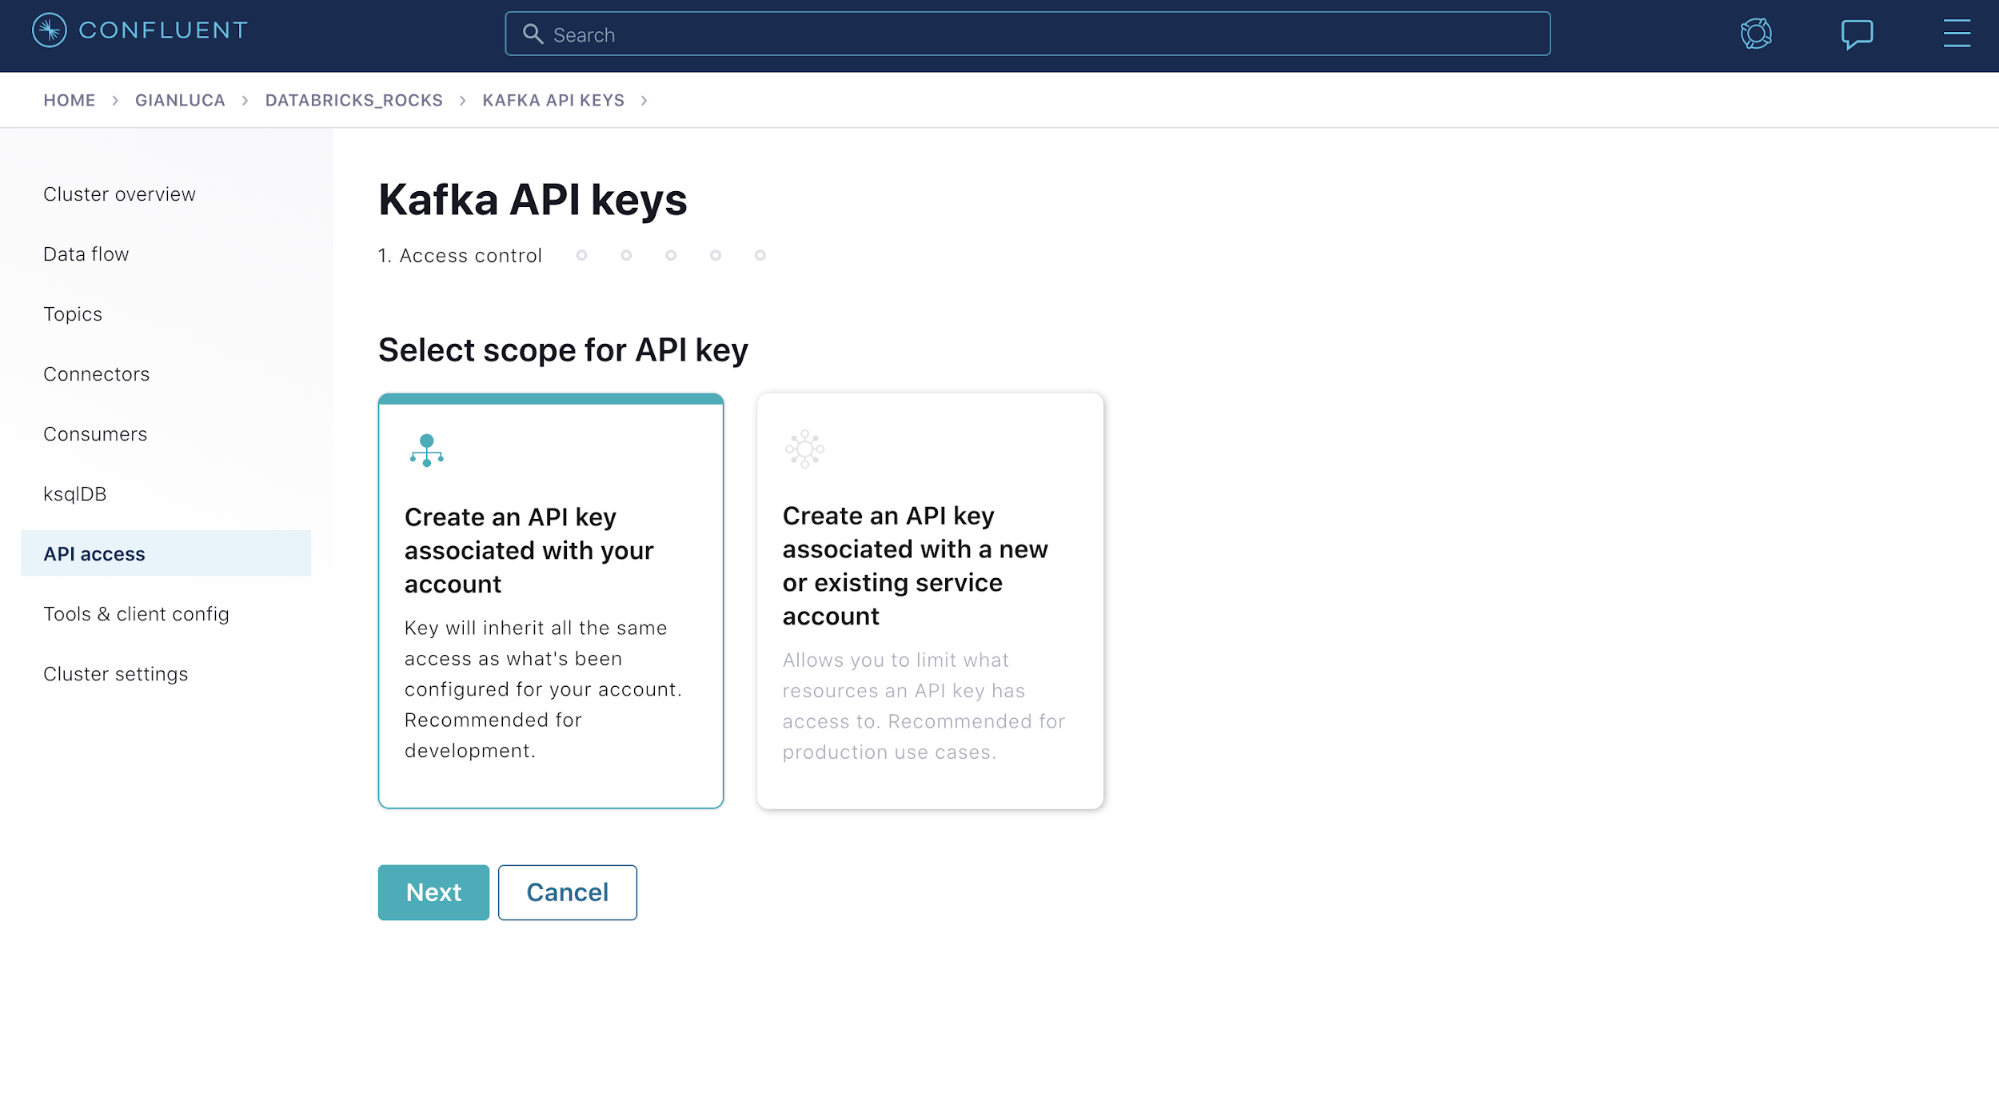
Select Create an API key associated with your account and then select Next.
Copy the key and secret to a local file, and check I have saved my API key and secret and am ready to continue. You will need the key and secret later for the Datagen Source connector as well as in the Azure Databricks code.
Create a topic
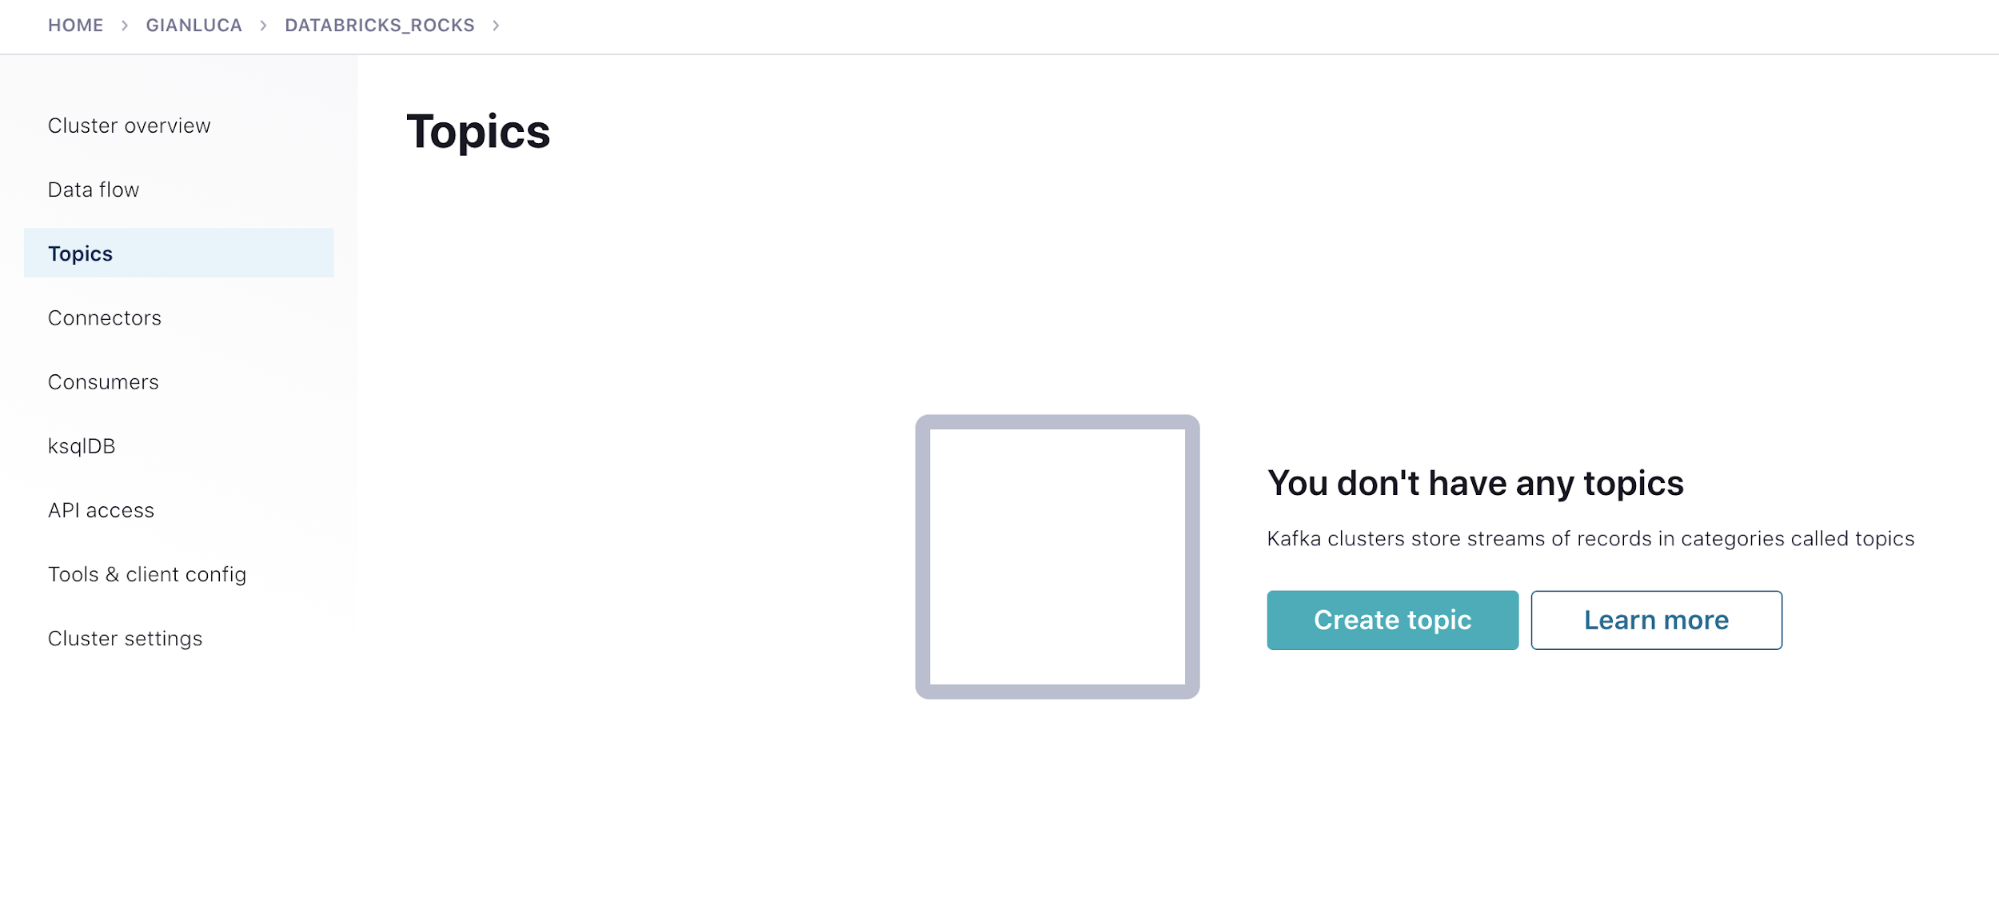
Return to your cluster. Click the Topics link in the left menu and click Create topic.
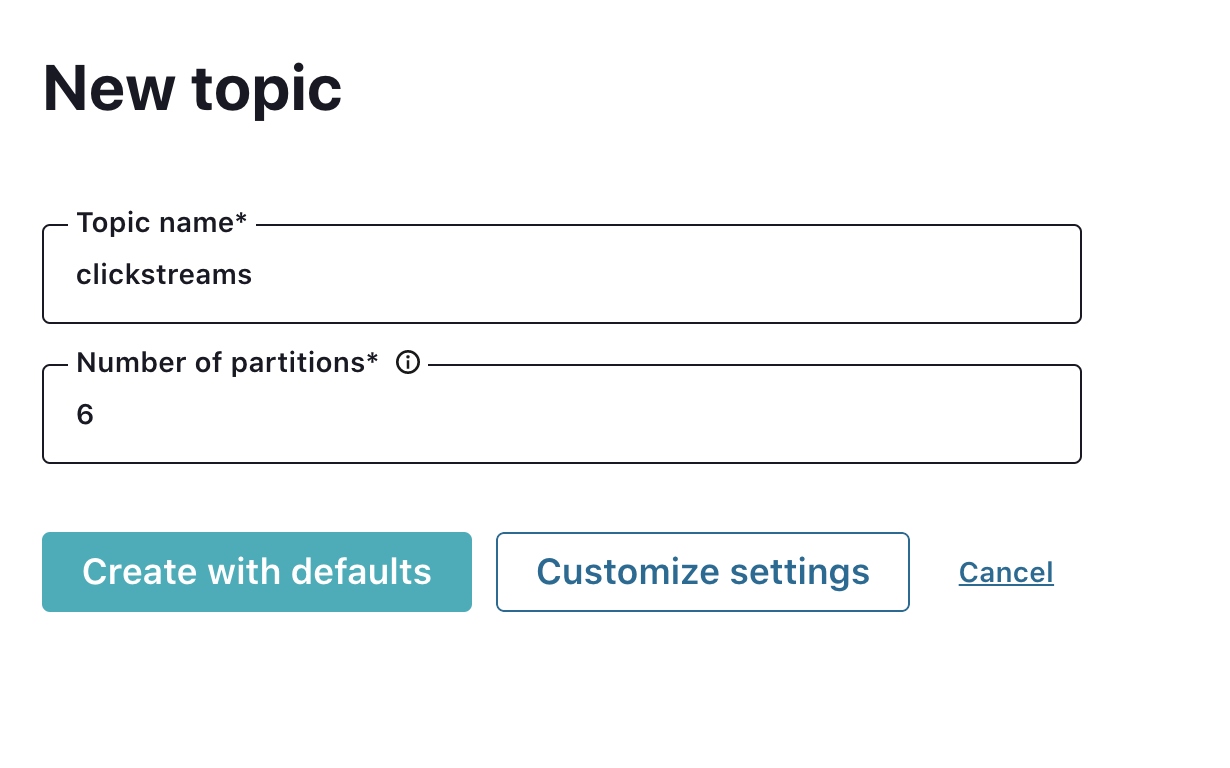
Type “Clickstreams” as the topic name and select Create with defaults.
Step 2: Enable Schema Registry
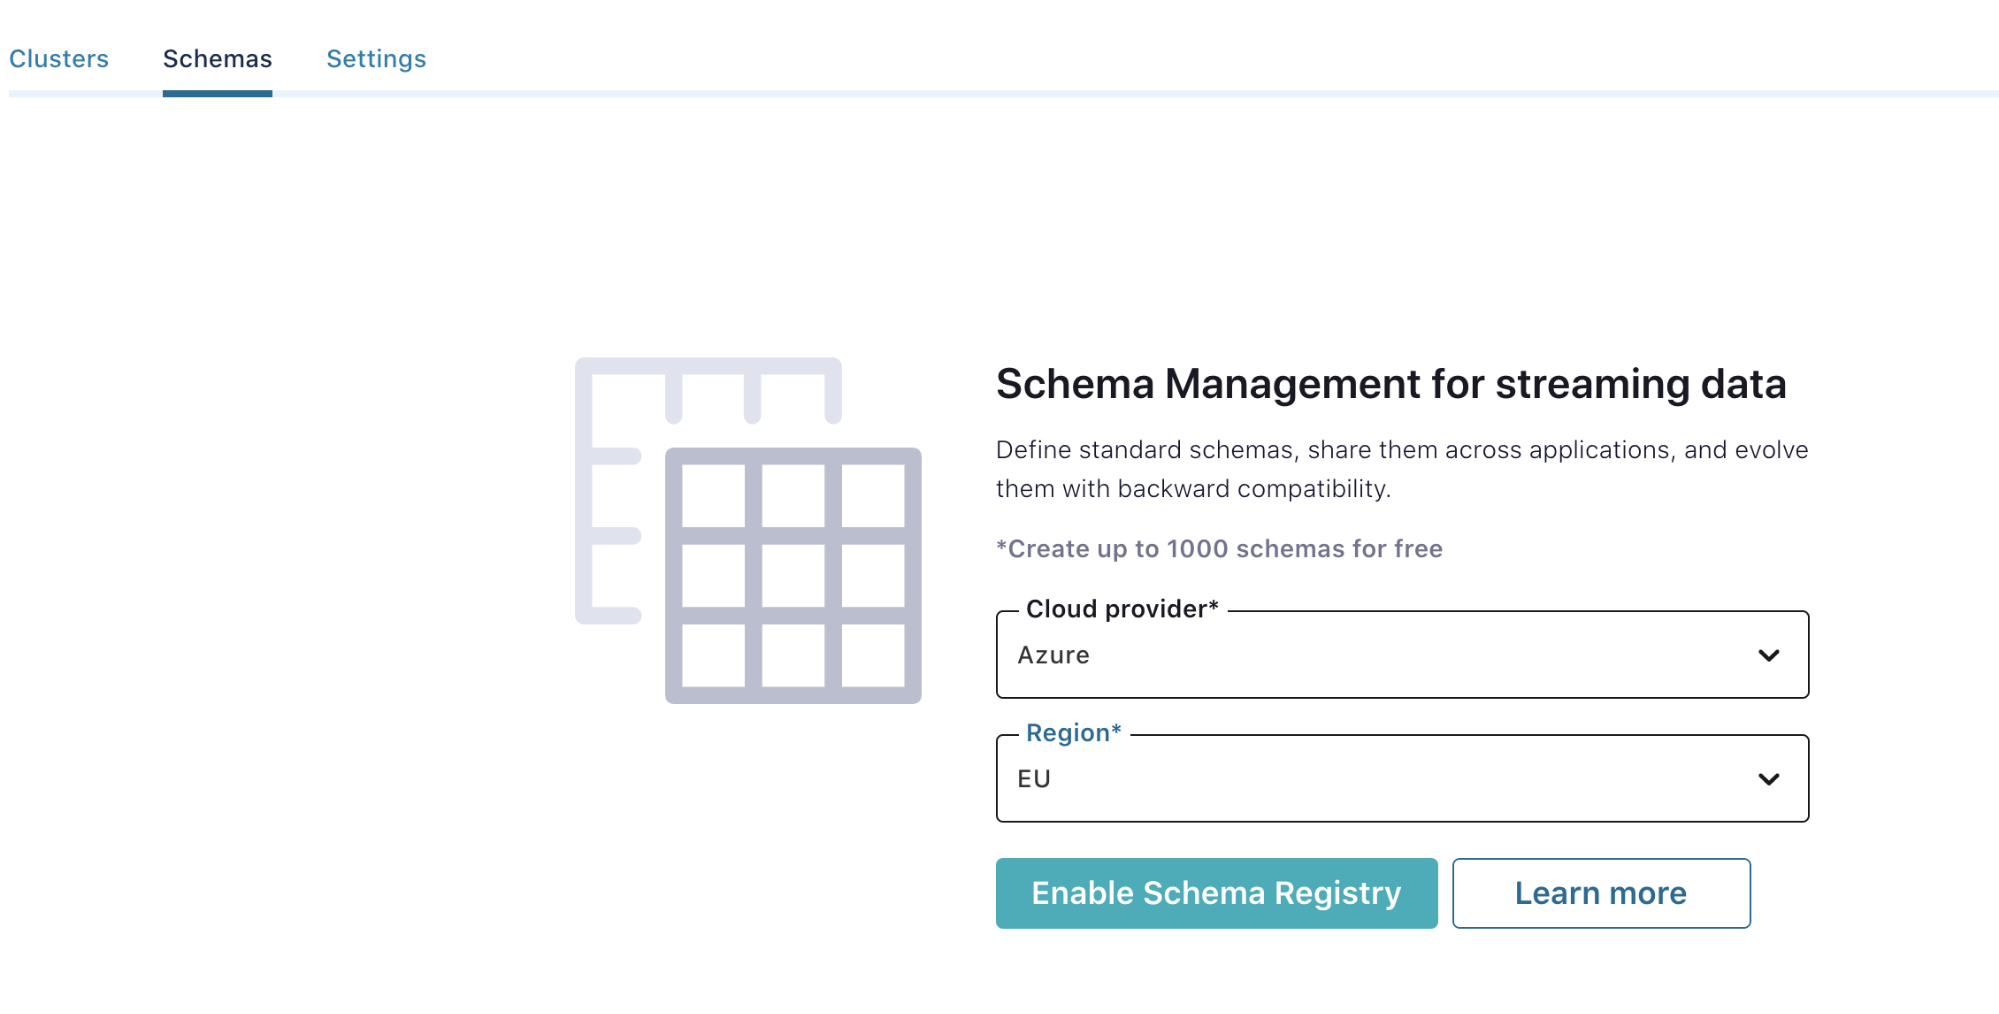
To enable Schema Registry, go back to your environment page. Click the Schemas tab and choose an Azure region. Select Azure, choose a region, and click Enable Schema Registry.
Create Schema Registry API access key
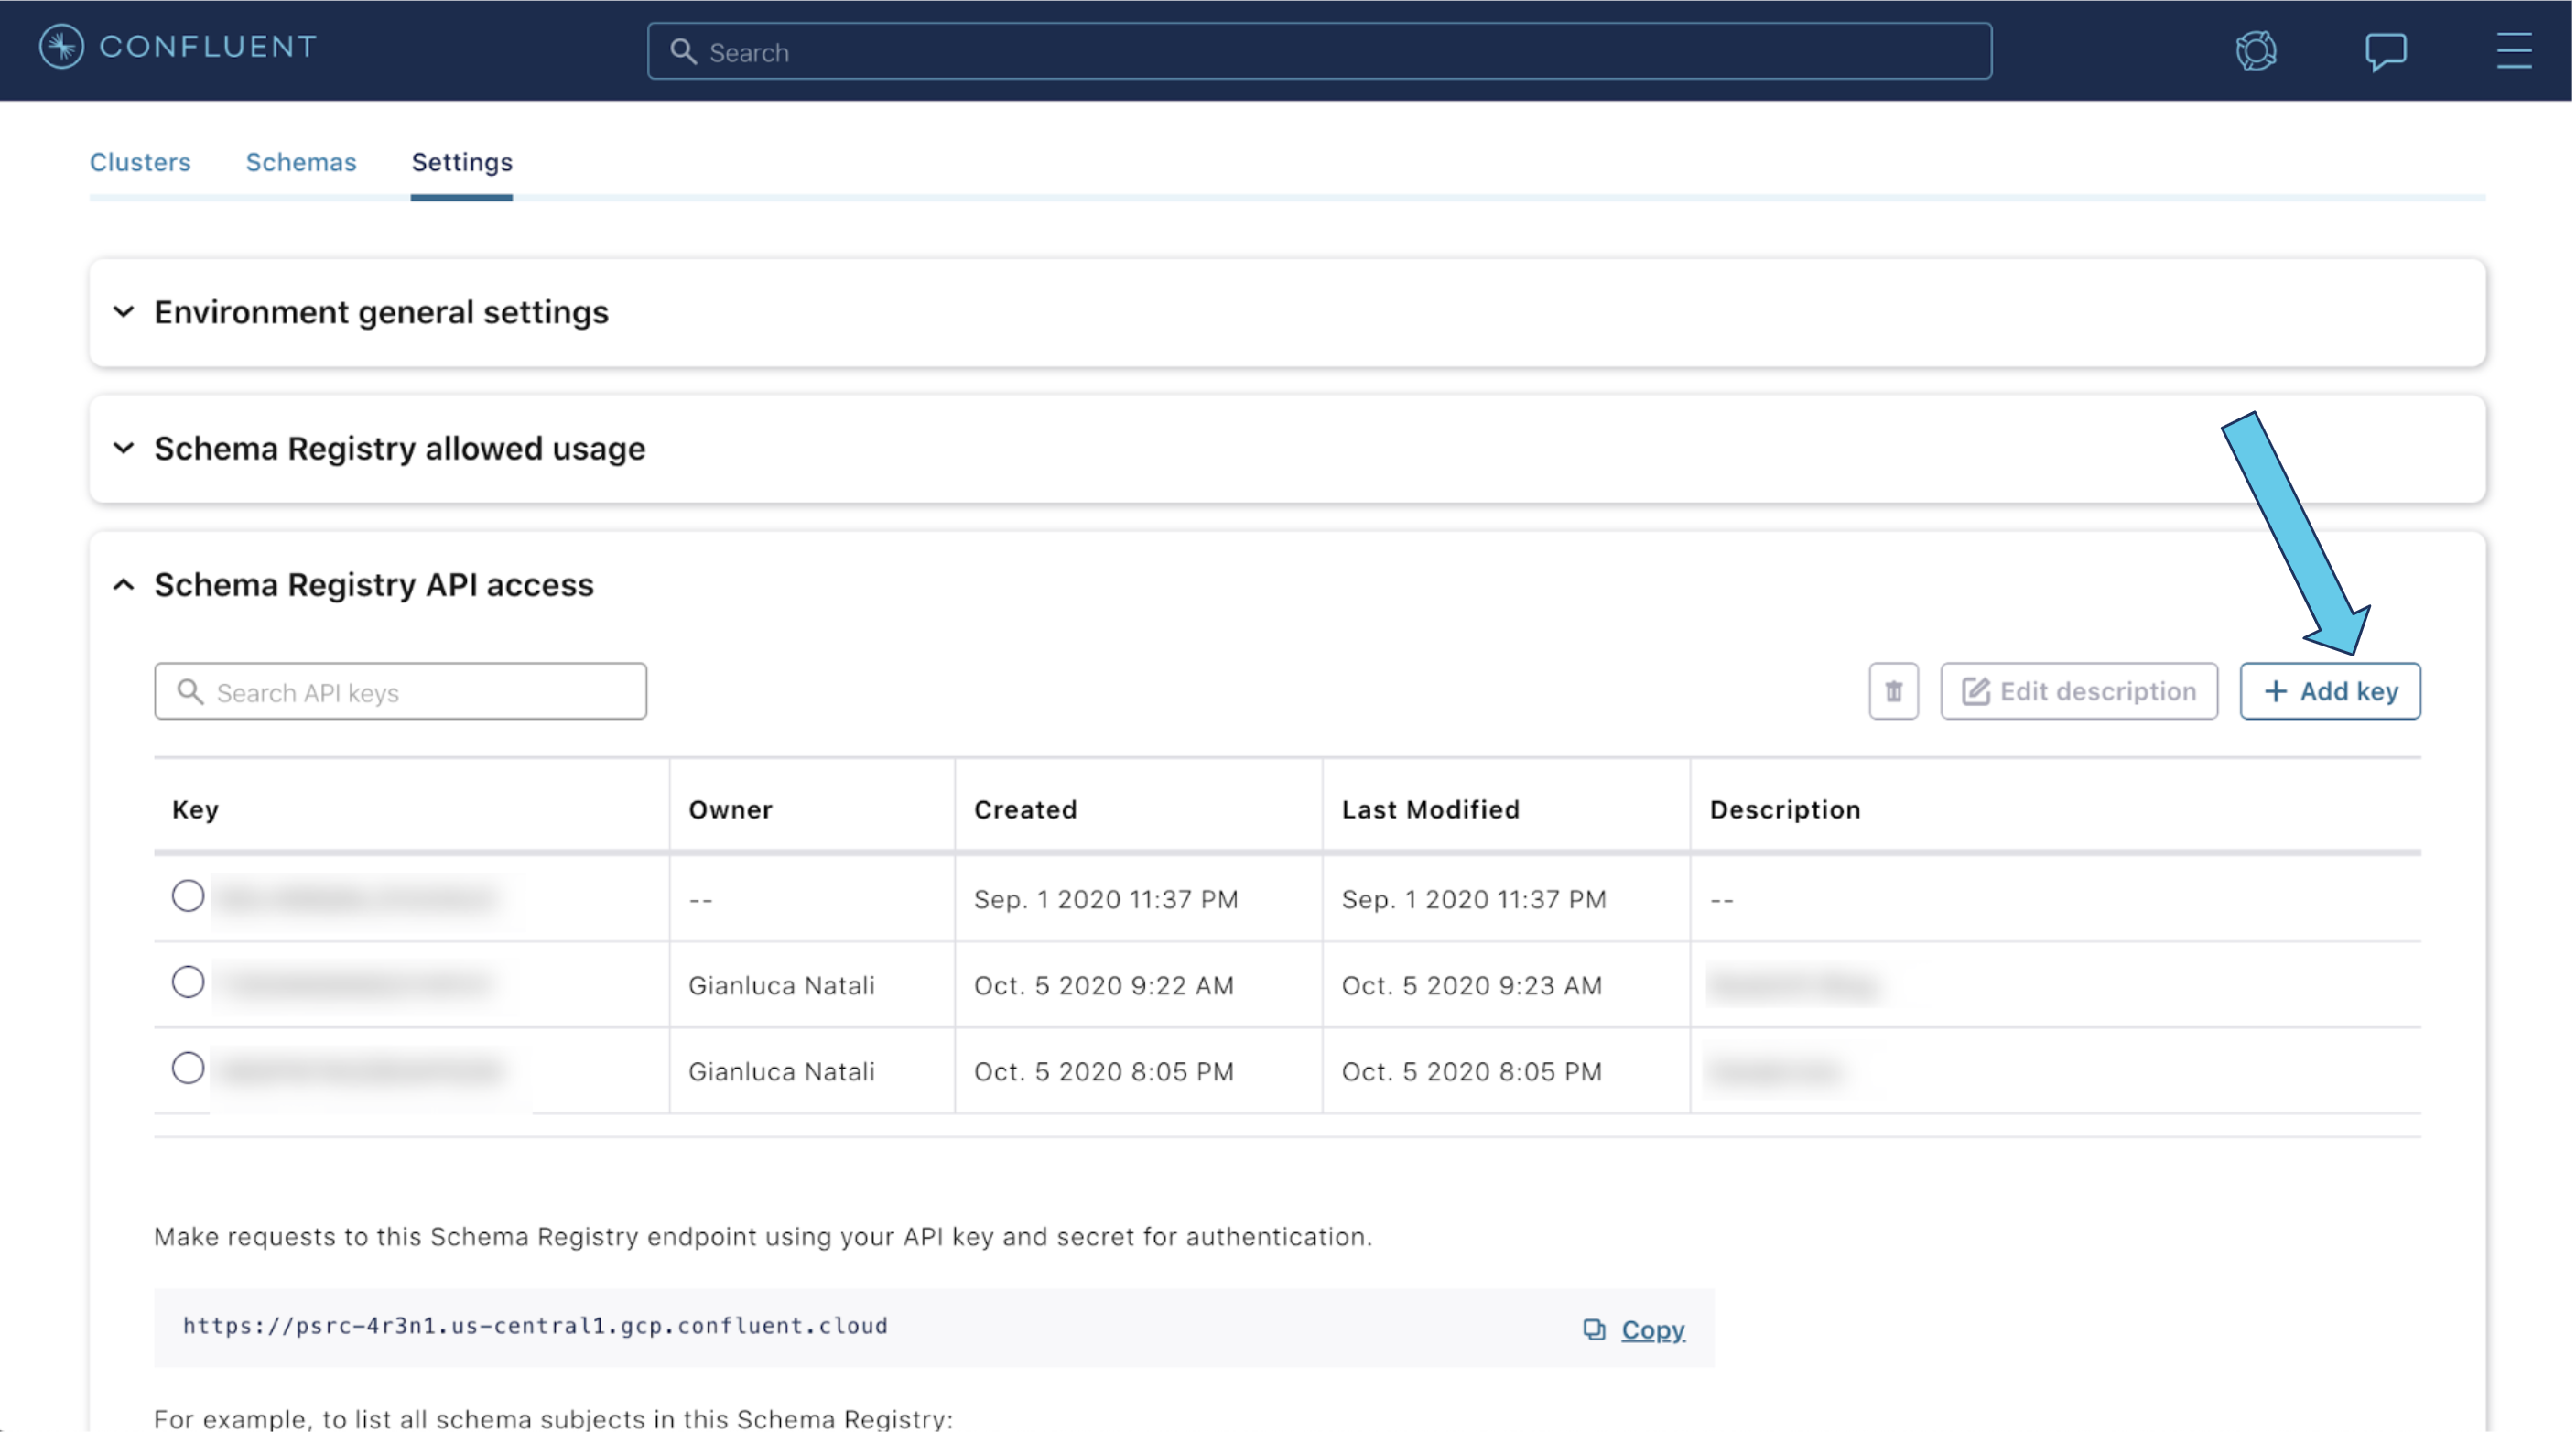
Click on the Settings tab. Open the Schema Registry API access section, and click on the Create key button (or Add Key button if you already have some keys created).
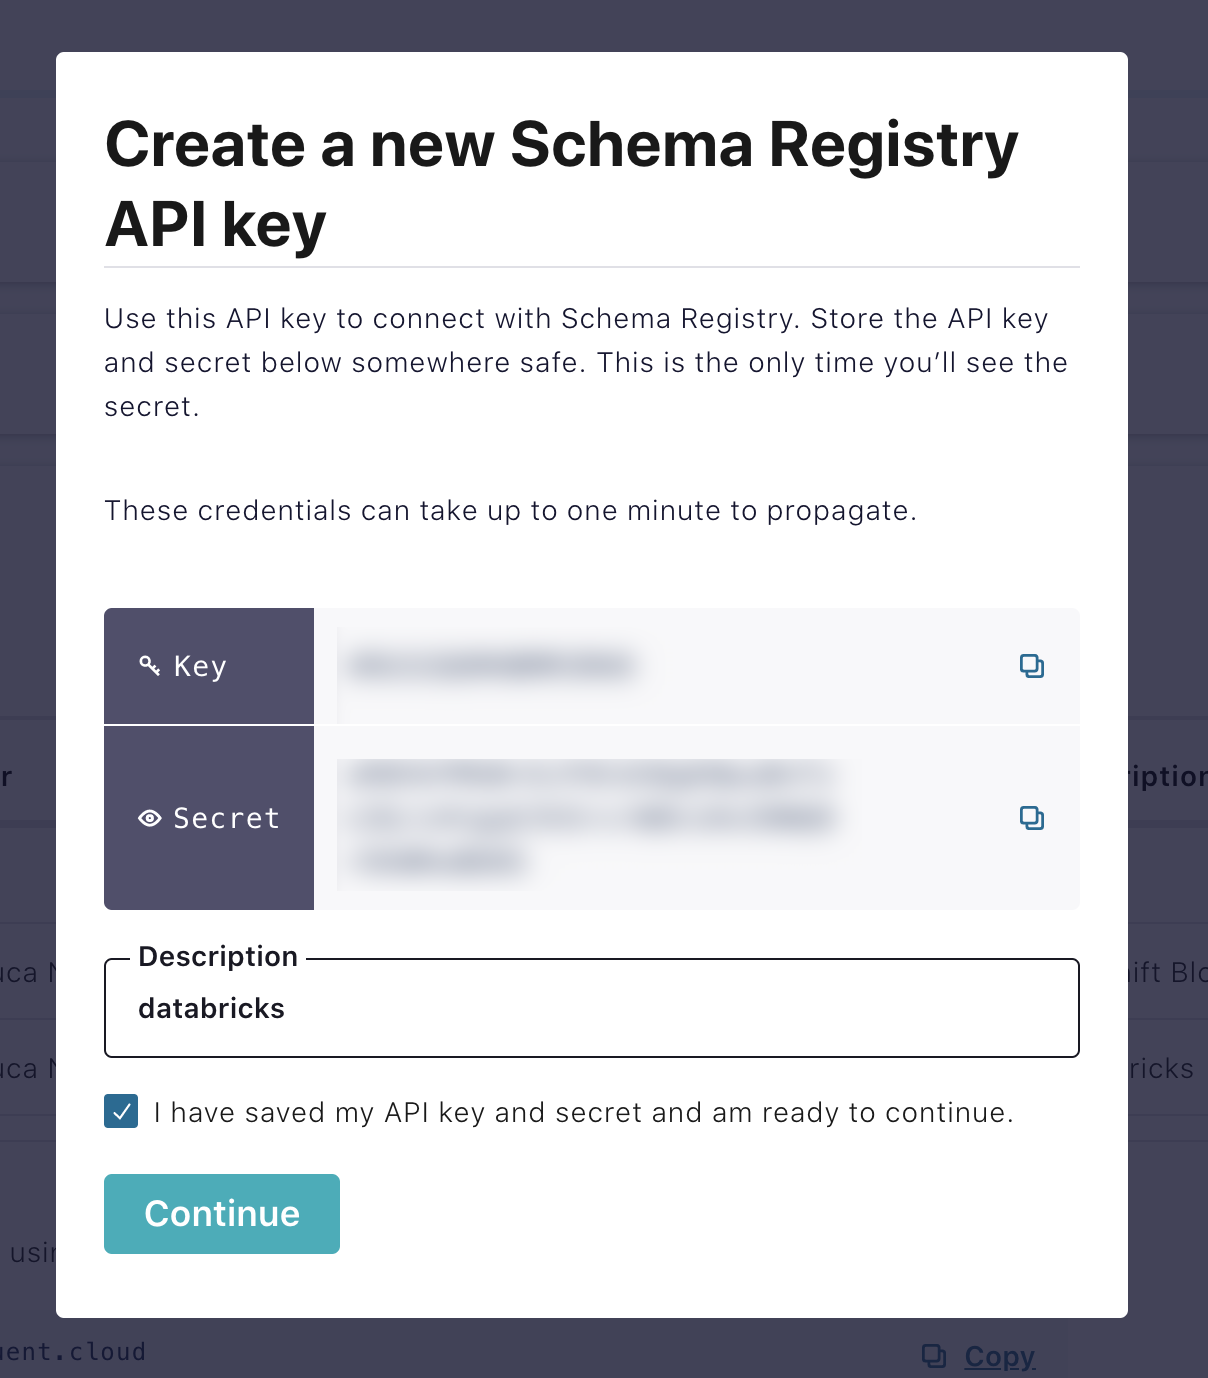
Copy the key and secret, and make sure to write them down. Add a description for the key. Check the I have saved my API keys checkbox. Click Continue.
Step 3: Configure the Confluent Cloud Datagen Source connector
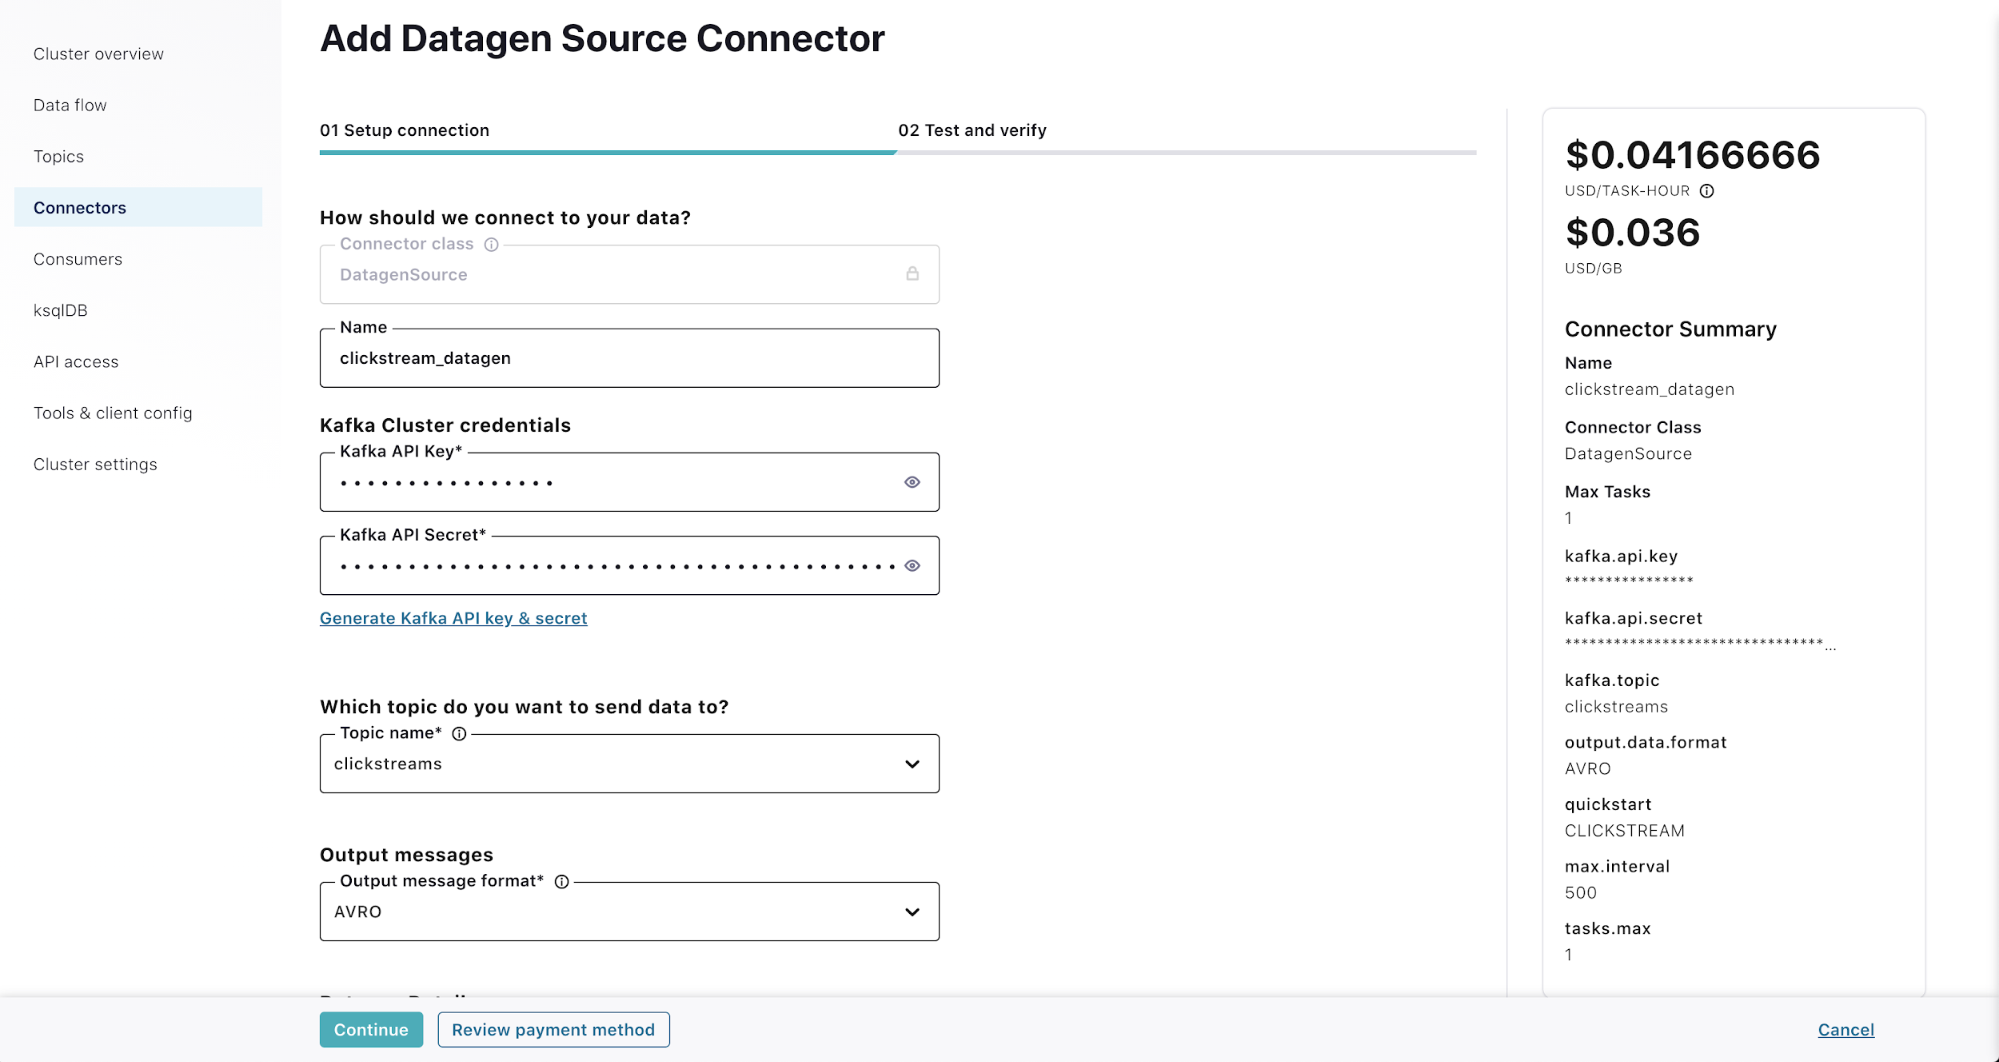
Click on the Connectors link on the left menu. Select the DatagenSource connector (you can also use the search box). Fill in the details as follows:
- Name: clickstream_datagen
- Kafka API key/Kafka API secret: See the Create API keys for Kafka cluster step
- Topic name: Select clickstreams from the list
- Output message format: AVRO
- Datagen details – quick start: CLICKSTREAM
- Max interval between messages: 500
- Tasks: 1
Hit Continue.
On the “Test and verify” page, you are presented with the JSON configuration of the connector.
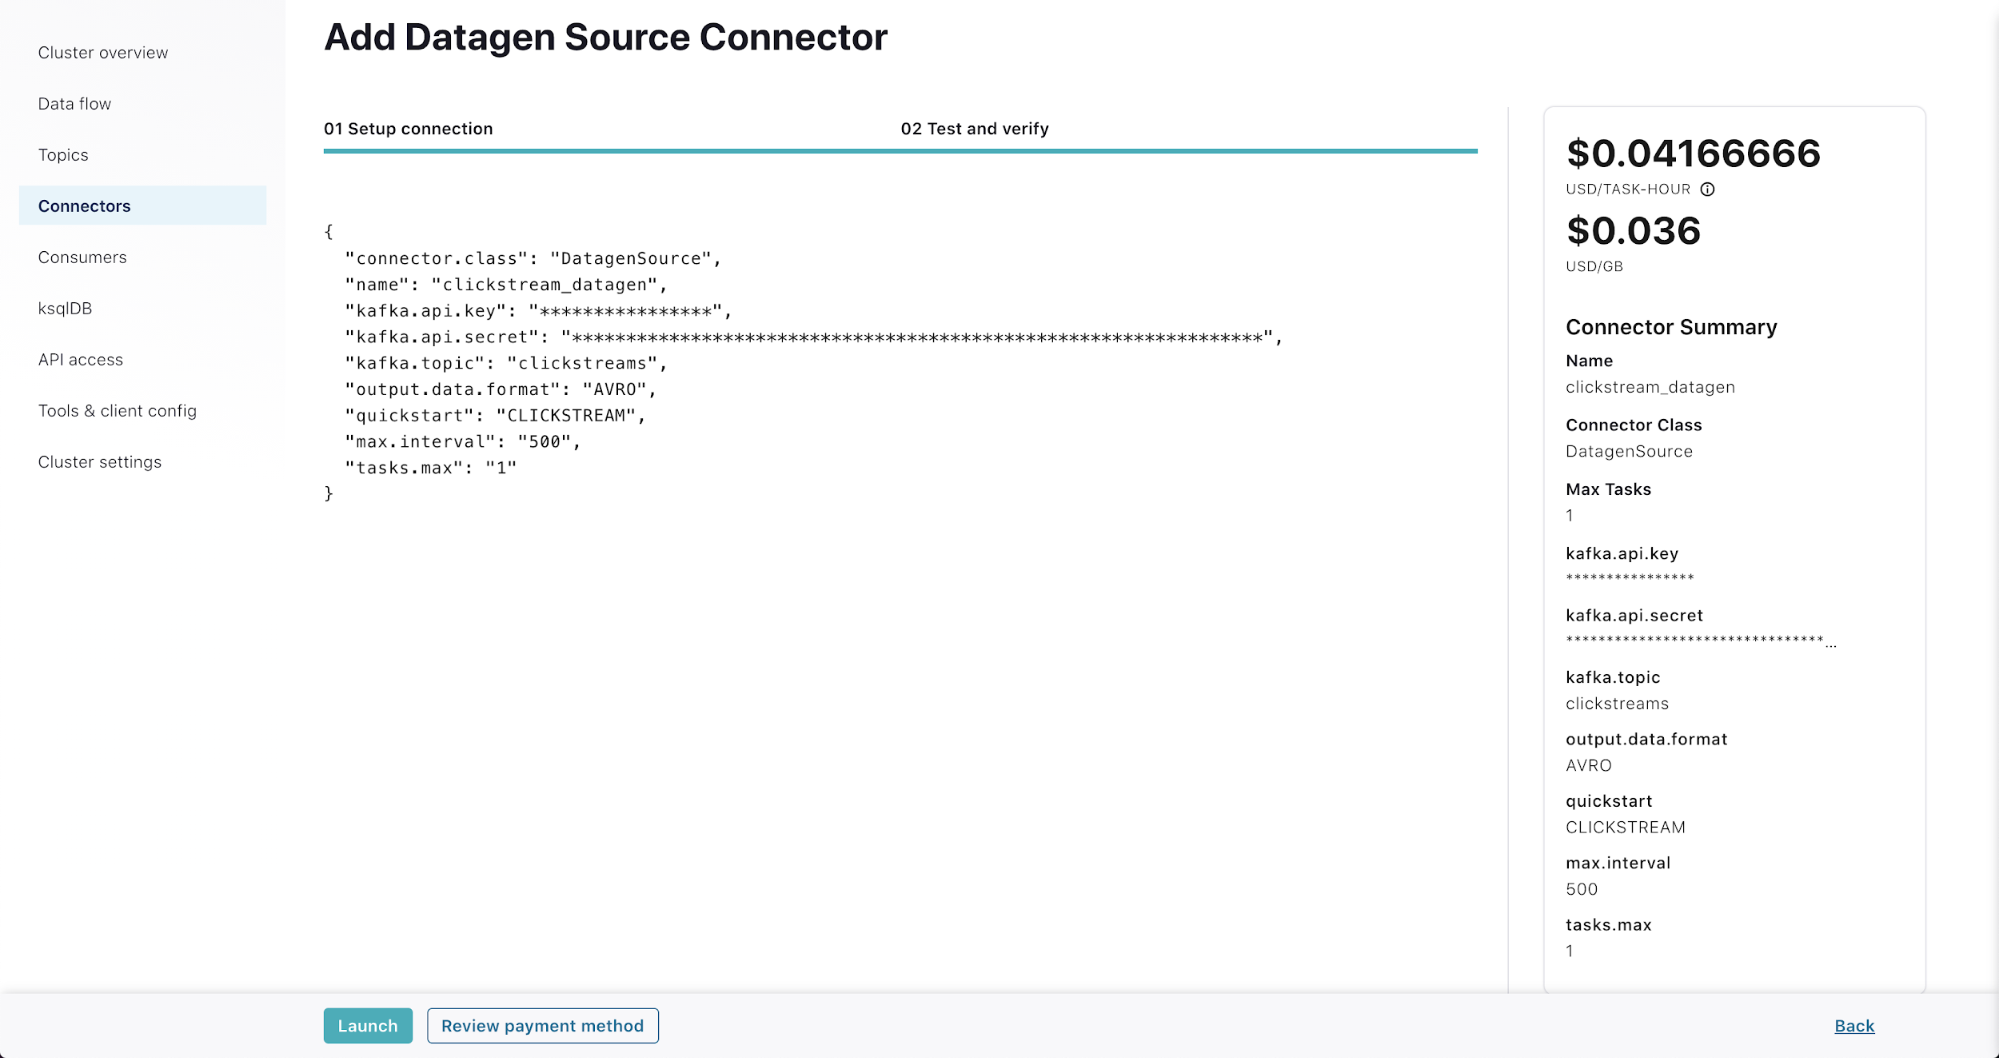
Hit Launch. You can now inspect the messages flowing in. Click the Topics link in the left menu. Select the clickstreams topic. Click on the Messages tab. (As the Datagen connector is provisioned, it may take a few minutes before you start seeing messages.)
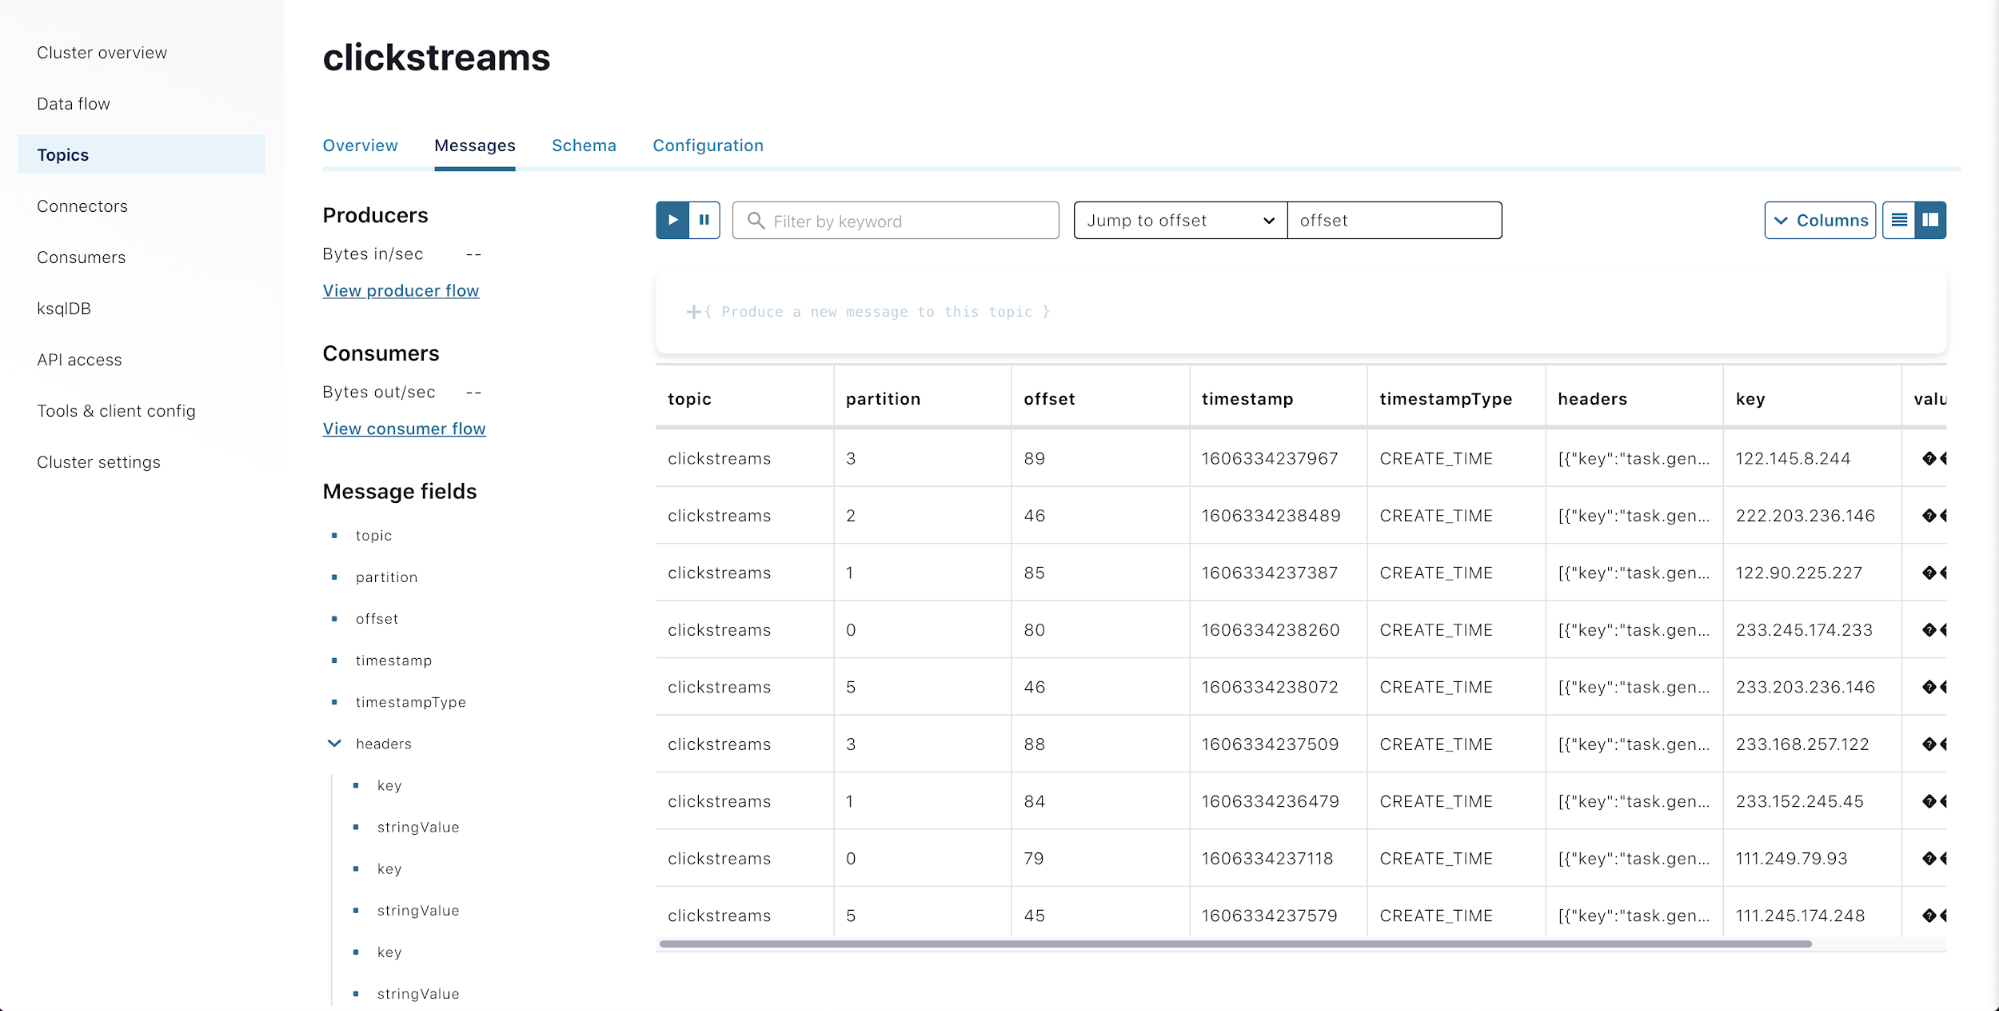
Now that your topic is receiving data, you can move to Azure Databricks to see how to leverage it!
Process the Data with Azure Databricks
Step 4: Prepare the Azure Databricks environment
Spin up an Azure Databricks instance
If you do not already have an Azure Databricks environment, you will need to spin one up:
- Log in to the Azure Portal and search for “Azure Databricks”
- When the page comes up, click the +Add button
- Choose the subscription that you want the instance to be in (if it isn’t already filled in)
- Choose the Resource Group that you want the instance to be in, or click Create new and give it a name
- Enter a name for the Azure Databricks workspace
- Select the region that you want the workspace to be created in
- Select your pricing tier—you can select Trial to get 14 days of free Azure Databricks units
- On the networking page, you can choose whether or not to deploy in your own VNet (deploying in your own VNet is recommended for instances that you intend to use long term; however, if you are spinning it up just to follow this blog example. Keep the default “No” selected and Azure Databricks will spin up a VNet)
- Enter in any required tags
- Click Review + create; if everything comes back as valid, then click the Create button to spin up the workspace
When the Azure Databricks instance finishes deploying, you can navigate to it in the Azure Portal and click Launch Workspace. Alternatively, if you already have the URL for an Azure Databricks workspace, you can go to the URL directly in your browser.
Spin up and configure an Azure Databricks cluster
Once you’re logged in to the Azure Databricks workspace, you will need a running cluster. If you do not already have a cluster that you would like to use for this example, you can spin one up by following these steps:
- Click the Clusters icon in the left sidebar
- Click +Create Cluster
- Give the cluster a name
- Keep all the rest of the defaults and click Create Cluster
Once the cluster is spun up, you will need to add an additional library to it. This example is for Python, but if you need this functionality in Scala, there is also an example Scala notebook that details which libraries are needed, you can find both in the downloadable notebooks section.
- Click on the name of the cluster that you want to use
- Click on Libraries
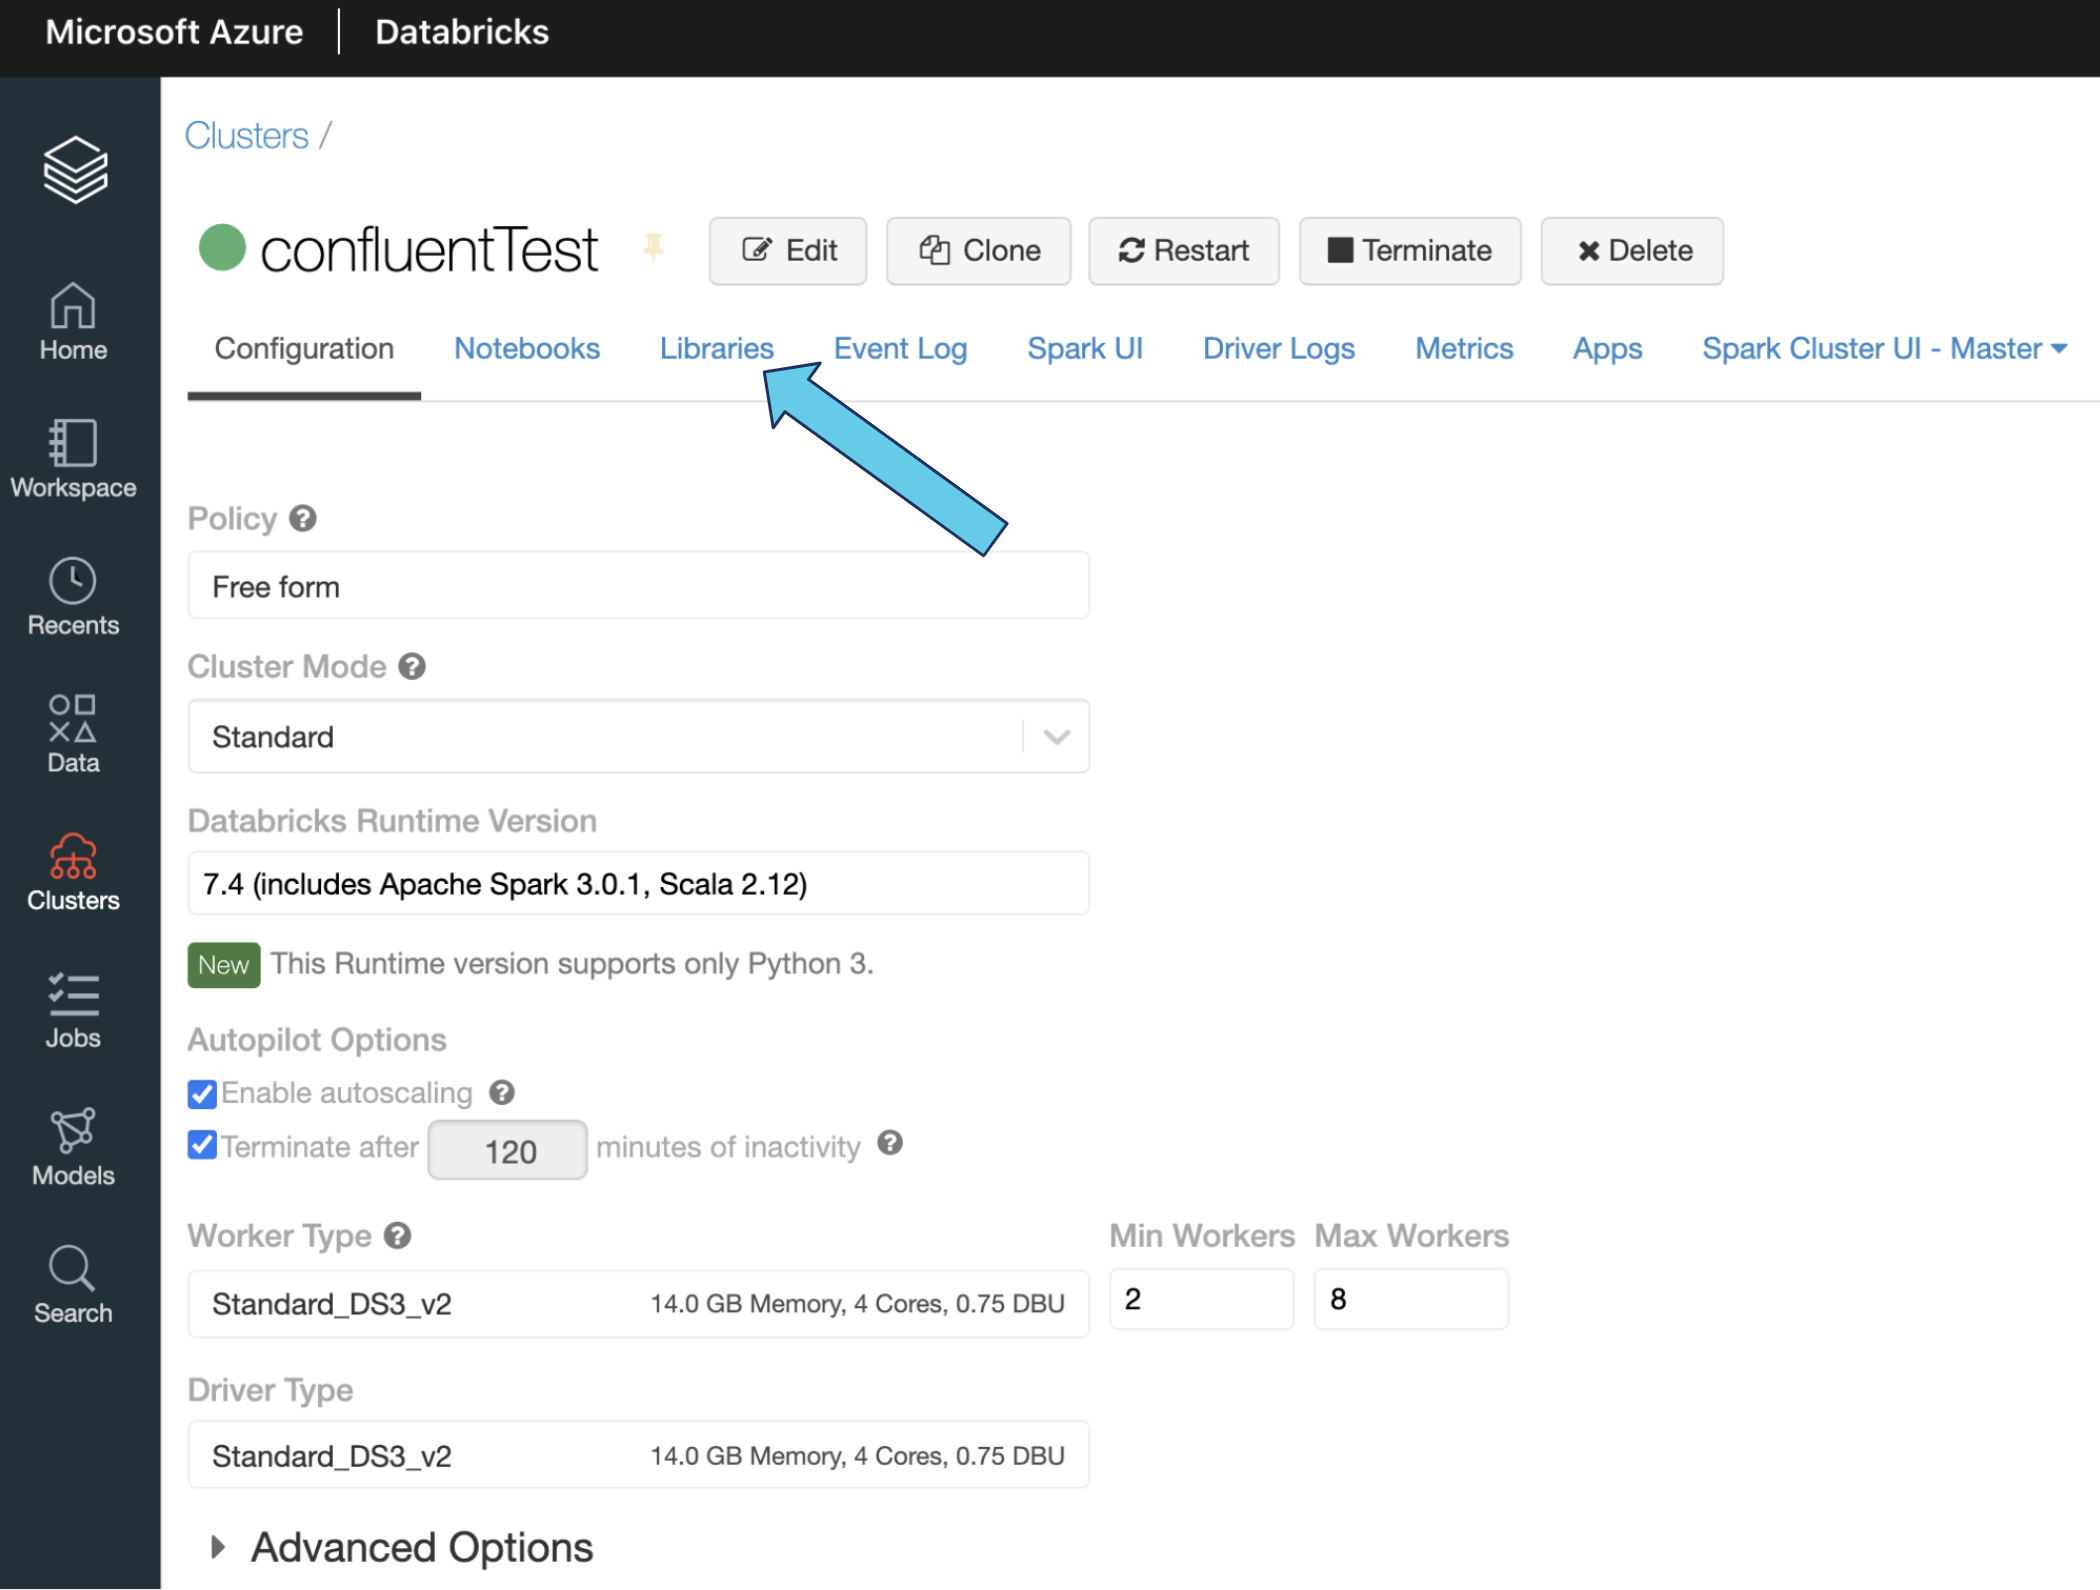
- Click Install New, and a new window will come up
- Select PyPi
- Type this string into the package field: confluent-kafka[avro,json,protobuf]>=1.4.2
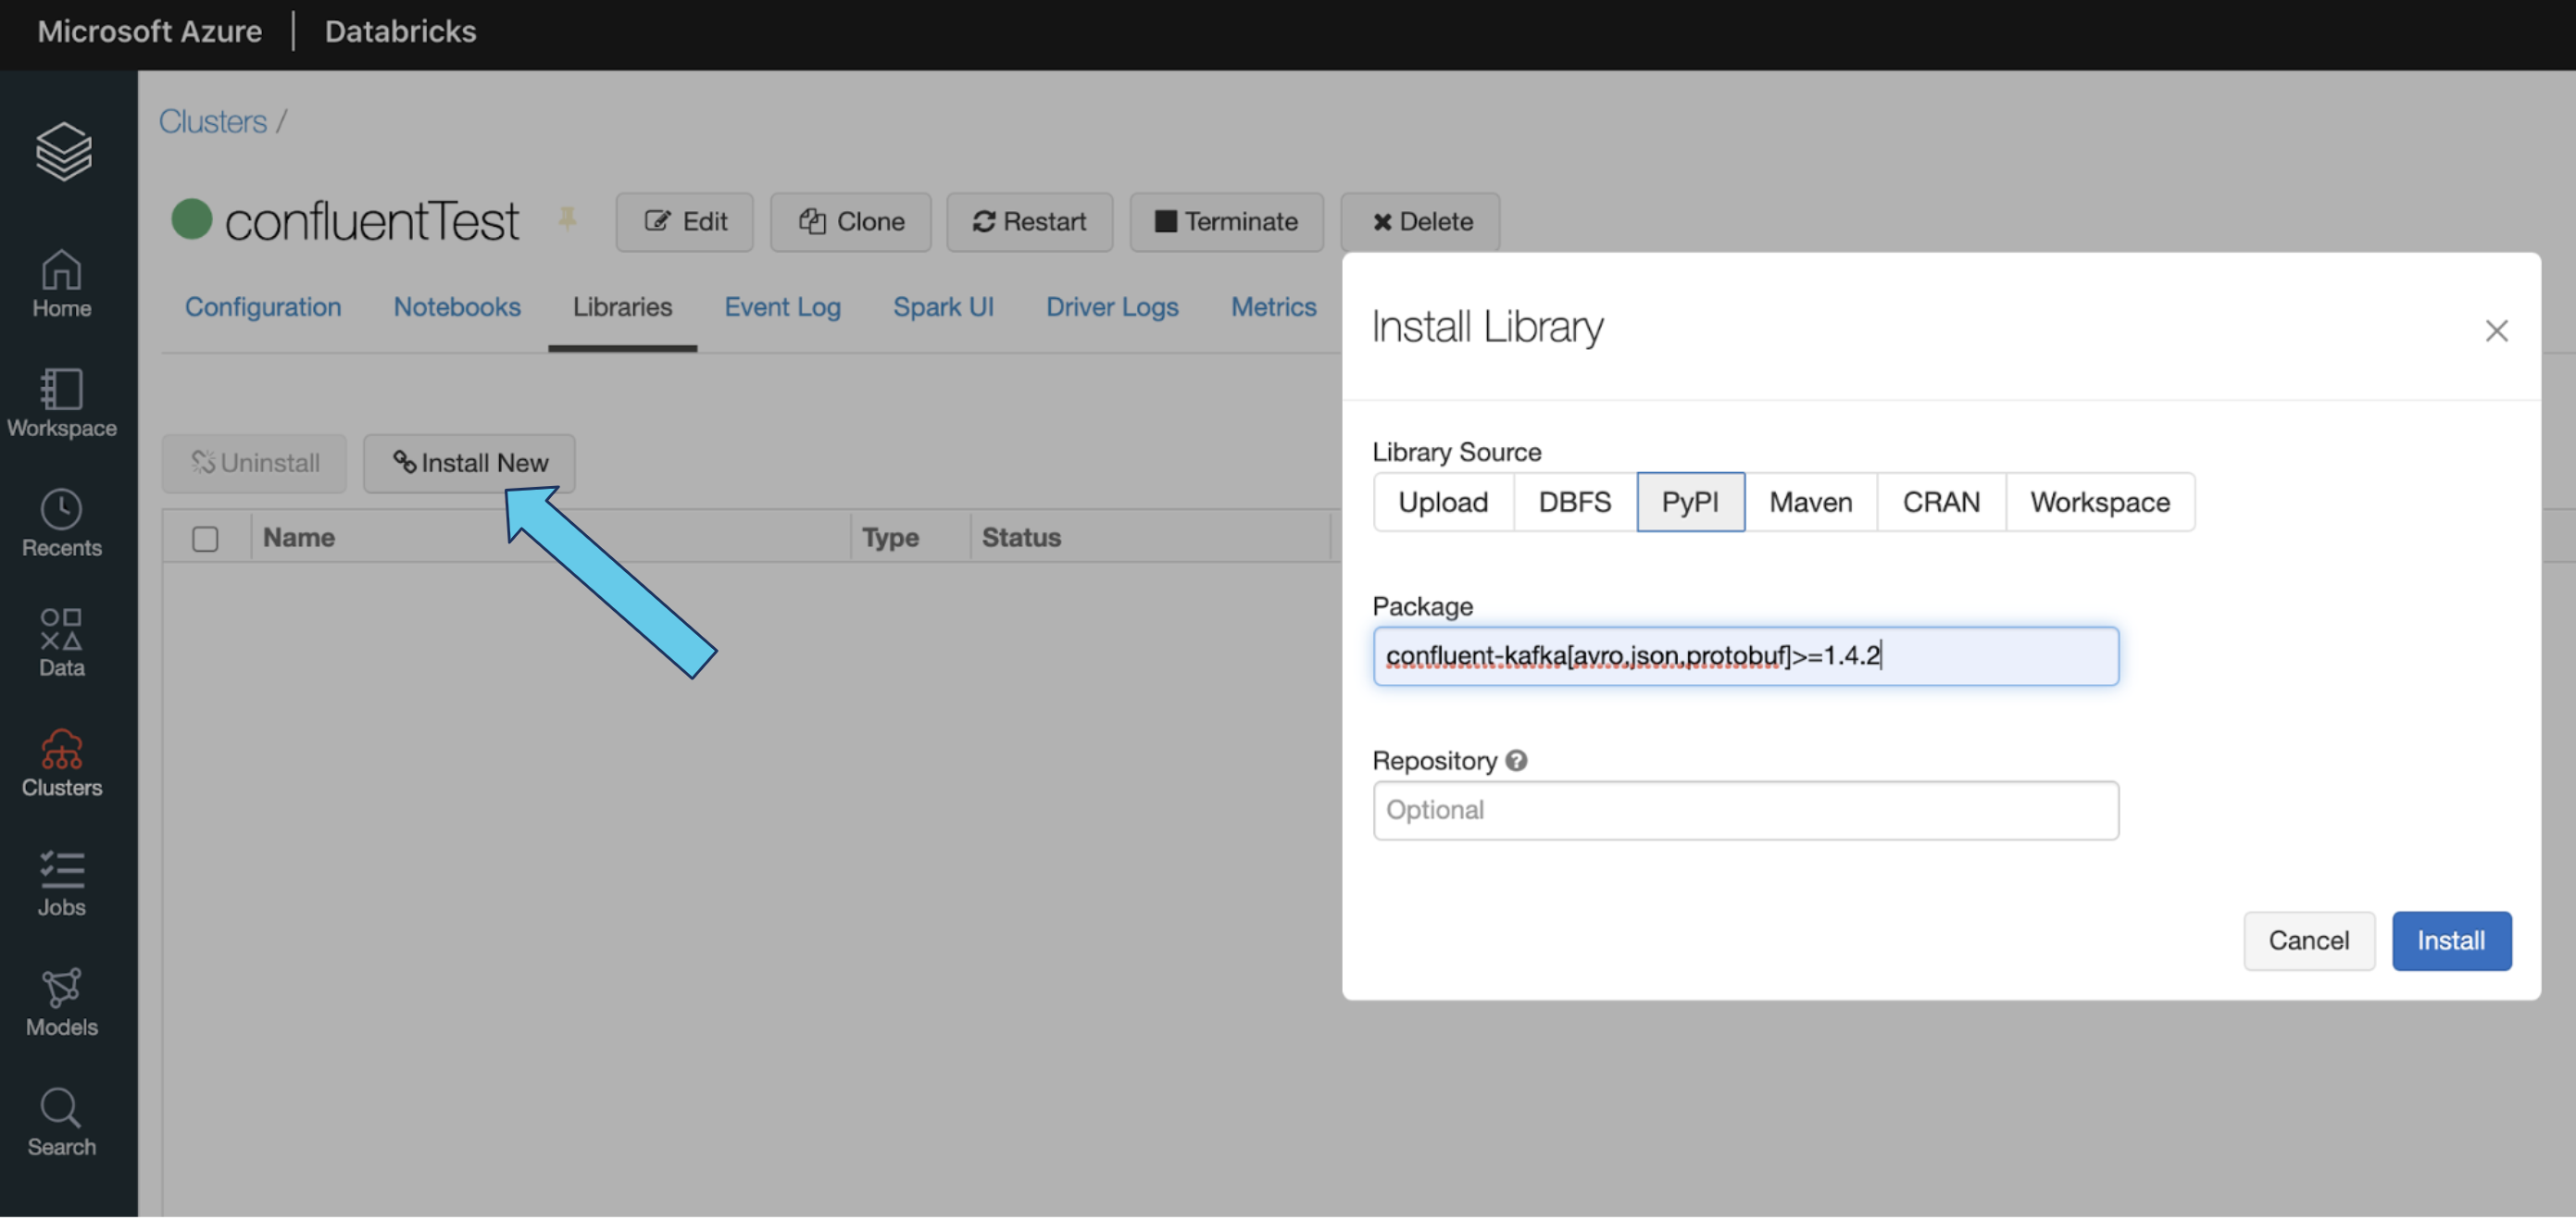
- Click Install to have the library installed on your cluster. You’re now ready to run the example.
Create a new notebook
Once your cluster is spun up, you can create a new notebook and attach it to your cluster. There are multiple ways to do this:
- Click on the Azure Databricks symbol in the left menu to get to the initial screen in the Azure Databricks workspace. The “New Notebook” link is listed under “Common Tasks.”
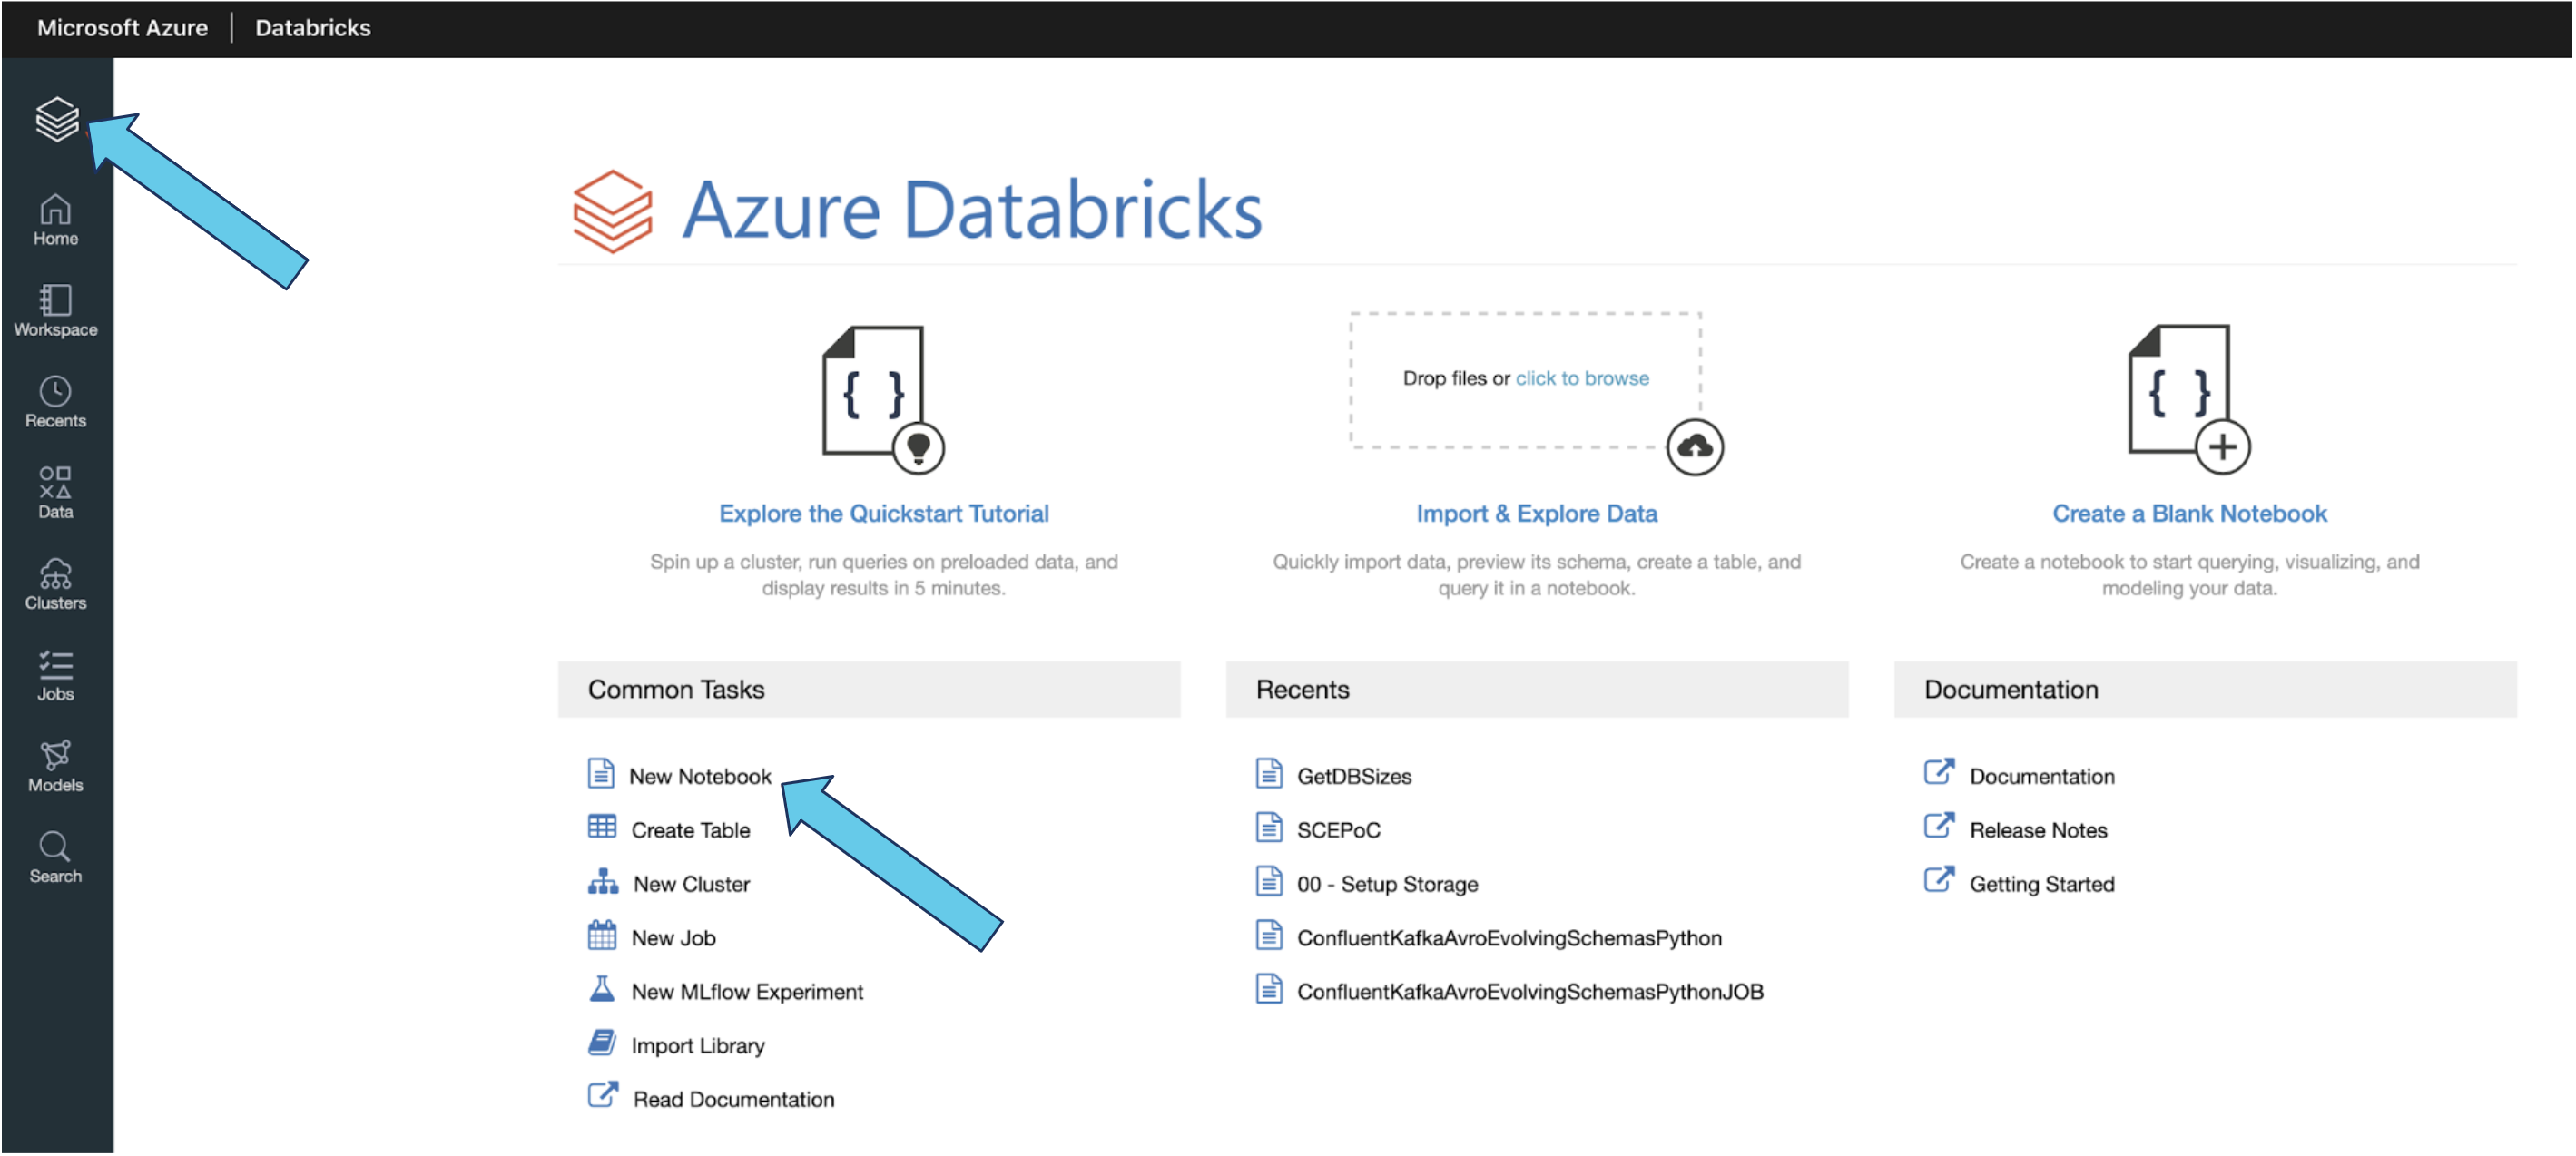
- Or, you can click on the Home icon, which will take you to your home directory. Next, right-click under your account name and select Create > Notebook.
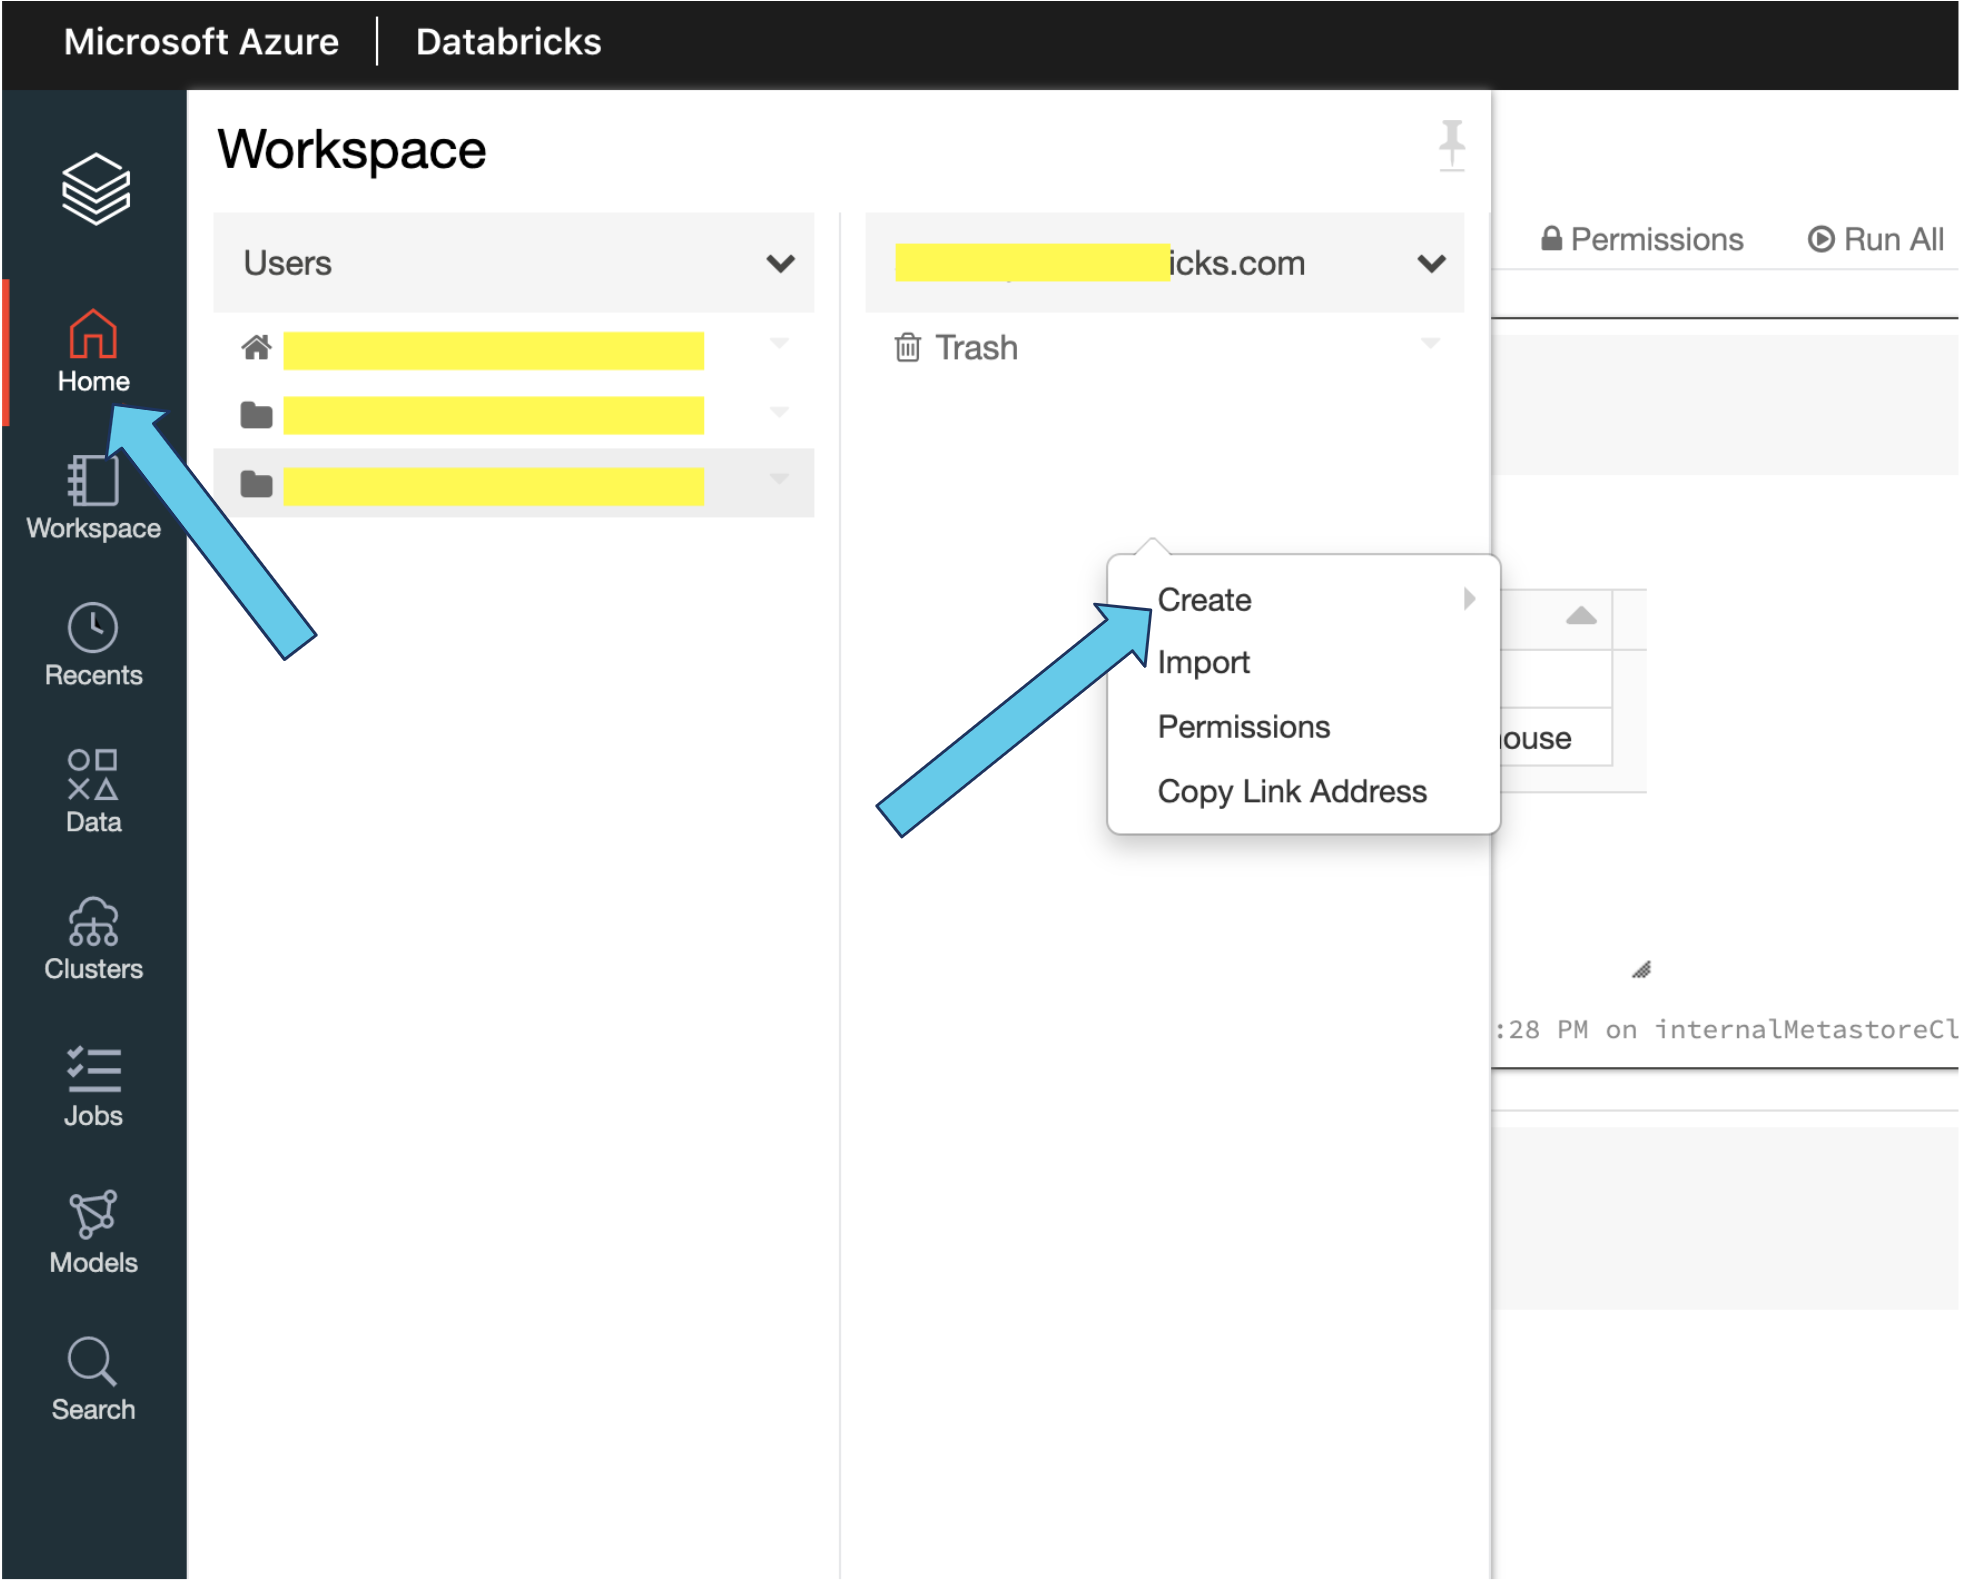
Once you’ve clicked on either Create Notebook or Create > Notebook, the following screen appears:
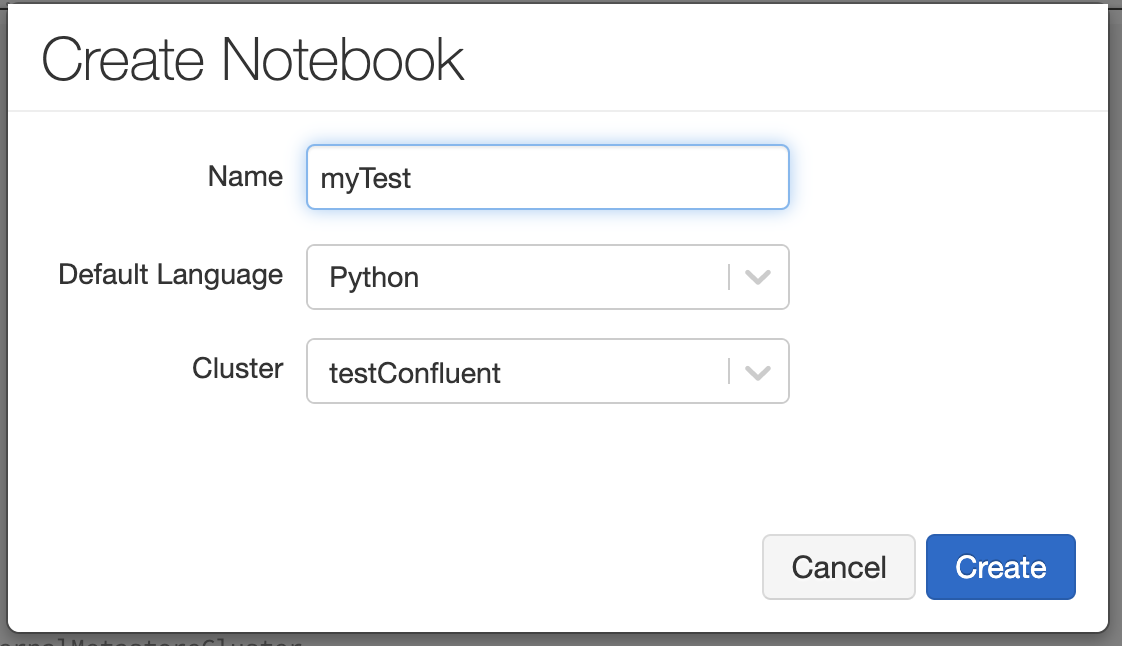
Give your notebook a name, pick your default language (select Python to follow the example below), and then select the cluster that you just spun up. From there, click Create.
Example notebook
The example for this tutorial uses Python, but there is also a Scala notebook available that enables the same functionality. The example below uses the sample clickstream data provided from Confluent Cloud’s Datagen Source Connector.
Below are the steps needed to successfully read, parse, and store Avro data from Confluent Cloud.
Step 5: Gather keys, secrets, and paths
Using the following information, connect to the topic that you created in Confluent Cloud from Azure Databricks:
- The name of the Kafka cluster
- The Kafka API key for the cluster that you generated earlier
- The Kafka API secret for the cluster that you generated earlier
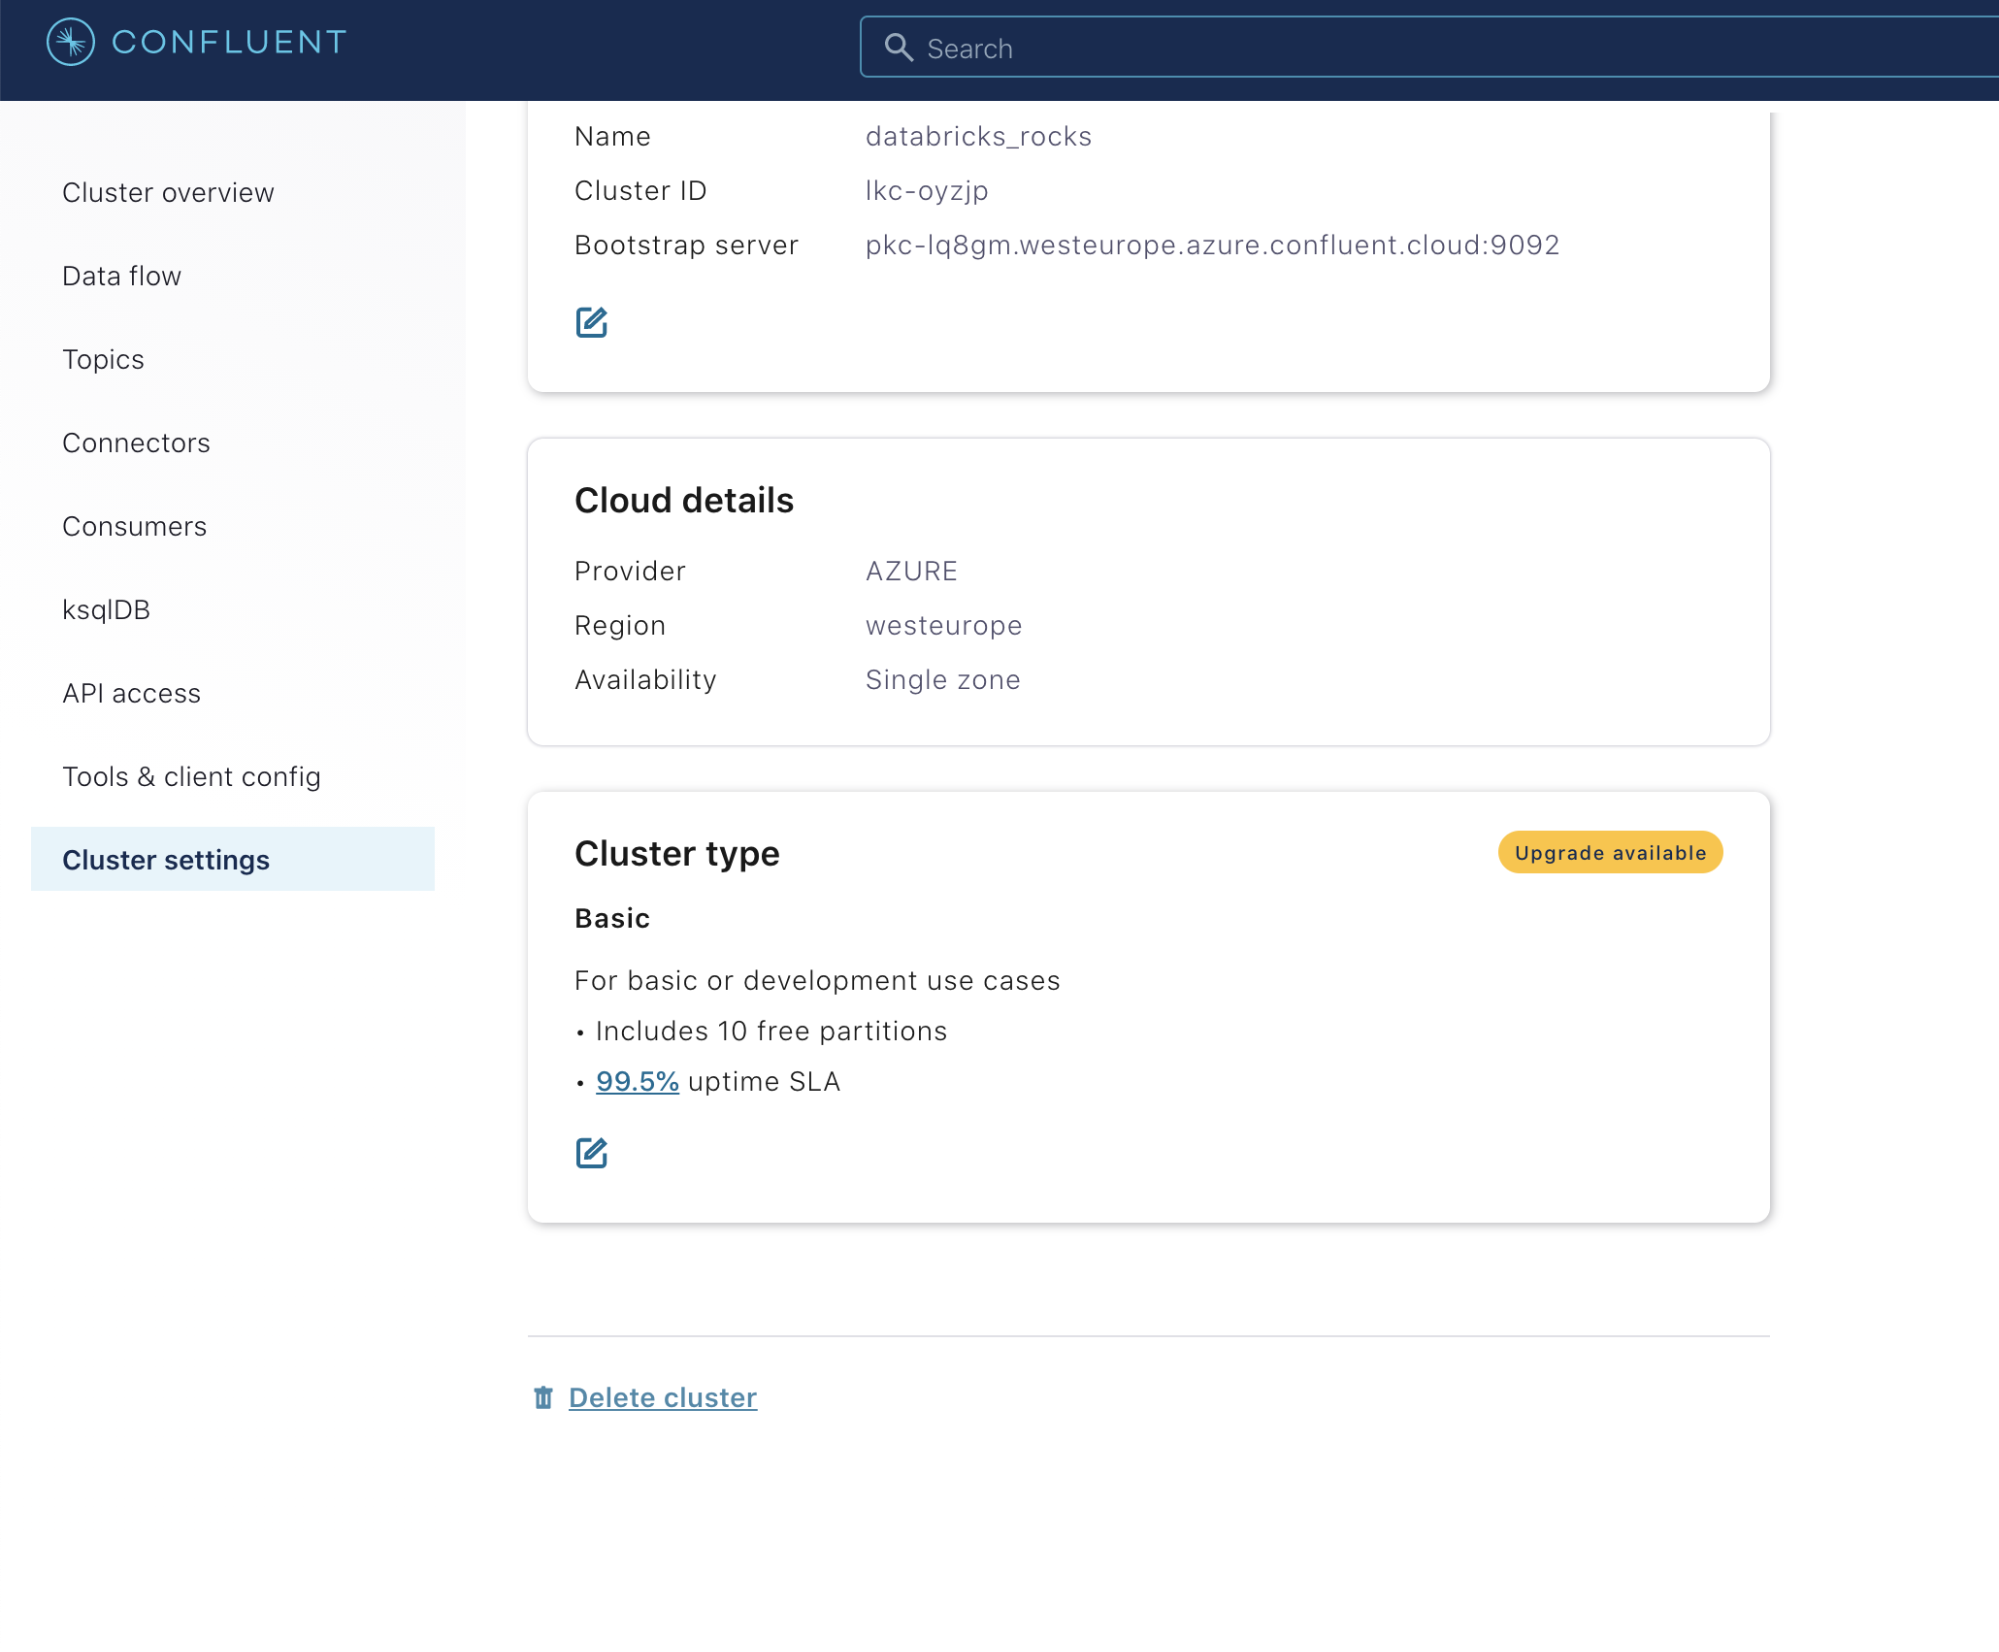
- The bootstrap server for the cluster, which you can find in your Confluent Cloud instance starting from the home screen by clicking on the cluster and then clicking on Cluster settings in the left sidebar
- The name of the Kafka topic
To connect to the Schema Registry, which you will need in order to pull the schemas for parsing your Avro data, you need the following information:
- The Schema Registry URL, which you can find in your Confluent Cloud instance by starting from the home screen and clicking on Settings and then Schema Registry API Access
- The Schema Registry API key that you generated earlier
- The Schema Registry API secret that you generated earlier
Finally, to write the result to a Delta table, you need to specify the ADLS Gen2 path, a Data Bricks File System (DBFS) mount pointing to the ADLS Gen2 path, or a local DBFS location (such as dbfs:/delta/mytable and dbfs:/delta/checkpoints/mytable, which are not recommended for production jobs; however, they don’t require any additional authentication) where your Delta table and streaming checkpoint will be located.
Below is the set of variables we’ll be using (which you can substitute with your server, key, and path values):
confluentClusterName = "databricks_rocks"
confluentBootstrapServers = "YOURBOOTSTRAPSERVERHERE"
confluentTopicName = "clickstreams"
schemaRegistryUrl = "YOURSCHEMAREGISTRYURLHERE"
confluentApiKey = "APIKEYHERE"
confluentSecret = "APISECRETHERE"
confluentRegistryApiKey = "REGISTRYAPIKEYHERE"
confluentRegistrySecret = "REGISTRYAPISECRETHERE"
deltaTablePath = "dbfs:/delta/mytable"
checkpointPath = "dbfs:/delta/checkpoints/mytable"
Note: While not required for this demo, in the sample notebooks, you will see that the variables for the API keys and secrets are set like this:
confluentApiKey = dbutils.secrets.get(scope = "confluentTest", key = "api-key")
confluentSecret = dbutils.secrets.get(scope = "confluentTest", key = "secret")
confluentRegistryApiKey = dbutils.secrets.get(scope = "confluentTest", key = "registry-api-key")
confluentRegistrySecret = dbutils.secrets.get(scope = "confluentTest", key = "registry-secret")
The syntax uses a mechanism called Azure Databricks secrets, which allows you to create values outside of your code and store them in a manner in which they can be accessed and used, but not displayed. If you were to perform a print(confluentAPiKey) after retrieving the value with the above syntax, the value will show as [REDACTED]. This is the recommended method for any values that you don’t want in plain text in your code, such as the key and secret values above. Azure Databricks utilizes Azure Key Vault as the secret store for these values.
For instructions on how to set up an Azure Key Vault backed secret scope in Azure Databricks, please see the Microsoft docs on secret scopes. The page guides you through spinning up Azure Key Vault, adding keys to it, and then creating an Azure Databricks secret scope so that you can access those values in your code.
Connecting to ADLS Gen2 storage
If you are choosing to write your data to an ADLS Gen2 path, you will need to pass in a storage key to the Spark configuration. If you’re just using a local DBFS path (like in this blog post) or a DBFS mount, then you can skip the following step:
adlsGen2Key = "YOURSTORAGEKEYHERE"
spark.conf.set("fs.azure.account.key.achuadlsgen2test.dfs.core.windows.net", adlsGen2Key)
The example notebooks also use Azure Databricks secrets for the adlsGen2Key.
Step 6: Set up the Schema Registry client
Once you have the connection information that you need, the next step is to set up a Schema Registry client. Confluent Cloud requires the Schema Registry API key and secret to authenticate—note the use of some of the variables declared above:
from confluent_kafka.schema_registry import SchemaRegistryClient
import ssl
schema_registry_conf = {
    'url': schemaRegistryUrl,
    'basic.auth.user.info': '{}:{}'.format(confluentRegistryApiKey, confluentRegistrySecret)}schema_registry_client = SchemaRegistryClient(schema_registry_conf)
Step 7: Set up the Spark ReadStream
Now the Spark ReadStream from Kafka needs to be set up and the data manipulated. Both of these operations are combined into one statement. First, we’ll show the complete statement and then we’ll break it down.
import pyspark.sql.functions as fn
from pyspark.sql.types import StringType
binary_to_string = fn.udf(lambda x: str(int.from_bytes(x, byteorder='big')), StringType())
clickstreamTestDf = (
  spark
  .readStream
  .format("kafka")
  .option("kafka.bootstrap.servers", confluentBootstrapServers)
  .option("kafka.security.protocol", "SASL_SSL")
  .option("kafka.sasl.jaas.config", "kafkashaded.org.apache.kafka.common.security.plain.PlainLoginModule required username='{}' password='{}';".format(confluentApiKey, confluentSecret))
  .option("kafka.ssl.endpoint.identification.algorithm", "https")
  .option("kafka.sasl.mechanism", "PLAIN")
  .option("subscribe", confluentTopicName)
  .option("startingOffsets", "earliest")
  .option("failOnDataLoss", "false")
  .load()
  .withColumn('key', fn.col("key").cast(StringType()))
  .withColumn('fixedValue', fn.expr("substring(value, 6, length(value)-5)"))
  .withColumn('valueSchemaId', binary_to_string(fn.expr("substring(value, 2, 4)")))
  .select('topic', 'partition', 'offset', 'timestamp', 'timestampType', 'key', 'valueSchemaId','fixedValue')
)
Read from Kafka
You can manipulate the data using the imports and user-defined functions (UDF). The first part of the above ReadStream statement reads the data from our Kafka topic. First, we specify the format of the ReadStream as “kafka”:
  clickstreamTestDf = (
  spark
  .readStream
  .format("kafka")
Next, the bootstrap servers, protocol, authentication configuration, and topic need to be specified:
  .option("kafka.bootstrap.servers", confluentBootstrapServers)
  .option("kafka.security.protocol", "SASL_SSL")
  .option("kafka.sasl.jaas.config", "kafkashaded.org.apache.kafka.common.security.plain.PlainLoginModule required username='{}' password='{}';".format(confluentApiKey, confluentSecret))
  .option("kafka.ssl.endpoint.identification.algorithm", "https")
  .option("kafka.sasl.mechanism", "PLAIN")
  .option("subscribe", confluentTopicName)
The “kafkashaded” at the front of the kafka.sasl.jaas.config option is present so that the PlainLoginModule can be used.
Next, specify the Kafka topic offset at which to start at. By default, a ReadStream from a Kafka topic will use “latest” for all topic partitions. That means that it will only start pulling data from the time that the stream started reading and not pull anything older from the topic. In our example, we will tell it to use “earliest”, meaning it will start reading data from the earliest available offset in the topic:
.option("startingOffsets", "earliest")
If data is actively being written to your topic, then you can experiment with both the “latest” and “earliest” settings. If, however, there is no new data coming into your topic, then you need to use “earliest” if you want your ReadStream to pull any data.
You can also specify the failOnDataLoss option—when set to “true”, it will stop the stream if there is a break in the sequence of offsets because it assumes data was lost. When set to “false”, it will ignore missing offsets (and depending on your use case, it can be valid for offsets to be missing):
.option("failOnDataLoss", "false")
Finally, specify load:
.load()
Parse out the extra bytes from the Avro data
A Kafka message contains a key and a value. Data going through a Kafka topic in Confluent Cloud has five bytes added to the beginning of every Avro value. If you are using Avro format keys, then five bytes will be added to the beginning of those as well. For this example, we’re assuming string keys. These bytes consist of one magic byte and four bytes representing the schema ID of the schema in the registry that is needed to decode that data. The bytes need to be removed so that the schema ID can be determined and the Avro data can be parsed. To manipulate the data, we need a couple of imports:
import pyspark.sql.functions as fn
from pyspark.sql.types import StringType
Next, use a UDF to help parse bytes into a string:
binary_to_string = fn.udf(lambda x: str(int.from_bytes(x, byteorder='big')), StringType())
Finally, new columns need to be generated as part of our Spark DataFrame.
The key needs to be cast to a string:
.withColumn('key', fn.col("key").cast(StringType()))
The first five bytes need to be removed from the value:
.withColumn('fixedValue', fn.expr("substring(value, 6, length(value)-5)"))
Bytes 2–5 of the value need to be converted from binary into a string to get the schema ID for each row:
.withColumn('valueSchemaId', binary_to_string(fn.expr("substring(value, 2, 4)")))
And finally, we only select the columns that we want from the dataset:
  .select('topic', 'partition', 'offset', 'timestamp', 'timestampType', 'key', 'valueSchemaId','fixedValue')
)
The .select is the final part of the overall statement for reading from the Kafka topic and manipulating the data.
Look at the ReadStream data
After executing the complete ReadStream statement into the clickstreamTestDf variable, we can run the following command:
display(clickstreamTestDf)
Here are the first three rows of the results: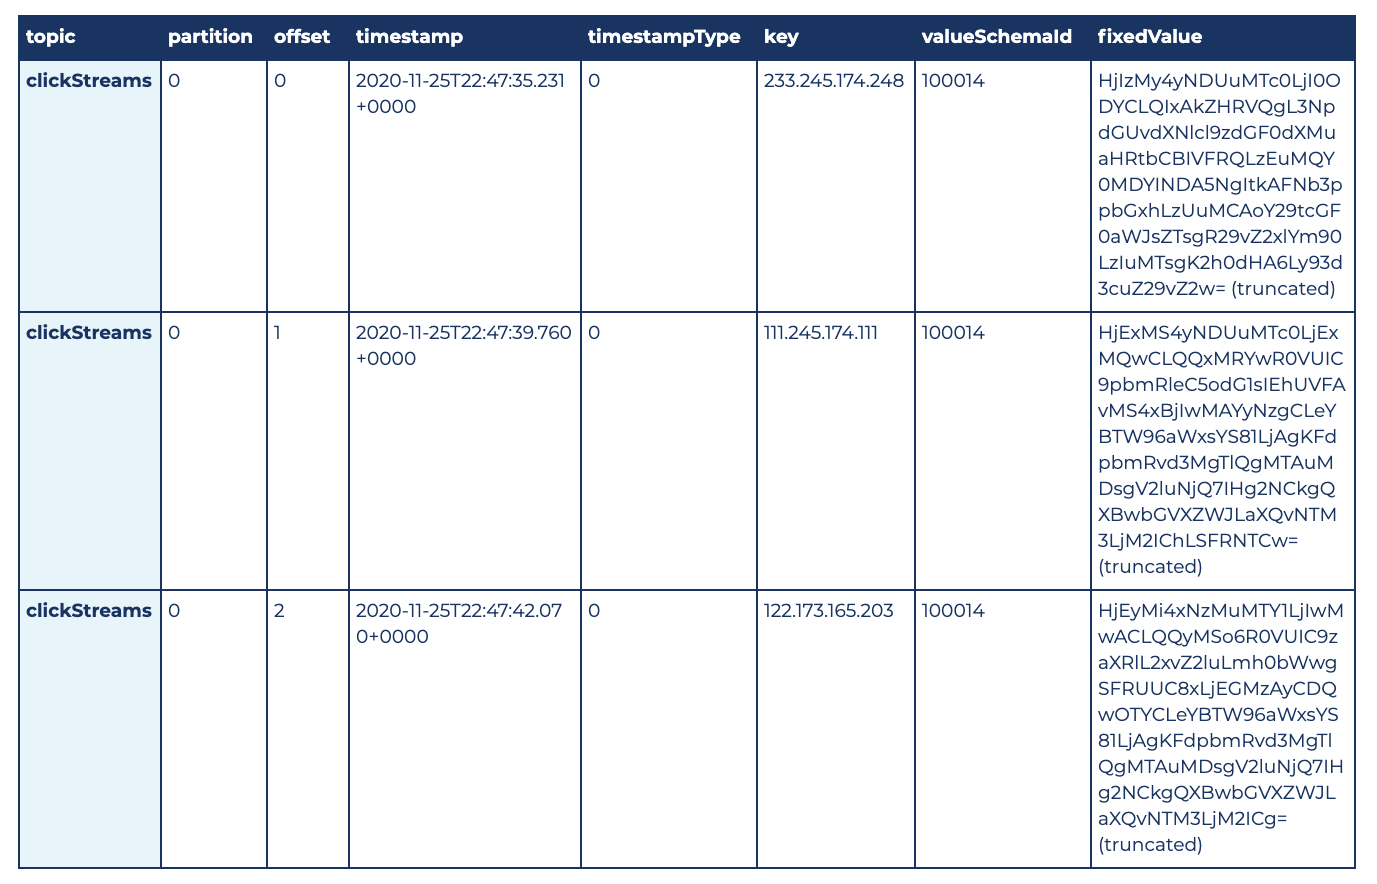
Make sure to click the Cancel icon that appears under the cell to stop the streaming display.
Step 8: Parsing and writing out the data
Now that the data is being read, it needs to be parsed and written out. For this example, we parse the data and then write it to a Delta table on ADLS Gen2.
Over time, data going through a Kafka topic can change. There are options in Confluent Cloud to restrict how a schema can change, but unless the topic is locked down so that no changes are allowed, the code will need to take changes into account. There could be rows that require parsing by different schemas within the same micro-batch in a Spark stream. Because this is the case, we can’t just pull a schema once from the registry and use it until the stream is restarted—rather, we may have to pull multiple schemas from the registry for each micro-batch.
The foreachBatch() functionality in Spark Structured Streaming allows us to accomplish this task. With the foreachBatch() functionality, code can be executed for each micro-batch in a stream and the result can be written out. A writeStream is still being defined, so you get the advantage of streaming checkpoints.
Define the foreachBatch() function
We’ll start with the function that will be executed for each micro-batch. Again, we’ll show you the complete statement and then break it down:
import pyspark.sql.functions as fn
from pyspark.sql.avro.functions import from_avro
def parseAvroDataWithSchemaId(df, ephoch_id):
  cachedDf = df.cache()
  fromAvroOptions = {"mode":"FAILFAST"}
  def getSchema(id):
    return str(schema_registry_client.get_schema(id).schema_str)
  distinctValueSchemaIdDF = cachedDf.select(fn.col('valueSchemaId').cast('integer')).distinct()
  for valueRow in distinctValueSchemaIdDF.collect():
    currentValueSchemaId = sc.broadcast(valueRow.valueSchemaId)
    currentValueSchema = sc.broadcast(getSchema(currentValueSchemaId.value))
    filterValueDF = cachedDf.filter(fn.col('valueSchemaId') == currentValueSchemaId.value)
    filterValueDF \
      .select('topic', 'partition', 'offset', 'timestamp', 'timestampType', 'key', from_avro('fixedValue', currentValueSchema.value, fromAvroOptions).alias('parsedValue')) \
      .write \
      .format("delta") \
      .mode("append") \
      .option("mergeSchema", "true") \
     .save(deltaTablePath)
Now for the imports:
import pyspark.sql.functions as fn
from pyspark.sql.avro.functions import from_avro
The first import gives us access to the PySpark SQL col function, which we use to reference columns in a DataFrame. The second import is for the from_avro function. The from_avro function is what we use to parse the binary Avro data. We can’t use the version of from_avro that takes a Schema Registry URL, because at this time, there’s no mechanism for passing authentication. Because Confluent Cloud requires authentication for the Schema Registry (which is a best practice), we use the version of from_avro that takes an Avro schema directly.
A foreachBatch() function will always have two inputs: a DataFrame containing all of the data in the micro-batch and an ephoch_id representing the micro-batch number.
def parseAvroDataWithSchemaId(df, ephoch_id):
We’re going to reference the DataFrame multiple times in our code, so let’s cache it to avoid pulling it from the stream multiple times:
cachedDf = df.cache()
Next, let’s specify how we want the from_avro function to behave when it cannot parse a row. There are two options: FAILFAST and PERMISSIVE. FAILFAST will immediately fail, and processing will stop. PERMISSIVE will return NULL for the parsed value and continue. In our case, we’ve chosen to stop on failure:
fromAvroOptions = {"mode":"FAILFAST"}
Next, we define a function that queries the Schema Registry by ID and returns the schema:
 def getSchema(id):
    return str(schema_registry_client.get_schema(id).schema_str)
We don’t want to query the Schema Registry with more than what is necessary, so let’s get the distinct set of schema IDs from the data:
distinctValueSchemaIdDF = cachedDf.select(fn.col('valueSchemaId').cast('integer')).distinct()
Then for each schema ID, we pull the schema from the registry and put it in a broadcast variable so that it is available to all of the workers:
for valueRow in distinctValueSchemaIdDF.collect():
    currentValueSchemaId = sc.broadcast(valueRow.valueSchemaId)
    currentValueSchema = sc.broadcast(getSchema(currentValueSchemaId.value))
Next, we filter the DataFrame only to the rows with that schema ID. Remember that if the schema is changing rapidly, there could be rows with completely different schemas in the DataFrame, so we only want to parse the rows that need the schema that we just pulled from the registry:
filterValueDF = cachedDf.filter(fn.col('valueSchemaId') == currentValueSchemaId.value)
Finally, we parse those rows with the from_avro function, passing the schema that we pulled from the registry, and write the parsed results out to Delta. Note that this is a batch write—when you’re operating within a foreachBatch() function, everything you’re doing is batch based.
    filterValueDF \
      .select('topic', 'partition', 'offset', 'timestamp', 'timestampType', 'key', from_avro('fixedValue', currentValueSchema.value, fromAvroOptions).alias('parsedValue')) \
      .write \
      .format("delta") \
      .mode("append") \
      .option("mergeSchema", "true") \
     .save(deltaTablePath)
The mergeSchema option was set to “true” in this case to allow the schema for the Delta table to change over time. If you want the current schema to be enforced and changes to be prevented, then either remove the option or set it explicitly to “false”.
Set up the Spark writeStream
After defining the foreachBatch() function, the last task is to define the writeStream. The writeStream statement calls the foreachBatch() function for each micro-batch, specifying the function name, the checkpoint, and a name for the stream:
clickstreamTestDf.writeStream \
  .option("checkpointLocation", checkpointPath) \
  .foreachBatch(parseAvroDataWithSchemaId) \
  .queryName("clickStreamTestFromConfluent") \
  .start()
If the checkpoint and Delta table don’t already exist, they will be created automatically. The checkpoint will be created first, followed by the Delta table when the first batch write is performed.
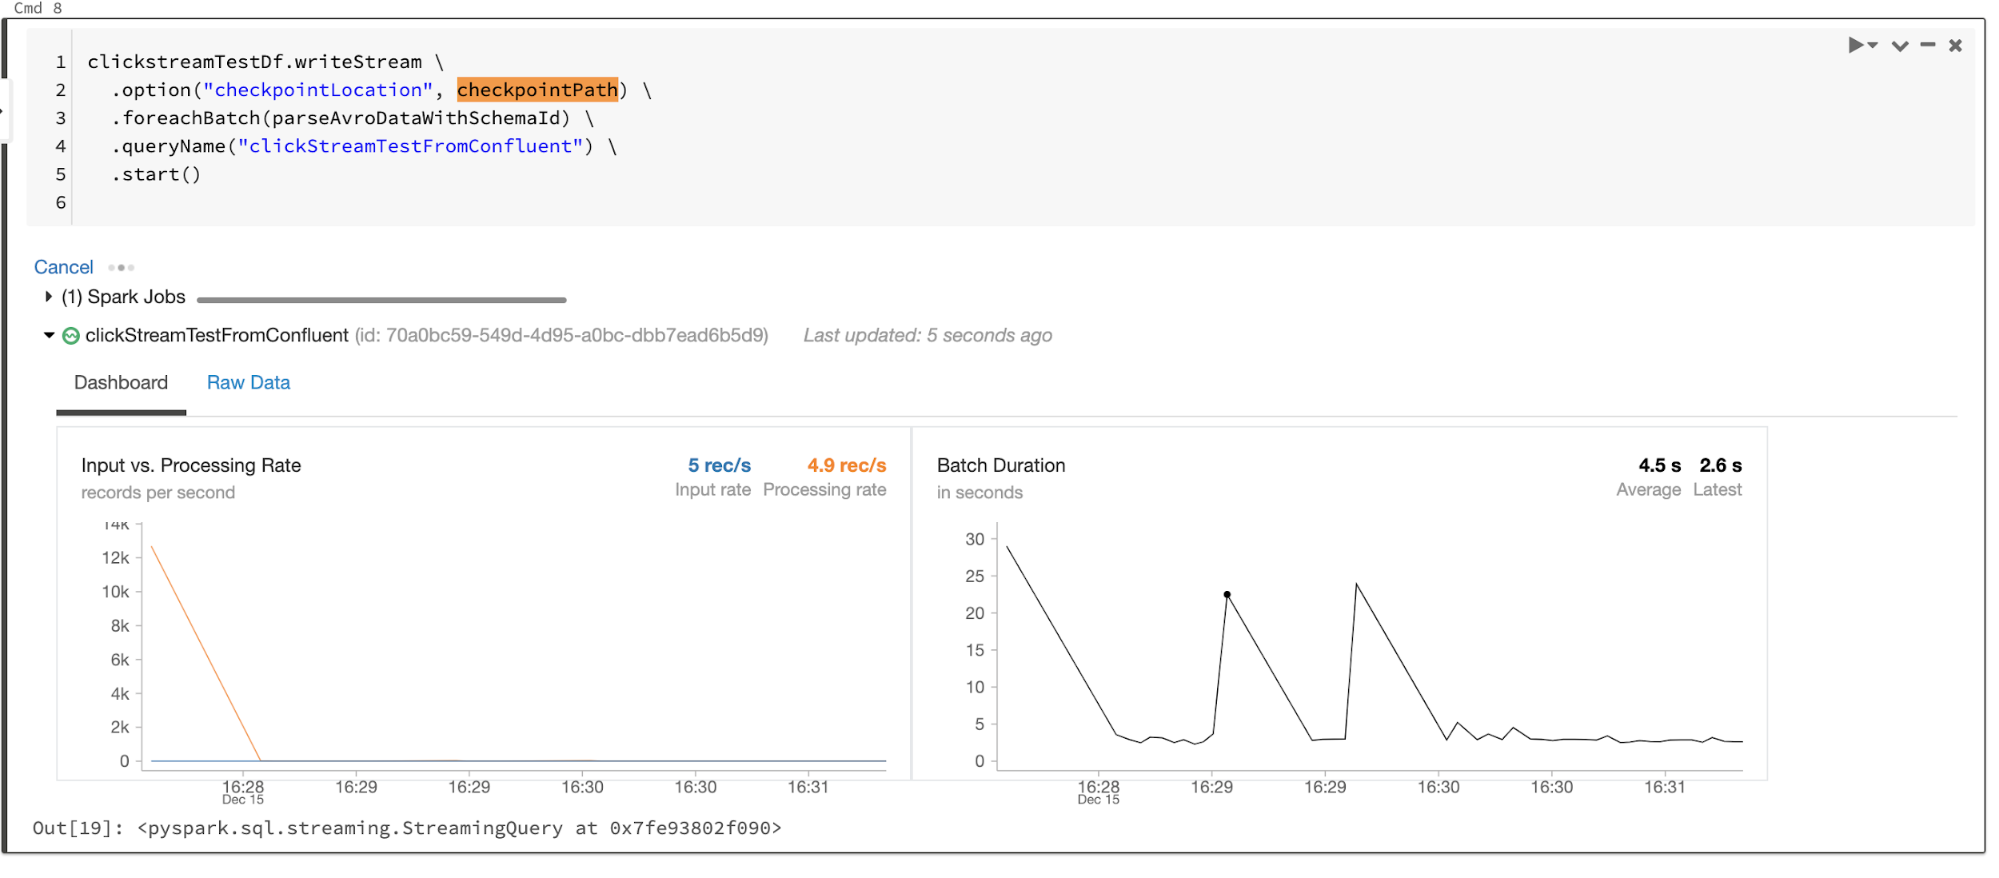
The following is what you see while the writeStream is running—micro-batches of data being processed:
Step 9: Query the result
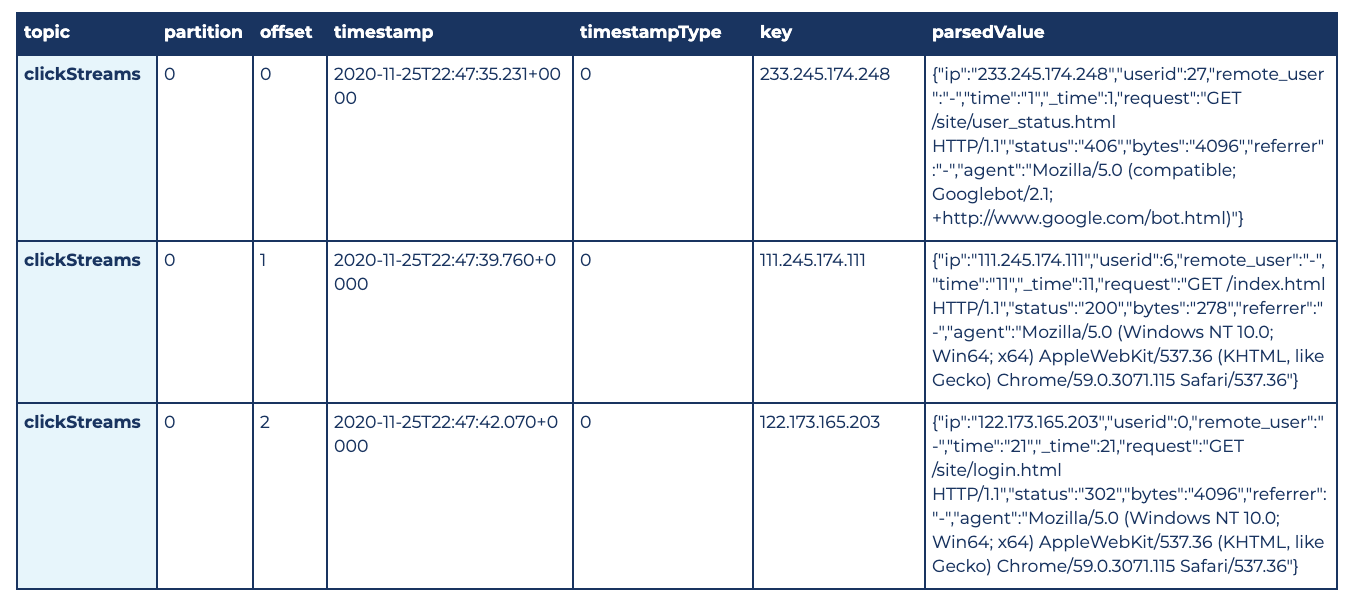
Below is a sample of the final output from the Delta table. You can get this output by querying the destination Delta table. You can run this statement while the writeStream is still running, and it will give you the latest consistent state of the Delta table:
deltaClickstreamTestDf = spark.read.format("delta").load(deltaTablePath)
display(deltaClickstreamTestDf)
Step 10: Stop the stream and shut down the cluster
When you’re done with the demo, stop the stream by clicking Cancel under the writeStream cell. You can then navigate to the “Clusters” page and stop the cluster.
Downloadable notebooks
If you’d like, you can download the example notebooks:
- Python notebook (used in this tutorial)
- Scala notebook
Step 11: Tear down the demo
To avoid incurring unwanted charges, after you’re done with the demo, make sure you delete the resources created as part of this tutorial.
Azure
Please note that any work that you’ve done will be lost when you tear down your Databricks workspace. If you’d like to keep your notebook, you can export it with the following steps:
- When logged into the Azure Databricks workspace, navigate to the notebook
- Click on the File menu, then select Export and choose your desired format
To tear down a Databricks workspace, open the Azure Portal and navigate to the Resource Group that your Azure Databricks instance is located in.
- If there’s nothing else in the Resource Group, then you can click the Destroy resource group option at the top of the page
- If there are other services in the Resource Group that you want to keep, click on the checkbox for your Azure Databricks instance and then click the Delete option (in this case, do not click “Delete resource group”)
Confluent Cloud
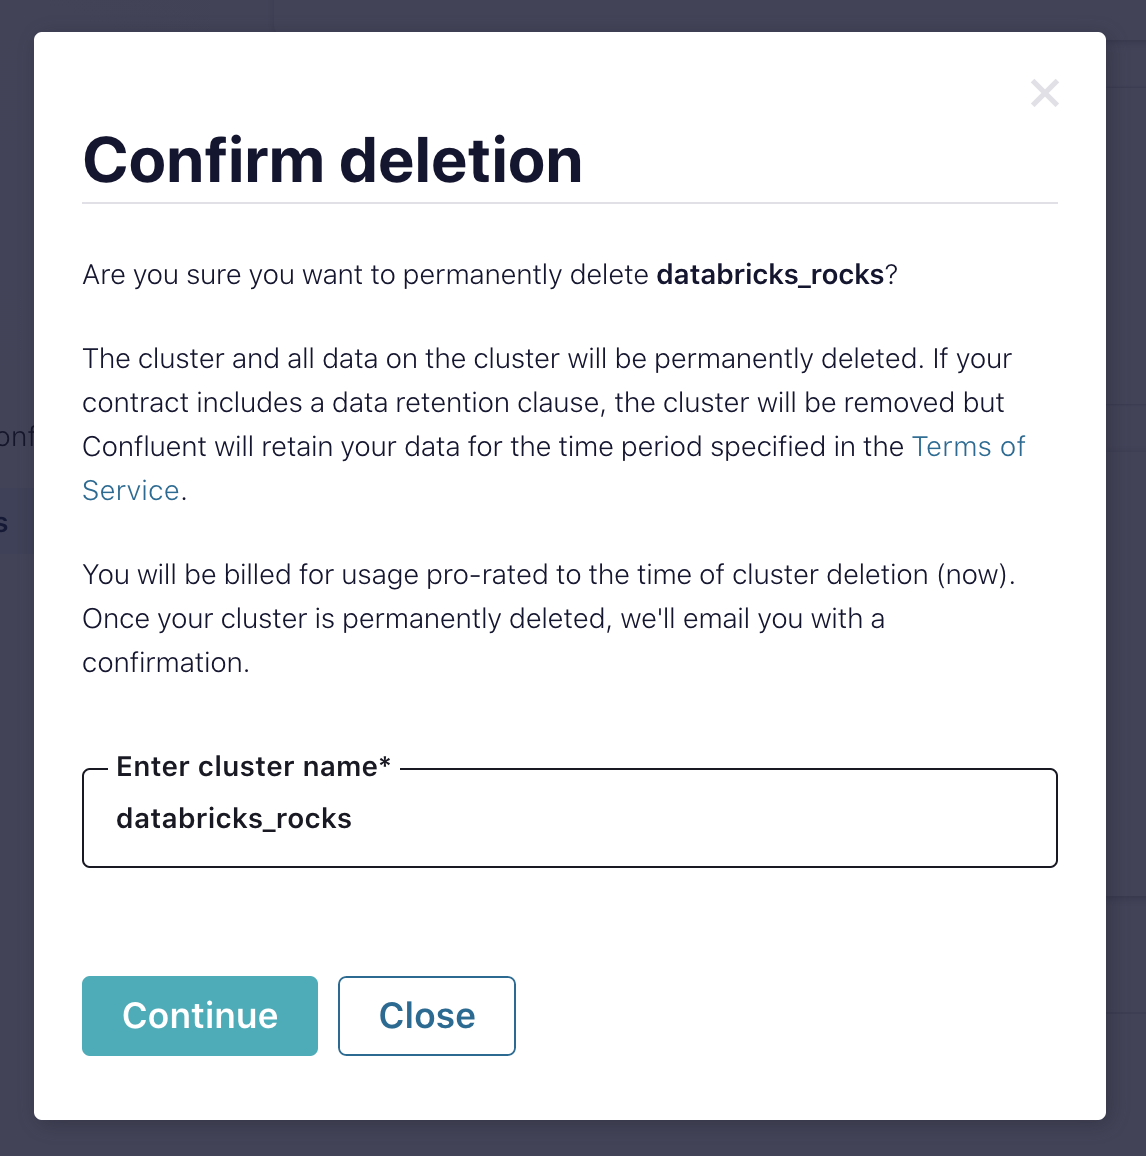
Click on Cluster settings in the left menu. Scroll to the bottom and click on the Delete cluster link.
In the “Confirm deletion” modal, confirm the cluster name and click Continue.
Conclusion
This blog post has guided you through first steps in using Databricks and Confluent Cloud together on Azure. Now you are ready to build your own data pipelines and get the value out of your data leveraging whatever service best suits the specific task at hand. With Confluent Cloud, Databricks, and all the Azure services at your disposal, the possibilities are wide open.
Learn more on the Streaming Audio podcast and try Confluent for free on Azure Marketplace. When you sign up, you receive $400 to spend within Confluent Cloud during your first 60 days, and you can use the promo code CL60BLOG for an additional $60 of free Confluent Cloud usage.*
Did you like this blog post? Share it now
Subscribe to the Confluent blog
New with Confluent Platform 7.9: Oracle XStream CDC Connector, Client-Side Field Level Encryption (EA), Confluent for VS Code, and More
This blog announces the general availability of Confluent Platform 7.9 and its latest key features: Oracle XStream CDC Connector, Client-Side Field Level Encryption (EA), Confluent for VS Code, and more.
Meet the Oracle XStream CDC Source Connector
Confluent's new Oracle XStream CDC Premium Connector delivers enterprise-grade performance with 2-3x throughput improvement over traditional approaches, eliminates costly Oracle GoldenGate licensing requirements, and seamlessly integrates with 120+ connectors...

