[Virtual Event] GenAI Streamposium: Learn to Build & Scale Real-Time GenAI Apps | Register Now
Motion in Motion: Building an End-to-End Motion Detection and Alerting System with Apache Kafka and ksqlDB
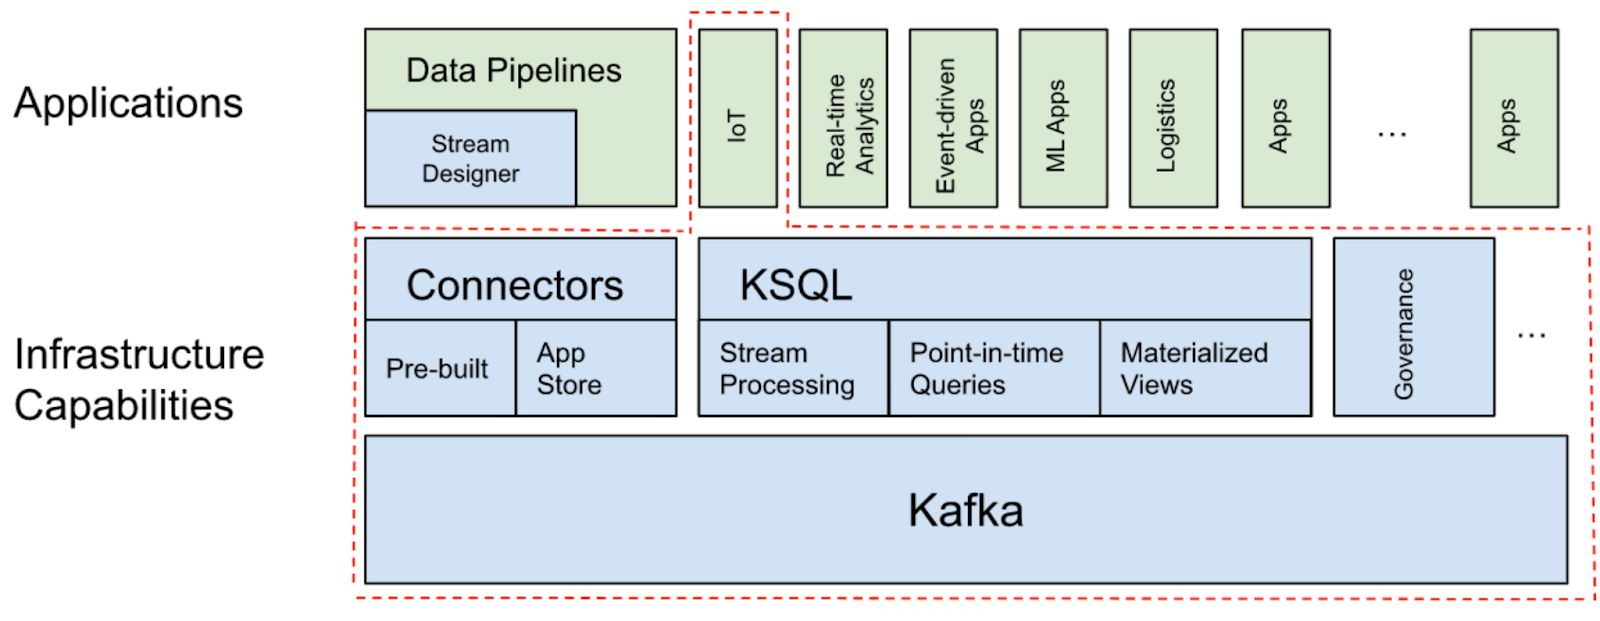
Managing IoT (Internet of Things) devices and their produced data or events can be a challenge. On one hand, IoT devices usually generate massive amounts of data. On the other hand, IoT hardware has many limitations to process the data generated, such as cost, physical size, efficiency, and availability. You need a back-end system with high scalability and availability to process the growing volume of data. Things become more challenging when dealing with numerous devices and events in real time, and considering the required availability, latency, scalability, and agility for different usage and scenarios.
For Confluent Hackathon 2022, we built an end-to-end motion detection and alerting system, which currently acts as a home surveillance system, on top of Apache Kafka® and ksqlDB to demonstrate how easy it is to build IoT solutions by leveraging Confluent Cloud.
Architecture
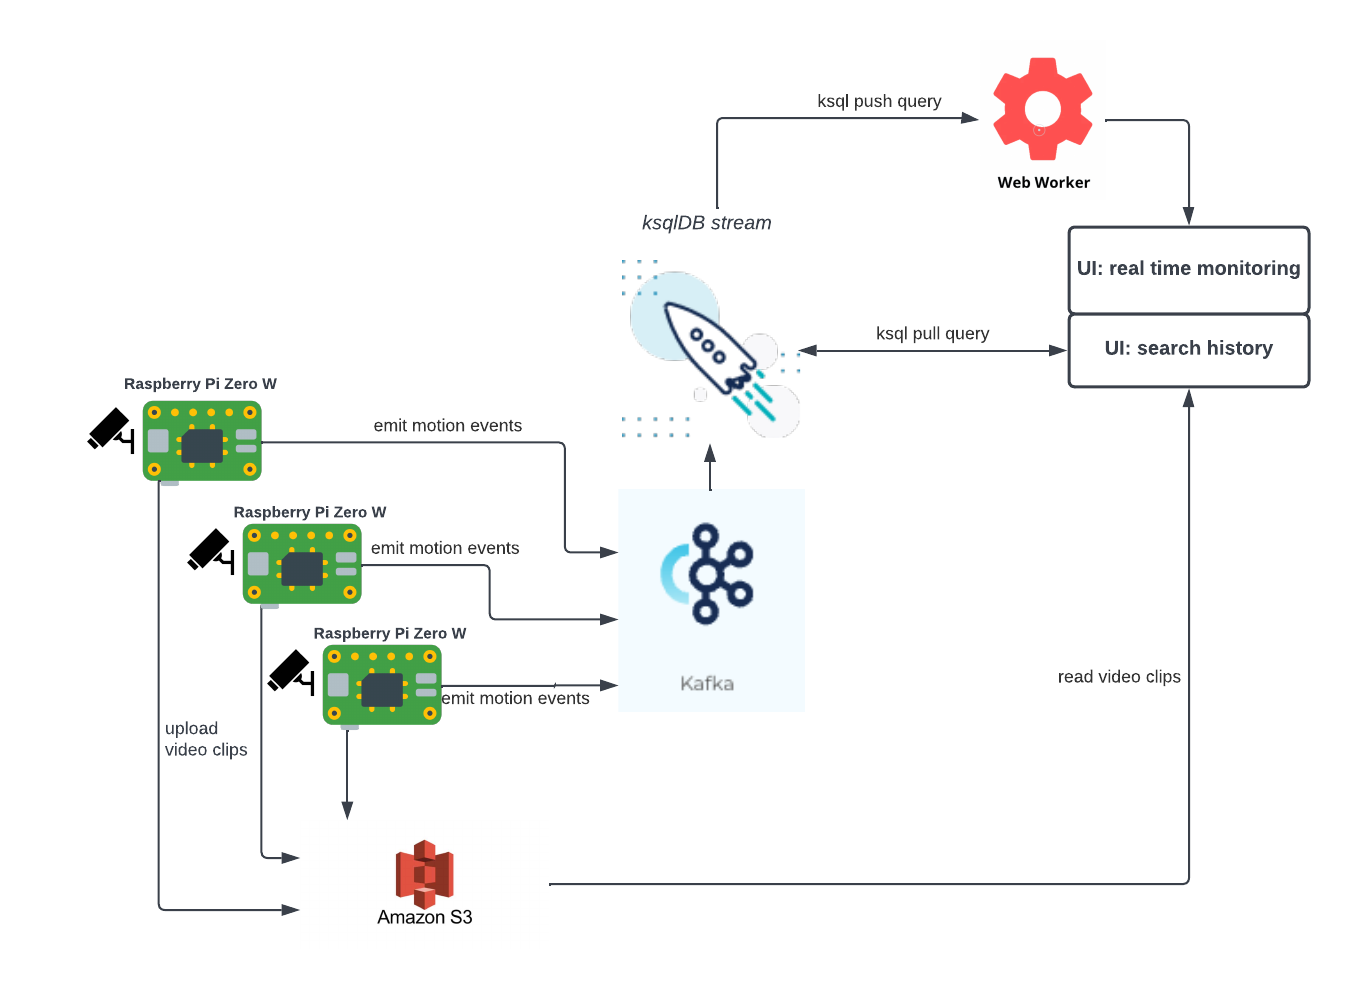
The following diagram illustrates the high-level architecture of the project. Simply put, we used Kafka via Confluent Cloud to manage our “motion in motion” project. On the producer side, there are IoT devices that detect and emit motion events to Kafka. On the consumer side, we developed a UI for real-time monitoring/alerting and past event search by leveraging the features of Kafka and ksqlDB.
Motion detecting system
Hardware
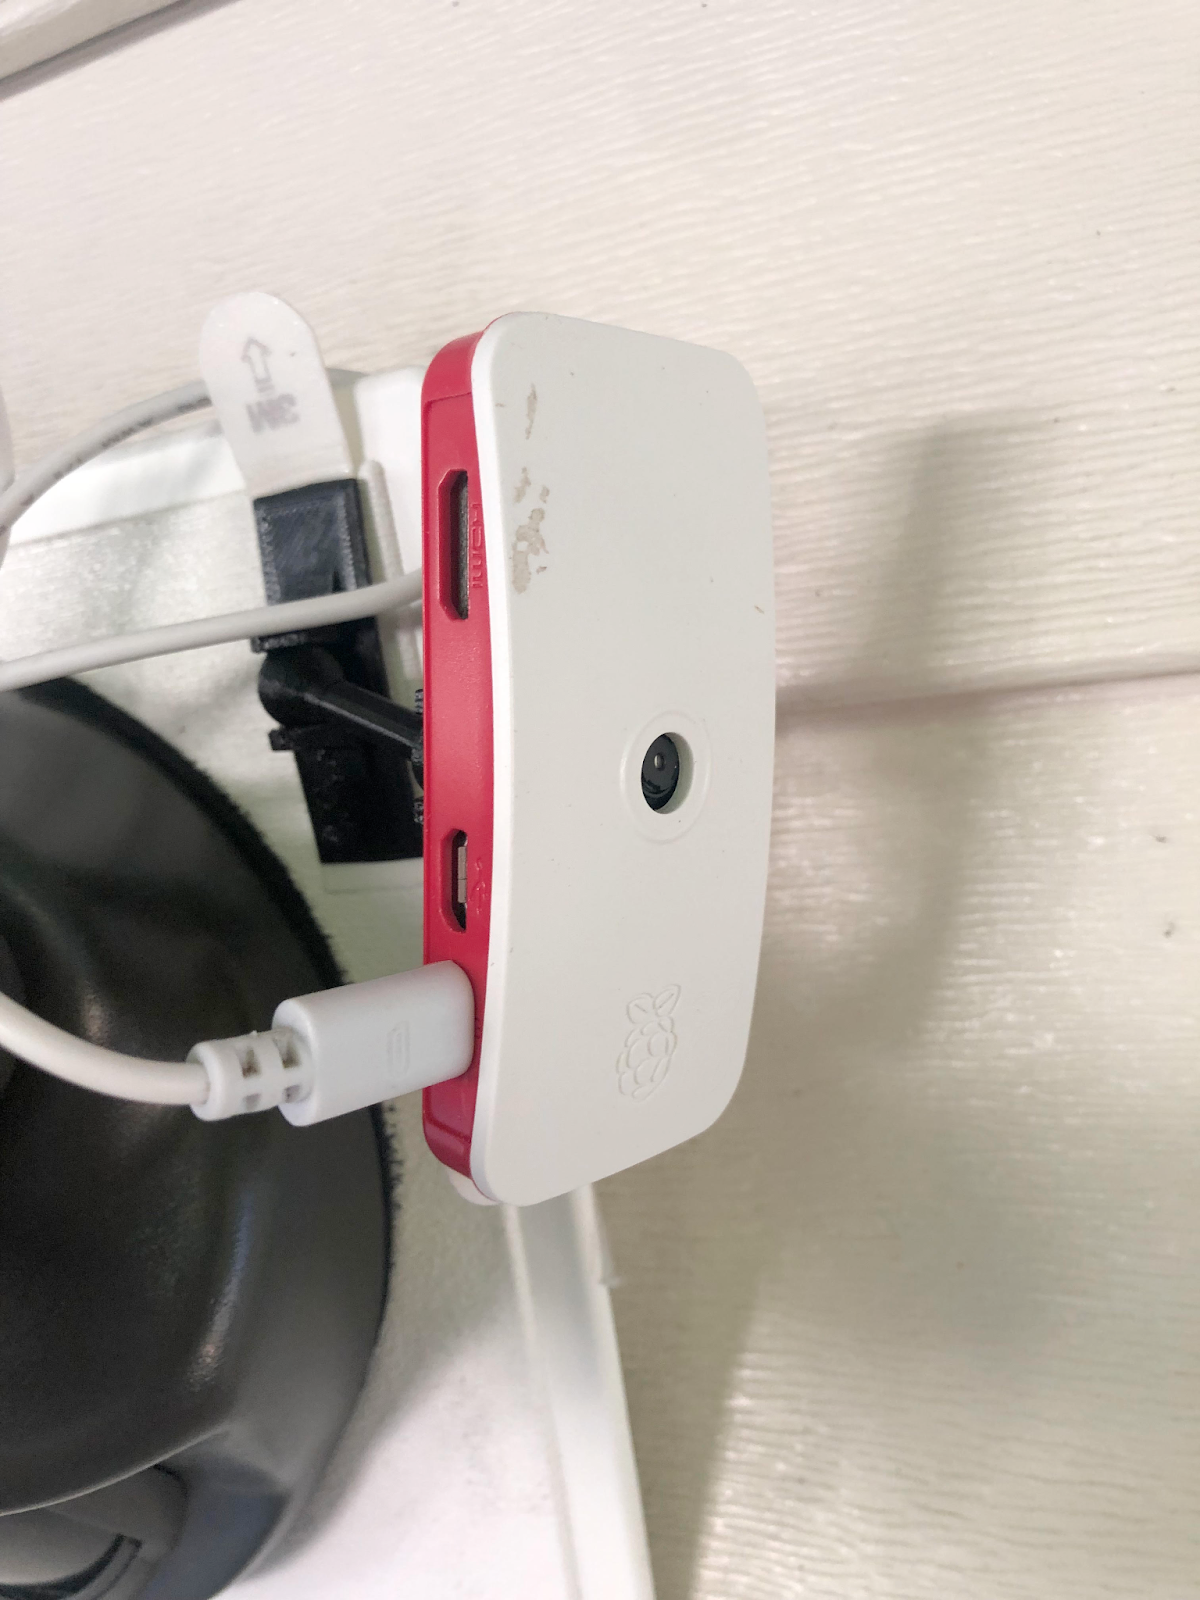
We chose Raspberry Pi Zero W for the hardware due to its compact size, low cost, and low power consumption, thus limiting computation power. It’s a good prototype device for edge computing in IoT applications. Our project used standard items suggested from official websites, as well as a mount model that provided a easy way to mount the Raspberry Pi Zero W.
Software
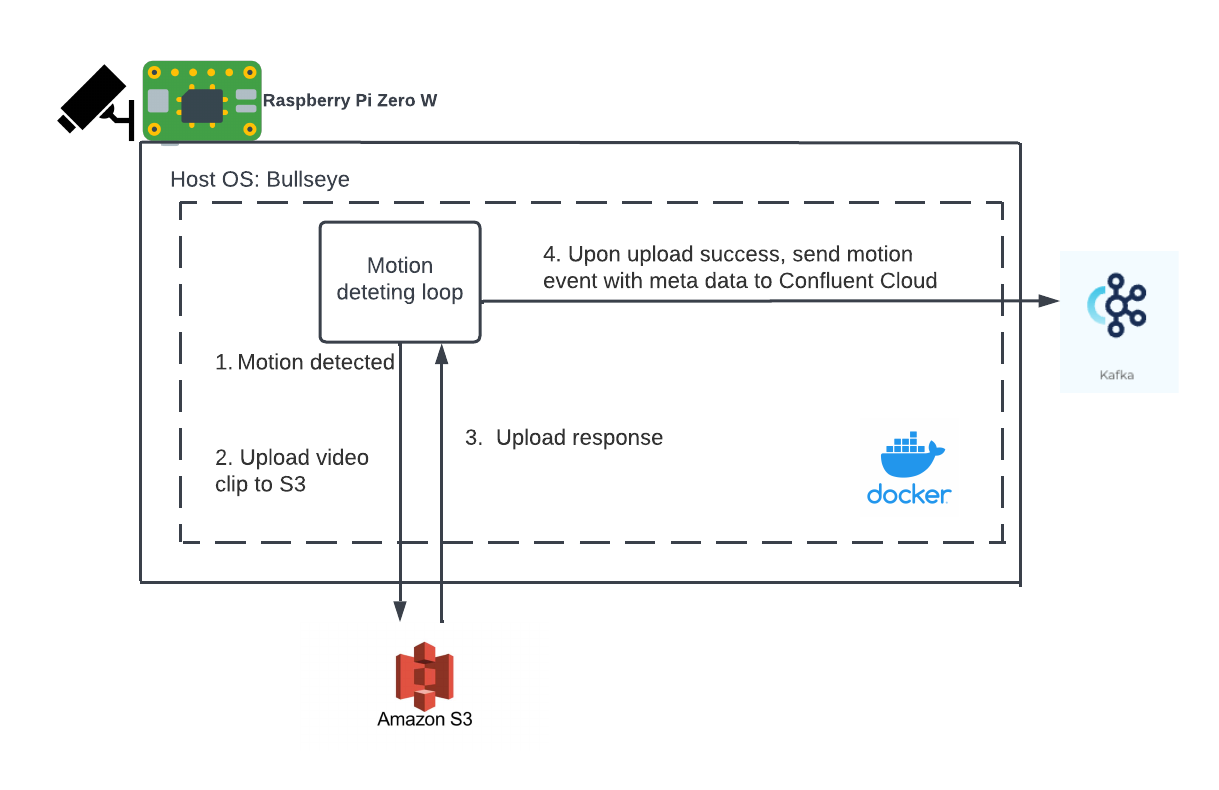
The following diagram illustrates how motion detection happens within each Raspberry Pi Zero node:
Motion is an open source motion detecting software that is utilized for detecting and capturing motion from a camera. The basic algorithm compares frames from continuous video streams and detects motion if the pixel change is greater than the configured threshold. It’s written in C and is lightweight, which is a great fit for Raspberry Pi Zero W.
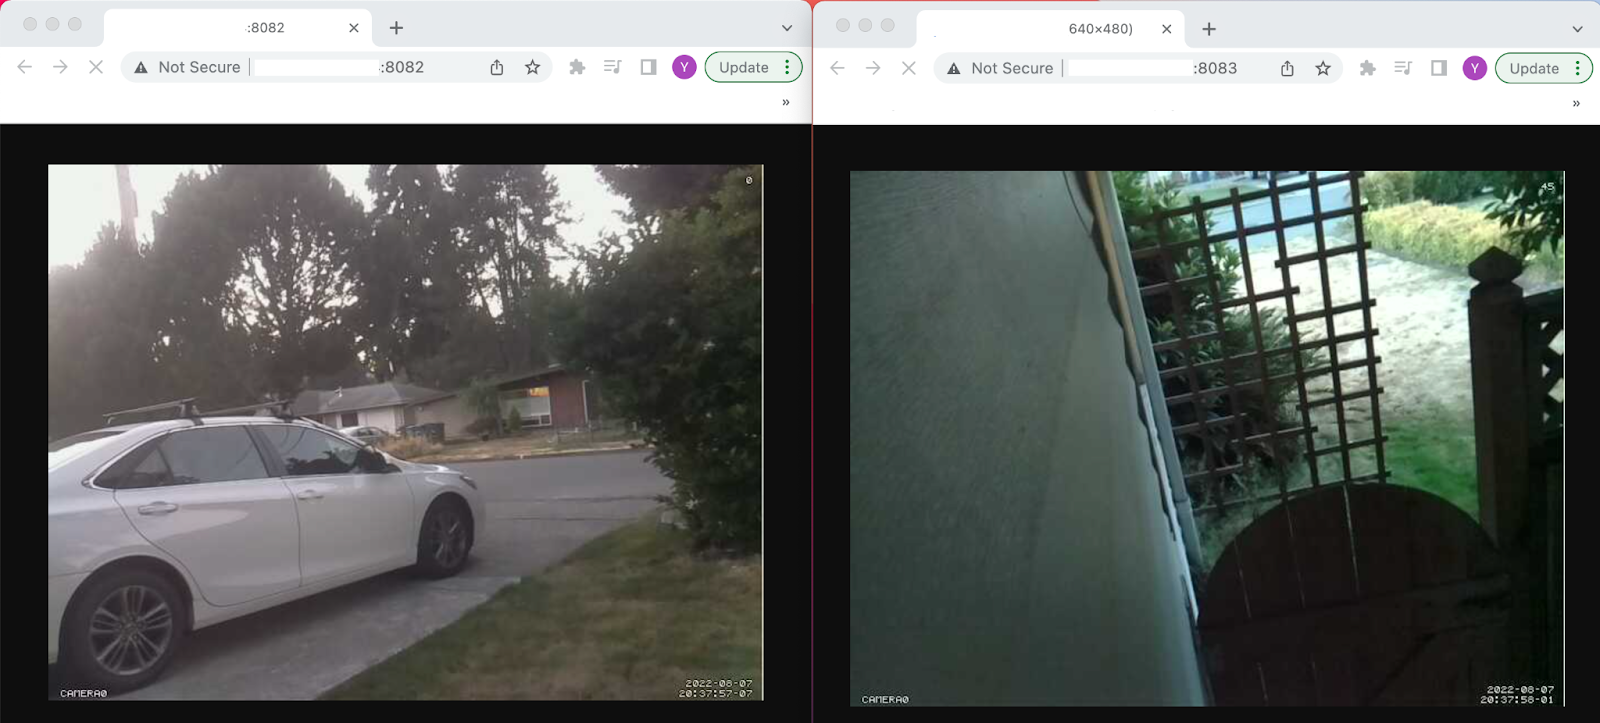
Once a motion event is detected, there are multiple design decisions to make, each with different trade-offs. One way is to upload video clips and send events to Confluent Cloud at the same time. This is the quickest way to get alerts since it saves one round trip of time to upload video clips. The drawback is that we might not be able to see the video clips due to the longer time it takes for video uploading or potential failure in uploading. We used an alternative solution to upload to AWS S3 first, and upon success we sent motion events to Confluent Cloud based on our scenario since we didn’t care about the 1-2 seconds alert delay. Further, by emitting an event only after the video was confirmed to be uploaded, we avoided the transaction challenges often encountered as part of parallel “dual-write” approaches.
We explored different ways to upload to AWS S3 from Raspberry Pi Zero like AWS CLI2/CLI, AWS SDK. As of project development time, AWS CLI2 only supports 64 bits ARM Linux while Raspberry Pi Zero’s architecture (ARMv6) is 32-bit. Our research also showed that AWS CLI requires Python as a dependency library and AWS SDK lacks a C client, so we ended up adopting AWS S3 Rest API for its easy dependency (cURL) and practical examples.
Finally, we decided to containerize the above software and services in a Docker container. This allowed us to separate applications from the fundamental host OS environment and facilitate maintenance and deployment, thus, enabling us to scale in the future. Other features such as various sensing and infrared support could be added and containerized to the Raspberry Pi Zero node with the help of its GPIOs. Furthermore, services like logging or telemetry in the node could also be isolated by Docker containers.
pi@raspberrypi:~/Motion-in-motion-raspberrypi-zero $ sudo docker container ls

CONTAINER ID   IMAGE                            COMMAND                  CREATED       STATUS          PORTS                                       NAMES

babc855547c6   pi-zero-motion-in-motion-image   "motion '-c /etc/mot…"   4 weeks ago   Up 41 seconds   0.0.0.0:8083->8083/tcp, :::8083->8083/tcp   pi-zero-motion-in-motion-container
We used Kafka client in C (i.e., librdkafka) to publish events to Confluent Cloud. Confluent provides a good example code for the producer. We slightly modified it with our use case together with the metadata and a config provided by Confluent Cloud after the Kafka cluster was provisioned. For example, we used the following schema to publish events to Kafka:
{
  "event_id": integer-epoch time,
  "device_id": integer,
  "device_name": "description of yard camera",
  "device_type": "camera",
  "url": "https://xxxx.s3.us-west-2.amazonaws.com/0-xx-xxxxxxxxxx.mp4",
  "time": "YYYY-MM-DD HH:MM:SS",
  "message": "motion was detected"
}
To summarize, the following software is installed on each Raspberry Pi Zero W node for motion detection:
-
Host OS, Debian version: 11 (bullseye)
-
Motion for motion detection and web streaming
-
cRUL for uploading video clips to AWS S3
-
Kafka client in C (librdkafka) provided by Confluent Cloud for event publishing
-
Docker for containerization
Confluent Cloud
Confluent Cloud enables us to make all things happen in a fully managed manner. We used a Kafka topic to store the motion events captured by the cameras. Unlike other message queue systems, Kafka won't delete your messages after delivery. Instead, it stores the messages for a period of time specified by the retention policy. This opens up a lot of possibilities for further processing, for example, ksqlDB. ksqlDB is backed by Kafka topics, and allows us to read, filter, and transform streams of events, and a lot more. We can do all of this using SQL syntax.
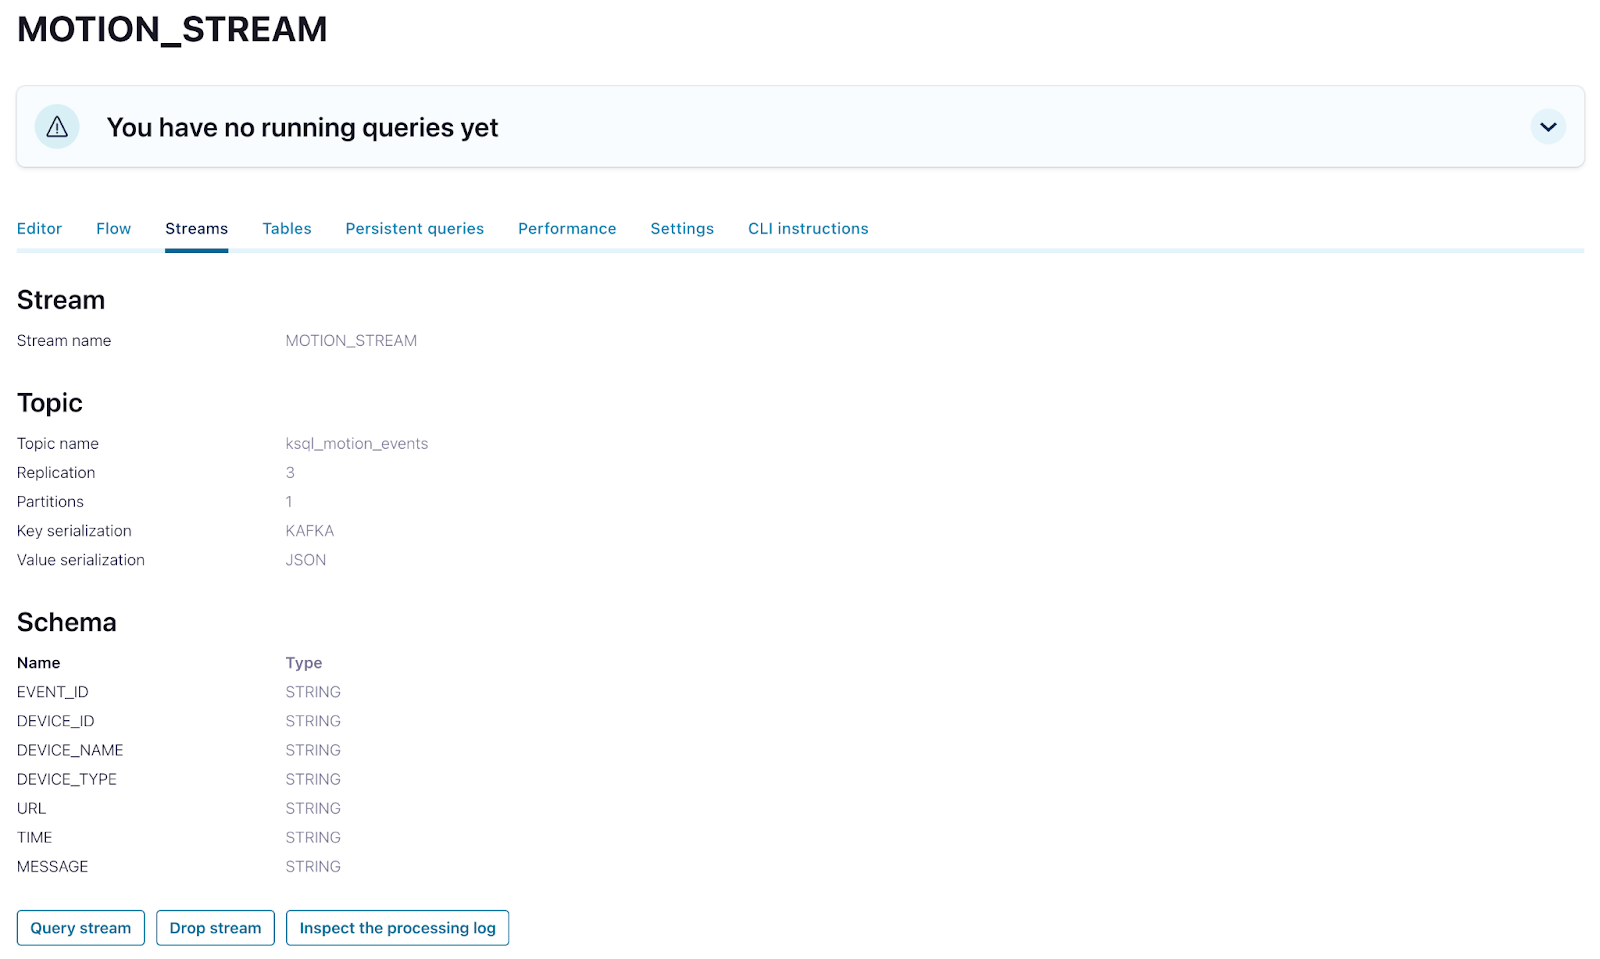
We created a stream using the following statement:
CREATE STREAM motion_stream (event_id VARCHAR KEY, device_id VARCHAR, device_name VARCHAR, device_type VARCHAR, url VARCHAR, time VARCHAR, message VARCHAR)

WITH (KAFKA_TOPIC = 'ksql_motion_events', VALUE_FORMAT = 'JSON', partitions = 1);
We can see that there is a Kafka topic ksql_motion_events underlying the ksqlDB stream. As previously shown, we published events to the topic using Kafka C client, and here we used SQL statements to query the stream.
UI
We built a simple UI using React and Next.js. There are two typical use cases for a monitoring system: real-time monitoring and past event search. For each use case, not only can we see the details of the events, but we can also watch a video clip captured at the moment when the event occured. Let’s take a look at each of them.
Real-time monitoring with push query
When an event happens, we usually want to know immediately. To achieve this, we utilized the push query of ksqlDB. Push query ends with EMIT CHANGES clause for every statement. The client needs to maintain a connection with ksqlDB server. For every change on the stream, the server will send a new message to the client. We used a web worker process to maintain the connection and receive the messages. Here’s the code of the web worker we used:
onmessage = async (event) => {
 const url = "https://*******.us-west4.gcp.confluent.cloud:443/query";
 const body = {
   ksql: "SELECT * FROM MOTION_STREAM EMIT CHANGES;",
   streamsProperties: {"ksql.streams.auto.offset.reset": "latest"}
 };

 let headers = new Headers();
 headers.append("Accept", "application/json");
 headers.append("Authorization","********");
 const response = await fetch(url, {
   method: "POST",
   headers: headers,
   body: JSON.stringify(body),
 });
 const reader = response.body.getReader();
 function push() {
   // "done" is a Boolean and value a "Uint8Array"
   reader.read().then(({ done, value }) => {
     if (done) {
       return;
     }
     // get the data chunk and post a message to main thread

     const streamData = new TextDecoder().decode(value);

     postMessage(streamData);

     // try to read new message

     push();

   });

 }

 push();

};
We get an alert almost immediately whenever a motion event is captured by the cameras, and we can watch the video clips by clicking on the film icons.

Past event search with pull query
Another typical use case is past event search. Users may want to see video clips on a certain day and on a certain camera. The ksqlDB pull query is perfect for this situation. Unlike push query, pull query doesn’t keep the connection open. It returns the current state to the client, and then terminates. They are like a SELECT statement executed on a regular relational database management system (RDBMS). Here is an example of the pull query we used to search past events:
SELECT *, ROWTIME FROM MOTION_STREAM WHERE time >= '${start}' AND time < '${end}' AND DEVICE_ID IN (${deviceIds.toString()});
A list of events sorted by time of the day show up on the screen, and we can watch the video clips by clicking on the film icons.
![]()
Summary
This blog post featured an end-to-end IoT solution for motion detection and monitoring systems on top of Confluent Cloud. The solution can be easily expanded to other IoT applications. For example, we can put the cameras in a parking lot to monitor empty parking slots and guide the parking process. With the help of Kafka and ksqlDB, the possibilities are truly unlimited.
Related reading
Did you like this blog post? Share it now
Subscribe to the Confluent blog
Real-Time Wildlife Monitoring with Apache Kafka
Wildlife monitoring is critical for keeping track of population changes of vulnerable animals. As part of the Confluent Hackathon ʼ22, I was inspired to investigate if a streaming platform could […]
Apache Kafka at Home: A Houseplant Alerting System with ksqlDB
Back in 2020, so many folks picked up pandemic hobbies—things they could throw themselves into at full force while they were restricted by lockdowns. I chose houseplants. Prior to the […]

